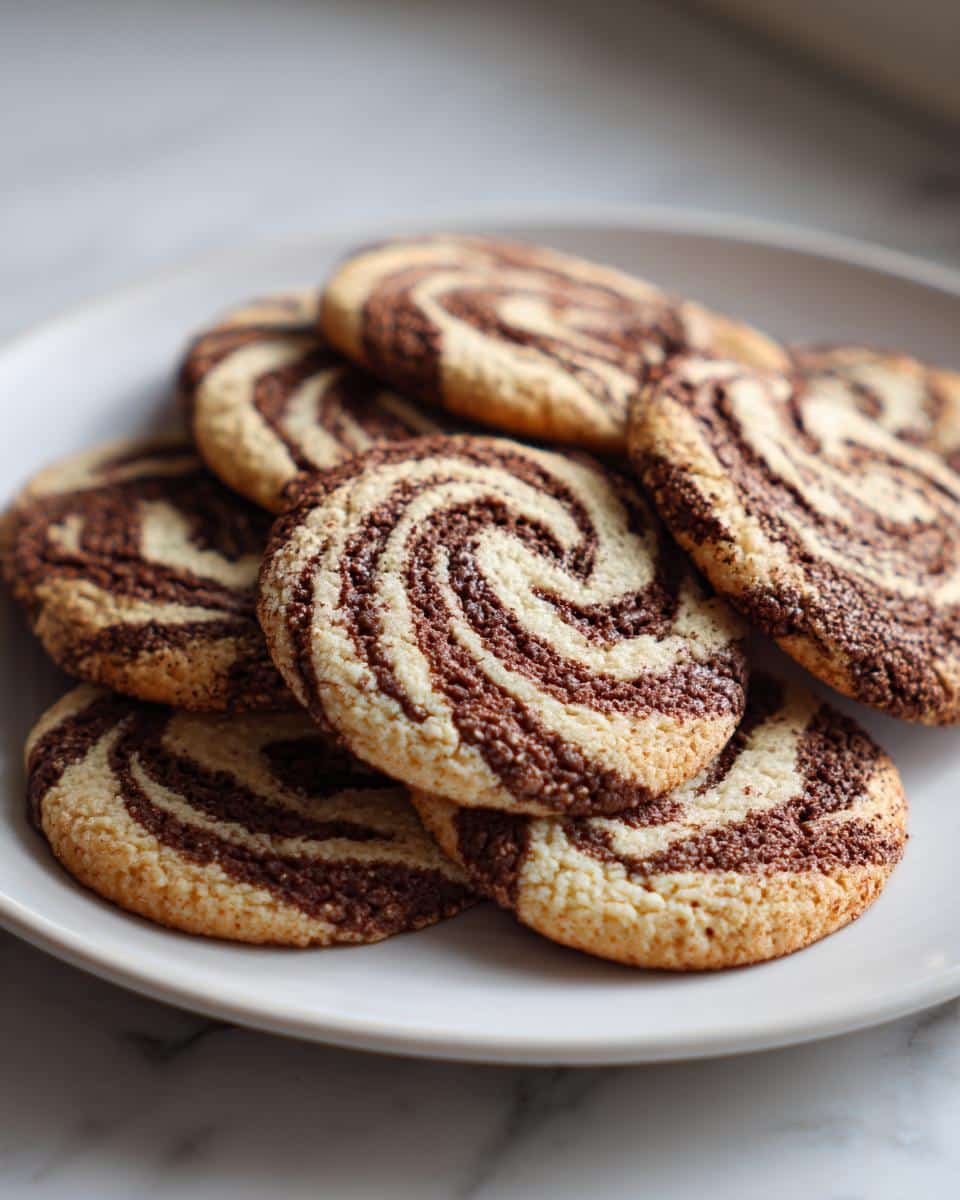
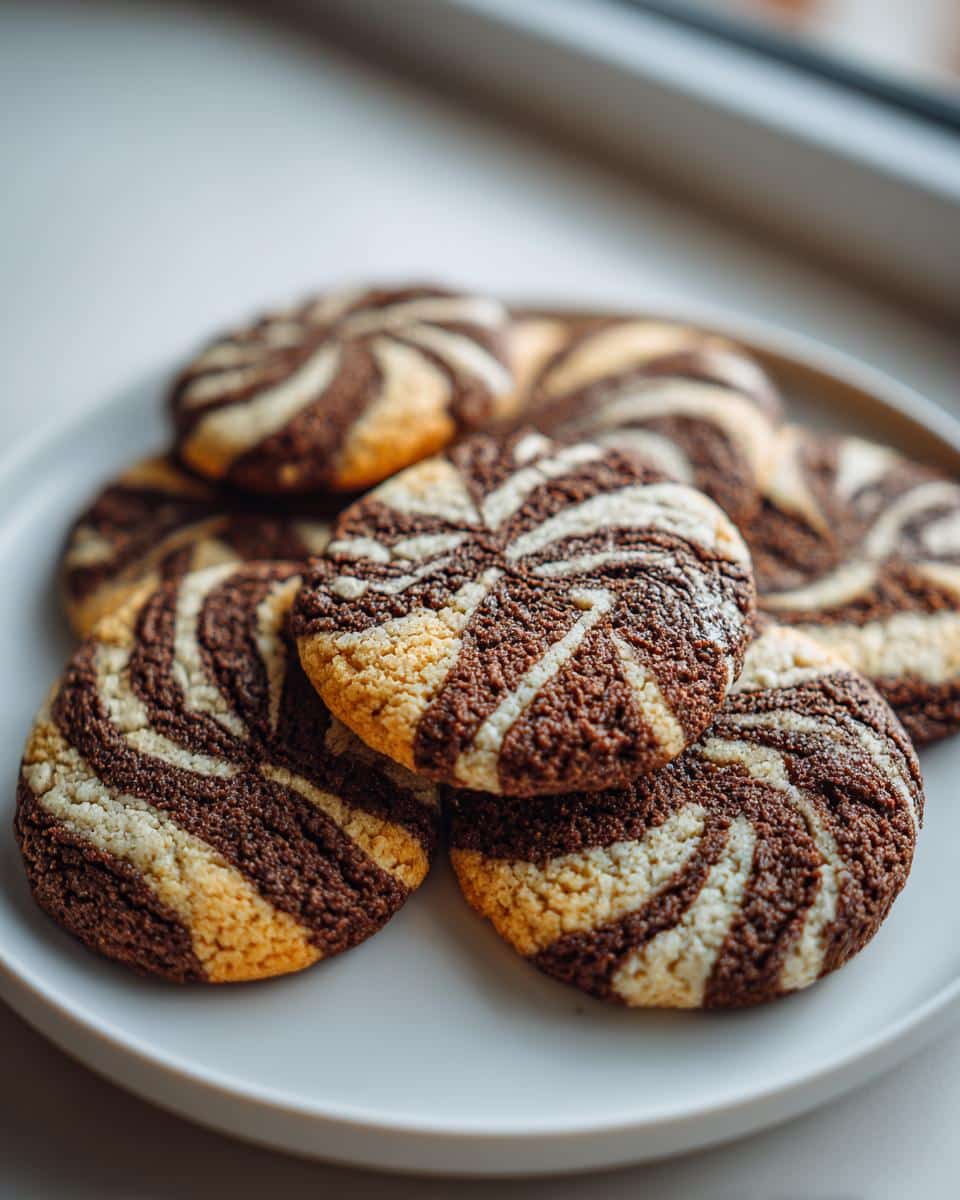
Oh my goodness, zebra cookies! The first time I saw these striped beauties at my aunt's bakery, I couldn't stop staring. That perfect swirl of vanilla and chocolate dough creates such a stunning pattern - it's like edible art! I begged her to teach me the technique, and after what felt like a hundred messy attempts (flour everywhere!), I finally mastered these showstopping treats.

What I love most is how zebra cookies fool everyone into thinking they're complicated, but trust me - they're secretly simple to make. The magic happens when you twist together two basic doughs, slice them, and voila! You've got these gorgeous black-and-white cookies that disappear faster than you can say "zebra stripes." My kids go absolutely wild for them, and I can't blame them - that perfect balance of vanilla sweetness with rich cocoa is absolutely irresistible.
Why You’ll Love These Zebra Cookies
Okay, let me count the ways you'll adore these cookies!
- Impressively easy: They look fancy but come together with basic techniques—no cookie cutter needed!
- Total showstoppers: That swirl pattern? Guaranteed to make guests (or your kids’ lunchbox crew) go "Wow!"
- Flavor magic: The vanilla and cocoa combo is simple genius—sweet and rich without being overpowering.
- Crowd-friendly: Perfect for bake sales, parties, or "just because" gifts (they’re practically begging to be shared!).
Seriously, one bite and you’ll understand why these became my signature bake!
Zebra Cookies Ingredients
Gather these simple ingredients - most are probably already in your pantry! The key is having everything ready at the right temperatures.
Wet Ingredients
- 1 cup unsalted butter, softened (but not melted!)
- 1 cup granulated sugar
- 2 large eggs, room temperature
- 1 teaspoon vanilla extract (the real stuff - it makes a difference)
Dry Ingredients
- 2½ cups all-purpose flour (spooned & leveled)
- ½ teaspoon salt
- 1 teaspoon baking powder
- ½ cup unsweetened cocoa powder (for that deep zebra stripe color)
Ingredient Notes & Substitutions
You can swap in gluten-free 1:1 flour blend if needed, but please don't skip sifting it first! Dairy-free butter works too - just watch the dough consistency. About the cocoa: natural works, but dutch-process gives richer color (just don't use hot chocolate mix!). And trust me - room temp eggs really help the dough come together smoothly.
How to Make Zebra Cookies
Now for the fun part - let's create those gorgeous stripes! I promise it's easier than it looks, but timing is everything here.
- Prep first: Preheat your oven to 350°F (175°C) and line baking sheets with parchment paper. Trust me, you don't want to be shaping dough while waiting for the oven!
- Cream the base: Beat softened butter and sugar until fluffy (about 2 minutes). Add eggs one at a time, then vanilla. Don't rush this - proper creaming makes the dough perfect for twisting later.
- Dry team: Whisk flour, salt, and baking powder in another bowl. Gradually add to wet ingredients until just combined. The dough should be soft but not sticky - like playdough!
- Divide & conquer: Split dough in half. Mix cocoa into one portion (I use a fork to really work it in evenly). Now you've got your "zebra colors" ready!
- Shape the magic: Roll each dough into two equal ropes (about 12 inches long). Place them side by side and gently twist together. Don't over-twist or the stripes will blur!
- Chill out: Wrap the twisted log in plastic and refrigerate for 30 minutes. This makes slicing SO much cleaner.
- Slice & bake: Cut into ½-inch rounds (I use dental floss for clean cuts!) and bake 10-12 minutes until edges are just set. Let cool 2 minutes on sheets before transferring.
Pro Tips for Perfect Zebra Cookies
If your stripes blend, the dough was too warm when twisted (chill longer next time!). For sticky dough, dust hands lightly with flour. And here's my secret: slice cookies slightly thicker than you think - they hold the pattern better!
Zebra Cookies Variations
Once you've mastered the classic zebra cookies, try these fun twists! Add 1 teaspoon espresso powder to the cocoa dough for a mocha kick. For holiday versions, swap vanilla with peppermint extract in the white dough. Feeling colorful? Use food gel to tint half the dough pink or green - instant unicorn cookies!
Storing and Freezing Zebra Cookies
Here's the good news - these zebra cookies stay fresh in an airtight container at room temperature for about 3 days (if they last that long!). For longer storage, you've got options. Freeze the baked cookies between parchment layers for up to 2 months - they thaw perfectly at room temp in an hour. Or wrap the dough log tightly and freeze for 3 months; just slice and bake straight from frozen (add 1-2 extra minutes). Pro tip: a quick 5-second zap in the microwave brings back that just-baked warmth!
Zebra Cookies Nutritional Information
Just so you know, these values are estimates - nutrition varies depending on your exact ingredient brands. Each zebra cookie contains about 150 calories, with 7g fat, 20g carbs, and 2g protein. Not bad for such a gorgeous little treat!
Zebra Cookies FAQs
Over the years, I’ve gotten some great questions about these zebra cookies—let me share the answers that’ll save you some trial and error!
Can I use melted butter instead of softened?
Oh please don’t! The creaming process with softened butter creates tiny air pockets that give the cookies their perfect texture. Melted butter makes the dough too soft and greasy—your stripes will practically melt together. Trust me, I learned this the messy way!
Why did my stripes blur together?
Usually this means the dough was too warm when twisted (been there!). Chill it longer next time—I even pop mine in the freezer for 10 minutes if I’m impatient. Also, don’t twist more than 2-3 times or the patterns will overmix.
Can I skip chilling the dough?
Technically yes, but the cookies won’t hold their shape as well. That 30-minute chill gives the butter time to firm up so your slices come out clean. Think of it as letting the dough take a little nap before its big debut!
My cocoa dough is crumbly—help!
This happens if you overmix after adding cocoa. Fold it gently—just until no white streaks remain. If it’s still dry, add ½ teaspoon milk (but no more!). The dough should feel like the vanilla half—soft but not sticky.
Share Your Zebra Cookies
Nothing makes me happier than seeing your zebra cookie creations! Tag me when you share photos—I love spotting all the creative twists. And if you loved them as much as we do, drop a note below telling me how yours turned out!
Print
Irresistible Zebra Cookies with Perfect Swirls
- Total Time: 32 mins
- Yield: 24 cookies 1x
- Diet: Vegetarian
Description
Delicious zebra-striped cookies with a perfect blend of vanilla and cocoa flavors.
Ingredients
- 2½ cups all-purpose flour
- 1 cup unsalted butter, softened
- 1 cup granulated sugar
- 2 large eggs
- 1 tsp vanilla extract
- ½ cup unsweetened cocoa powder
- ½ tsp salt
- 1 tsp baking powder
Instructions
- Preheat oven to 350°F (175°C).
- Cream butter and sugar until light and fluffy.
- Add eggs one at a time, then mix in vanilla.
- In a separate bowl, whisk flour, salt, and baking powder.
- Gradually add dry ingredients to wet mixture.
- Divide dough in half. Mix cocoa into one half.
- Roll both doughs into logs and twist together.
- Slice and bake for 10-12 minutes.
Notes
- Chill dough for easier handling.
- Store in airtight container for freshness.
- Prep Time: 20 mins
- Cook Time: 12 mins
- Category: Dessert
- Method: Baking
- Cuisine: International
Nutrition
- Serving Size: 1 cookie
- Calories: 150
- Sugar: 8g
- Sodium: 50mg
- Fat: 7g
- Saturated Fat: 4g
- Unsaturated Fat: 2g
- Trans Fat: 0g
- Carbohydrates: 20g
- Fiber: 1g
- Protein: 2g
- Cholesterol: 25mg
Keywords: zebra cookies, striped cookies, cocoa cookies
Leave a Reply