There’s something wonderfully nostalgic about banana pudding, and when you blend it with creamy cheesecake and soft banana cake, magic happens. This Banana Pudding Cheesecake Cake is a show-stopping dessert that layers all your favorite banana flavors into one indulgent masterpiece. It’s rich, decadent, and feels like a warm hug in cake form.

This recipe was born from a craving for comfort food with a twist. I wanted all the flavors of banana pudding but with the structure and wow-factor of a celebration cake. After some experimenting, this layered dream became a regular on our dessert table. It's a total crowd-pleaser, with its creamy cheesecake center, moist banana cake, and fluffy banana pudding filling.
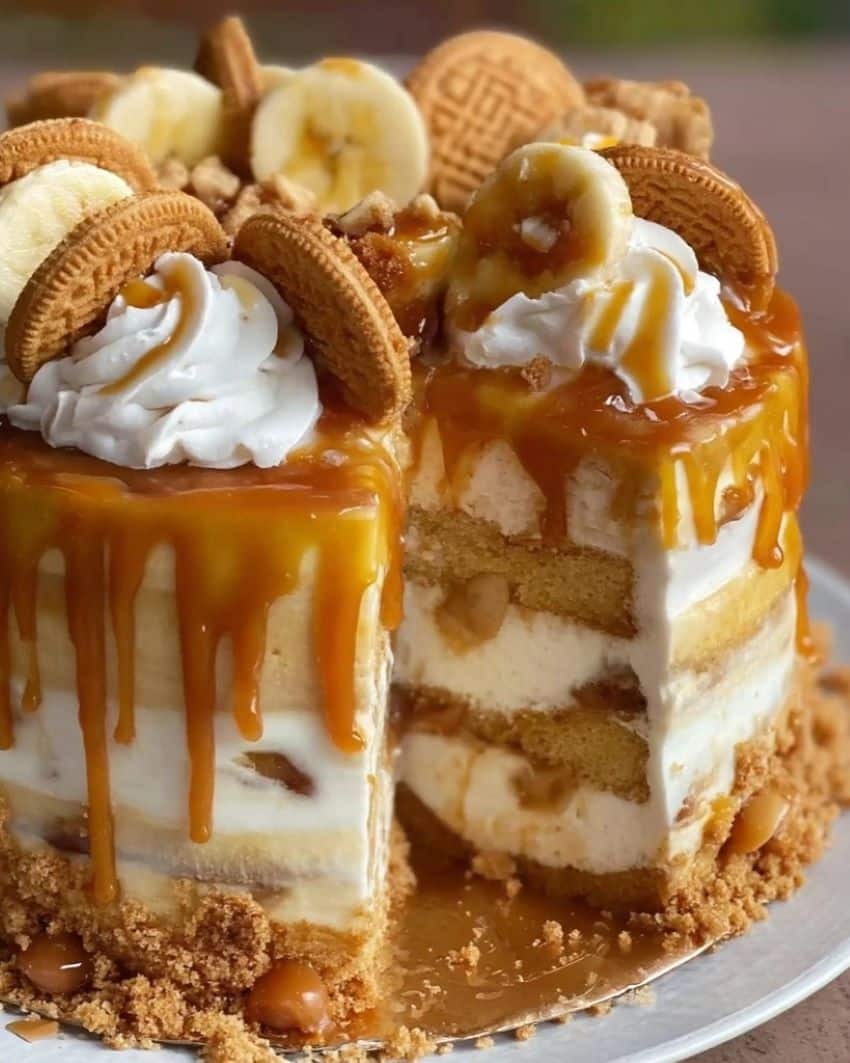
Perfect for birthdays, holidays, or just because, this dessert brings together the best of all worlds—smooth cheesecake, fluffy banana cake, and luscious pudding. Topped with caramel, Nilla wafers, and fresh banana slices, it’s as beautiful as it is delicious. It also travels well and looks like it came from a bakery, making it a great choice for potlucks and family dinners.
Why You’ll Love Banana Pudding Cheesecake Cake
- Three Incredible Layers: Cheesecake, banana cake, and pudding make every bite dreamy and indulgent.
- Banana Lover’s Dream: A perfect way to use ripe bananas and banana pudding in one dish.
- Impressive Yet Doable: Looks bakery-quality but is made entirely from scratch in your kitchen.
- Make-Ahead Friendly: All components can be prepared in advance for stress-free entertaining.
- Creamy, Moist, and Sweet: Balanced textures and rich banana flavor in every forkful.
- Toppings Galore: Customize with your favorite garnishes like nuts, chocolate shavings, or extra whipped topping.
- Kid-Friendly: Sweet and soft, it’s a hit with little ones and grown-ups alike.
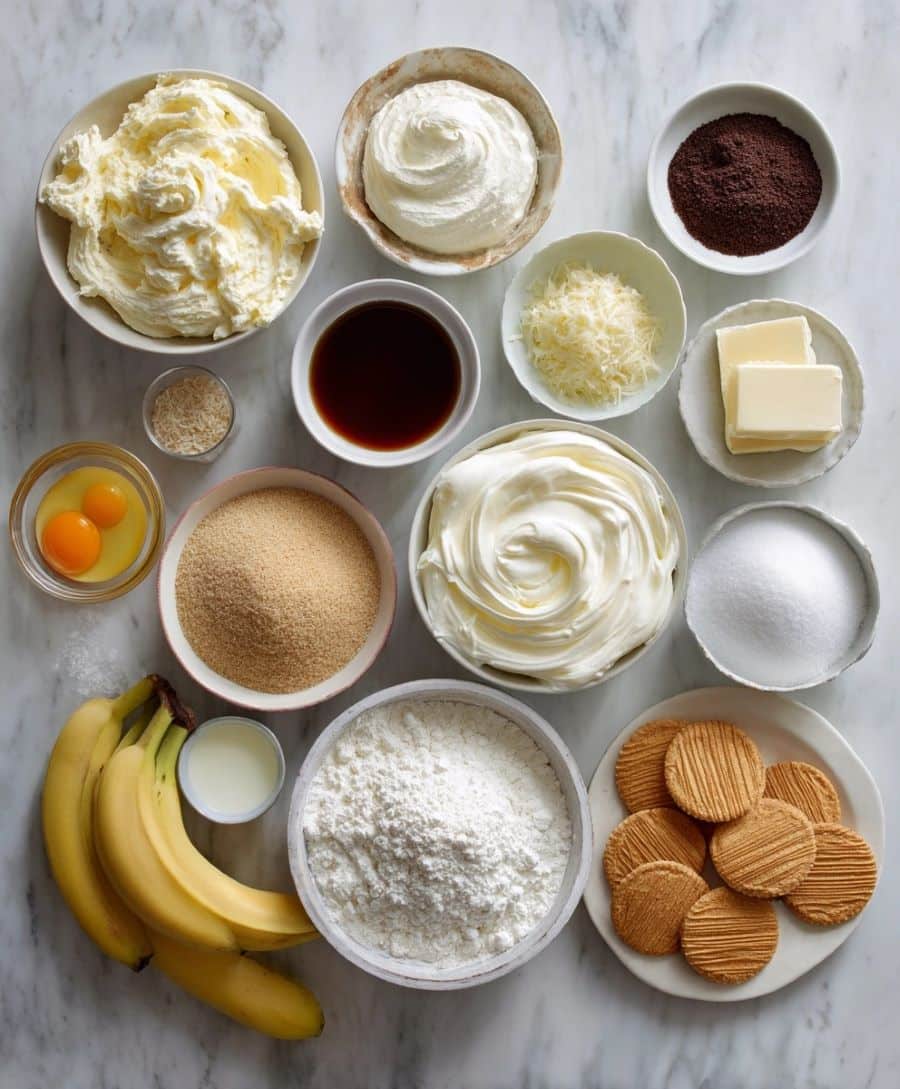
Ingredients You’ll Need
For the Cheesecake Layer:
- 16 oz cream cheese, softened
- ¾ cup granulated sugar
- 2 large eggs
- ½ cup sour cream
- 1 teaspoon vanilla extract
For the Banana Cake Layers:
- 2 ½ cups all-purpose flour
- 1 ½ teaspoon baking powder
- ½ teaspoon baking soda
- ½ teaspoon salt
- ¾ cup unsalted butter, softened
- 1 ½ cups granulated sugar
- 3 large eggs
- 1 cup mashed ripe bananas (about 2 large bananas)
- 1 cup buttermilk
- 1 teaspoon vanilla extract
For the Banana Pudding Filling:
- 1 package (3.4 oz) instant banana pudding mix
- 2 cups cold milk
- 1 cup whipped topping (like Cool Whip)
For Toppings:
- Caramel sauce for drizzle
- Nilla wafers for garnish
- Fresh banana slices (optional)
Step-by-Step Instructions
- Make the Cheesecake Layer:
- Preheat oven to 325°F (163°C).
- Beat cream cheese and sugar until smooth and fluffy.
- Add eggs one at a time, mixing well. Stir in sour cream and vanilla extract.
- Pour into a greased 9-inch springform pan lined with parchment.
- Bake for 40-45 minutes or until center is set. Cool completely, then refrigerate for at least 2 hours or overnight.
- Bake the Banana Cake Layers:
- Preheat oven to 350°F (175°C). Grease and flour two 9-inch round cake pans.
- In a medium bowl, whisk together flour, baking powder, baking soda, and salt.
- In a large bowl, cream butter and sugar until light and fluffy, about 3-4 minutes.
- Beat in eggs one at a time, followed by mashed bananas and vanilla.
- Alternate adding dry ingredients and buttermilk, beginning and ending with flour mixture.
- Divide batter evenly between pans and bake for 25-30 minutes or until a toothpick comes out clean.
- Let cool in pans for 10 minutes, then transfer to wire racks to cool completely.
- Prepare Banana Pudding Filling:
- In a mixing bowl, whisk together pudding mix and cold milk for 2 minutes until thickened.
- Fold in whipped topping gently until smooth.
- Chill the mixture for 10-15 minutes to firm up.
- Assemble the Cake:
- Place one banana cake layer on a serving platter.
- Spread half of the banana pudding filling evenly on top.
- Carefully add the cheesecake layer, ensuring it is centered.
- Spread the remaining pudding mixture over the cheesecake.
- Top with the second banana cake layer and gently press down.
- Decorate:
- Drizzle the top with caramel sauce in zig-zag or spiral pattern.
- Garnish with whole or crushed Nilla wafers and fresh banana slices if serving immediately.
- Optional: Add whipped topping rosettes or sprinkle with chopped pecans for extra flair.
Serving and Storage Tips
- Serve: Chill thoroughly before serving. Slice using a sharp knife wiped clean between cuts.
- Store: Refrigerate covered for up to 4 days. Keep bananas for garnish separate until serving.
- Make Ahead: Prepare all layers 1-2 days ahead and assemble the night before or day of.
- Freeze: Wrap individual slices in plastic wrap and foil. Freeze for up to 1 month. Thaw in fridge overnight before serving.
- Transport Tip: Assemble in a cake carrier with locking lid for safe transport to events.
Helpful Notes
- Room Temp Ingredients: Ensure butter, eggs, and cream cheese are at room temp for smooth batters.
- Cheesecake Tip: Use a water bath for the cheesecake layer to prevent cracks.
- Flavor Twist: Add a pinch of cinnamon or nutmeg to the cake batter for a cozy spice note.
- Add Texture: Fold chopped walnuts or pecans into the banana cake batter for a nutty crunch.
- Pudding Hack: Use slightly less milk for a thicker, more spreadable pudding.
Frequently Asked Questions
- Can I make this ahead of time?
Yes, each layer can be prepared in advance. Assemble the cake the night before or a few hours ahead. - Can I use homemade pudding?
You can use homemade pudding, but make sure it’s thick enough to hold its shape. - How do I prevent the cheesecake from cracking?
Bake in a water bath and avoid overmixing the batter. Let it cool gradually. - Can I use frozen bananas?
Yes, thaw and drain any excess liquid before mashing and using. - What if I don't have whipped topping?
You can use homemade whipped cream stabilized with gelatin, powdered sugar, or cornstarch. - Can I make it gluten-free?
Yes! Use a 1:1 gluten-free flour blend for the cake layers and ensure other ingredients are gluten-free.
Final Thoughts
Banana Pudding Cheesecake Cake is what dessert dreams are made of. With its creamy layers, banana-rich flavor, and fun toppings, it's guaranteed to be the star of your table. It’s a dessert that looks impressive but is surprisingly easy to pull together, especially when you prepare the layers ahead of time.
Whether you’re baking for a celebration, potluck, or just want to treat your family, this cake will wow everyone who tries it. The blend of creamy cheesecake, pudding, and tender banana cake is a harmony of textures and flavors that you’ll crave again and again. Try it, share it, and tag your delicious creation. Happy baking!
Print
Banana Pudding Cheesecake Cake
- Total Time: 1 hour 55 minutes
- Yield: 12 1x
Description
This Banana Pudding Cheesecake Cake layers creamy cheesecake, moist banana cake, and banana pudding for a dreamy, crowd-pleasing dessert.
Ingredients
Cheesecake Layer:
- 16 oz cream cheese (softened)
- ¾ cup granulated sugar
- 2 large eggs
- ½ cup sour cream
- 1 tsp vanilla extract
Banana Cake Layers:
- 2 ½ cups all-purpose flour
- 1 ½ tsp baking powder
- ½ tsp baking soda
- ½ tsp salt
- ¾ cup unsalted butter (softened)
- 1 ½ cups granulated sugar
- 3 large eggs
- 1 cup mashed ripe bananas
- 1 cup buttermilk
- 1 tsp vanilla extract
Banana Pudding Filling:
- 1 3.4 oz package instant banana pudding mix
- 2 cups cold milk
- 1 cup whipped topping
Toppings:
- Caramel sauce
- Nilla wafers
- Fresh banana slices (optional)
Instructions
- Preheat oven to 325°F. Make cheesecake by mixing cream cheese, sugar, eggs, sour cream, and vanilla. Bake in lined springform pan 40–45 min. Cool and chill.
- Preheat oven to 350°F. Whisk dry cake ingredients. Cream butter and sugar; beat in eggs, bananas, and vanilla. Alternate adding dry ingredients and buttermilk. Divide into pans and bake 25–30 min.
- Whisk pudding mix with milk. Fold in whipped topping and chill.
- To assemble: banana cake layer → pudding → cheesecake → pudding → banana cake.
- Decorate with caramel, Nilla wafers, and bananas. Serve chilled.
Notes
-
Room temperature ingredients improve texture.
-
Use less milk for firmer pudding.
-
Freeze individual slices for up to 1 month.
-
Can be made gluten-free with 1:1 flour blend.
-
Stabilize homemade whipped cream if not using Cool Whip.
- Prep Time: 40 minutes
- Cook Time: 1 hour 15 minutes
Nutrition
- Calories: 520


Leave a Reply