I still remember the first time I tasted a butter mint—it was at my cousin’s wedding, tucked into a little pastel-colored candy dish on the reception tables. I popped one in my mouth and, wow, that creamy, melt-in-your-mouth texture and the perfect hint of peppermint just blew me away. I must’ve gone back for, oh, about a dozen more. (No shame.)

That’s the magic of butter mints. They’re simple, nostalgic, and somehow fancy and homey all at once. Perfect for weddings? Absolutely. But also perfect for holiday cookie trays, baby showers, or just because you want a sweet little treat that takes barely any effort. And the best part? You only need a few pantry staples to make them. So let’s get to it—your future self (and your friends) will thank you.
Why You’ll Love These Butter Mints
Listen, I know what you’re thinking—homemade candy sounds fussy, right? But trust me, butter mints are the exception. They’re the easiest little bites of happiness you’ll ever make, and here’s why:
- Perfect for Any Occasion: Bridal showers, holiday parties, even just a Tuesday—these mints fit right in. Toss them in a pretty dish, and suddenly, you’re that person who “whipped something up.” (We all want to be that person.)
- Quick and Easy to Make: No baking, no candy thermometers, no stress. Just mix, roll, and cut. If you can cream butter and sugar, you’re golden. And hey, if you’ve got kids around, they’ll love helping with the cutting part.
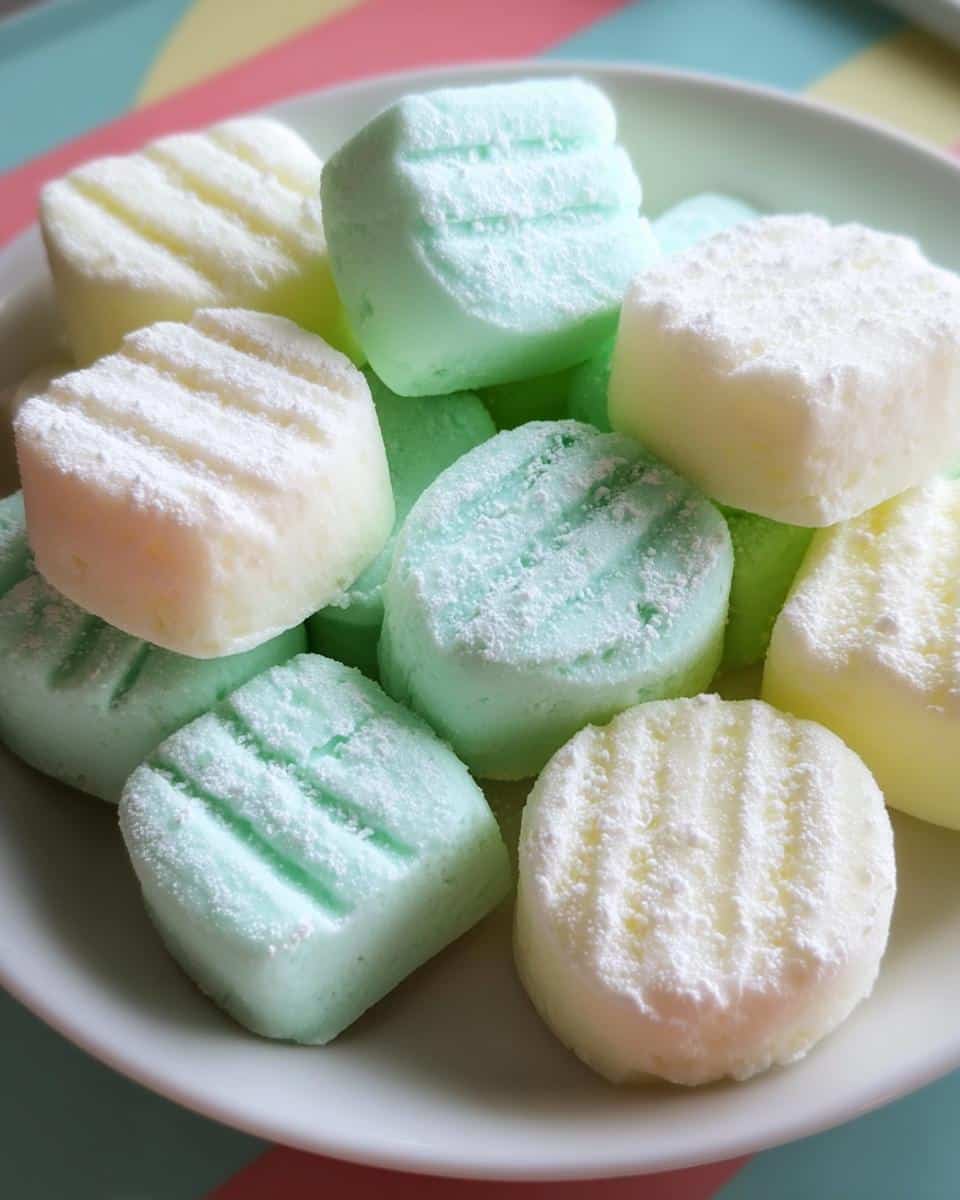
- Customizable Flavors and Colors: Peppermint’s classic, but swap in almond or vanilla extract if you’re feeling wild. And the color? Go pastel for Easter, red and green for Christmas, or neon pink just because you woke up like that.
Oh, and did I mention they make killer homemade gifts? Tie ’em up in cellophane with a ribbon, and boom—instant love. (Yes, food is love. Fight me.)
Ingredients You’ll Need for Butter Mints
Okay, let’s talk ingredients—because the magic of butter mints is all in the simplicity. You probably have most of this in your kitchen right now (and if not, it’s a quick grocery run, promise). Here’s what you’ll need:
- 1 stick (½ cup) unsalted butter, softened: Don’t skip the softening step! Cold butter is a nightmare to mix here. Leave it out for an hour, or if you’re impatient (like me), microwave it for 5-second bursts until it’s soft but not melted.
- 1 tablespoon whipping cream (or heavy cream): This is your secret weapon for that dreamy, creamy texture. If you only have milk, it’ll work in a pinch, but cream’s worth the splurge.
- 4 cups powdered sugar, divided (plus extra for dusting): Yes, divided! We’ll add it in stages to avoid a sugar tornado in your kitchen. And keep extra handy for dusting—this dough’s a bit sticky, like a sweet little hug.
- ½ teaspoon pure peppermint extract: The real deal, please. Imitation extract just tastes... sad. And feel free to adjust to your taste—some like it bold, some like it whispery.
- 1–4 drops food coloring (optional; gel recommended for vibrancy): Gel coloring works best—it’s vibrant and won’t make your dough sticky. But if you’re going au naturel, skip it—they’ll still taste amazing.
See? Nothing weird or fancy. Now, let’s turn this into candy magic.
Step-by-Step Butter Mints Instructions
Alright, let’s dive in! These mints come together so fast, you might start questioning why you’ve ever bought them pre-made. Here’s how to make magic happen:
Step 1: Cream the Butter and Sugar
- Start with softened butter. Toss that stick of butter (remember, unsalted—we’re not making pretzels here) into a mixing bowl. If it’s not soft enough, you’ll know because your mixer will sound like it's having a midlife crisis. No one wants that.
- Add the whipping cream. Pour in that glorious tablespoon of cream and mix until it’s smooth and a little fluffy, about 1 minute. It should look like the world’s smallest cloud.
- Gradually add the powdered sugar. Here’s the key: add 3 cups of the sugar in small batches, mixing well after each addition. If you dump it all in at once, you’ll create a powdered sugar snowstorm in your kitchen. (Ask me how I know.)
Step 2: Add Flavor and Color
- Mix in the peppermint extract. Add that ½ teaspoon (or more, if you’re a mint fiend like me) and blend until it’s fully incorporated. Give it a taste—this is the fun part. Need more oomph? Add another drop or two.
- Color it up (optional). If you’re using food coloring, add it now. Start with 1 drop, mix, and add more until you get the shade you want. Gel coloring works best—it’s vibrant and won’t make your dough sticky.
- Knead in the rest of the sugar. Sprinkle in the remaining 1 cup of powdered sugar and mix until it forms a soft, pliable dough. If it’s too sticky, add a bit more sugar; too dry? A tiny splash of cream will fix it.
Step 3: Shape and Cut the Mints
- Prep your surface. Dust a clean counter or cutting board with powdered sugar—this is your edible non-stick surface. Think of it as edible glitter. Fancy.
- Roll it out. Flatten the dough to about ½-inch thickness. No need to be precise here—just aim for evenness. If it sticks, sprinkle on more sugar. (There’s no such thing as too much sugar in this recipe. It’s candy, people.)
- Cut into shapes. Use a sharp knife to slice the dough into small squares (about 1-inch), or get fancy with tiny cookie cutters. Hearts for Valentine’s Day? Yes, please.
Step 4: Let Them Set
- Dry at room temperature. Arrange the mints on a parchment-lined tray and let them sit for about an hour. This helps them develop that perfect, slightly crisp outer layer while staying creamy inside. Resist the fridge—it can make them sweat and get sticky.
- Test one (for science). After an hour, sneak a taste. If they’re still too soft, give them another 30 minutes. But let’s be real—they’re delicious at any stage.
And there you have it! Butter mints so good, you’ll forget the store-bought ones exist. Now, who’s ready to eat the whole batch?
Delicious Butter Mints Variations
Once you've mastered the classic butter mint, it's time to play around! These little candies are like a blank canvas—here are some fun ways to switch things up:
Chocolate-Dipped Butter Mints
Want to take these from delightful to downright decadent? Melt some dark, milk, or white chocolate (about ½ cup) and dip half of each mint in it. Let them set on parchment paper—the combo of creamy mint and rich chocolate is unreal. Perfect for when you want to impress but still keep things easy.
Holiday-Themed Colors
Butter mints are basically edible decorations. For Christmas, go classic with red and green (pro tip: add a drop of almond extract to the green ones for a "wintergreen" vibe). Easter? Pastel pinks, yellows, and blues make the cutest spring treats. And Halloween? Orange and purple, obviously. The color possibilities are endless—just match them to your party theme and watch them disappear.
See? Even the simplest recipe can have a little fun. Now go forth and mint-ify everything!
Serving and Storing Your Butter Mints
Now that you’ve made these little gems, let’s talk about showing them off and keeping them fresh (if they last that long—no judgment).
Best Ways to Serve
Butter mints are basically edible confetti. Pile them in a glass jar for a cute café vibe, or scatter them on a pretty tray at parties—they’re instant crowd-pleasers. For bridal or baby showers, tie them up in little tulle bags with ribbon. And if you’re feeling extra, arrange them by color in a candy dish like a minty rainbow. (Yes, I’ve done this. Yes, people acted like I was a pastry wizard.)
Storage Tips
These mints keep like a dream. Just pop them in an airtight container at room temperature, and they’ll stay fresh for up to 2 weeks. If your kitchen runs hot, you can stash them in the fridge—they’ll firm up a bit, but still taste amazing. Want to prep ahead? They freeze beautifully for up to 3 months; just thaw at room temp before serving. Pro tip: Layer them between parchment paper so they don’t stick together. Because nobody wants a mint brick.
Helpful Notes for Perfect Butter Mints
Okay, real talk—even the easiest recipes can have their quirks. Here’s how to handle butter mint emergencies (and yes, a sticky dough situation totally counts as an emergency in my book):
- Sticky dough? Don’t panic—just knead in a tablespoon of powdered sugar at a time until it stops clinging to your fingers like a lovesick octopus.
- Too crumbly? Add a teaspoon of cream and mix. If it’s still dry, repeat. Think of it as giving your dough a little hydration spa treatment.
- Extract too strong? If you went overboard with the peppermint, balance it with a pinch of salt or a splash of vanilla extract. Flavor rescuer to the rescue!
- Calorie note: Each mint is about 45 calories—so yeah, eating half the batch counts as lunch. (I’m not a nutritionist, but I am an enabler.)
Remember, butter mints are forgiving. Even the "mistakes" taste delicious. Now go forth and mint!
Butter Mints FAQs
Got questions? I’ve got answers! Here are the big ones people always ask me about butter mints (usually while shoving another one in their mouth):
Can I Use Margarine Instead of Butter?
Oh honey, no. Margarine might save you a few calories, but it’ll give you sad, waxy mints. Butter’s rich flavor and creamy texture are non-negotiable here. Think of it as the VIP guest at this minty party—everything else is just a +1.
How Long Do They Stay Fresh?
In an airtight container at room temp, they’ll stay perfect for about 2 weeks. If they last that long. (Spoiler: They usually don’t in my house.) Just keep ’em away from humidity—nobody likes a sweaty mint.
Can I Freeze These?
Absolutely! Freeze them in a single layer first (so they don’t stick together), then transfer to a bag. They’ll keep for 3 months. Thaw at room temp when the mint craving strikes—which, let’s be honest, is always.
Final Thoughts
Look, if there's one recipe that proves homemade candy doesn't have to be complicated, it's these butter mints. They take me right back to my cousin's wedding every time I make them—only now, I get to be the hero handing out the irresistible treats. So grab that butter and sugar, and let's make some magic. Trust me, once you taste these, you'll never settle for store-bought again. Happy mint-making, friends!
Print
Creamy Butter Mints Recipe with Peppermint Twist
- Total Time: 1 hour 15 minutes
- Yield: About 50 mints 1x
- Diet: Vegetarian
Description
Butter mints are a classic sweet treat with a smooth, creamy texture and refreshing peppermint flavor. Perfect for parties or as a homemade gift.
Ingredients
- 1 stick unsalted butter
- 1 tablespoon whipping cream
- 4 cups powdered sugar, divided (plus more for dusting)
- ½ teaspoon pure peppermint extract
- 1-4 drops food coloring (optional, for brighter color)
Instructions
- Combine butter and whipping cream in a mixing bowl.
- Gradually add 3 cups powdered sugar while mixing.
- Add peppermint extract and food coloring if using.
- Mix in remaining powdered sugar until dough forms.
- Dust surface with powdered sugar and roll dough to ½-inch thickness.
- Cut into small squares or shapes.
- Let mints dry at room temperature for 1 hour before serving.
Notes
- Store in airtight container for up to 2 weeks.
- For firmer mints, refrigerate before serving.
- Prep Time: 15 minutes
- Cook Time: 0 minutes
- Category: Dessert
- Method: No-Bake
- Cuisine: American
Nutrition
- Serving Size: 1 mint
- Calories: 45
- Sugar: 5g
- Sodium: 0mg
- Fat: 2g
- Saturated Fat: 1g
- Unsaturated Fat: 0g
- Trans Fat: 0g
- Carbohydrates: 6g
- Fiber: 0g
- Protein: 0g
- Cholesterol: 5mg
Keywords: butter mints, homemade candy, peppermint treats


Leave a Reply