There’s something about the smell of warm apples and buttery cake mix wafting through the kitchen that instantly feels like home. My grandma used to make her famous Easy Apple Cobbler when the first crisp fall days rolled in, and now, every time I bake it, I’m right back at her table, laughing over a scoop of melting vanilla ice cream. This recipe is my go-to when I need a dessert that’s as comforting as it is effortless—just a few pantry staples, zero fuss, and maximum coziness. Whether you’re hosting a last-minute gathering or just craving a sweet hug in a bowl, this cobbler delivers every time. Trust me, it’s the kind of recipe you’ll want to pass down (and sneak seconds of).

Why You’ll Love This Easy Apple Cobbler
- Effortless to make – Seriously, if you can open a can and sprinkle some mix, you’ve got this. No fancy skills required, just simple, honest baking.
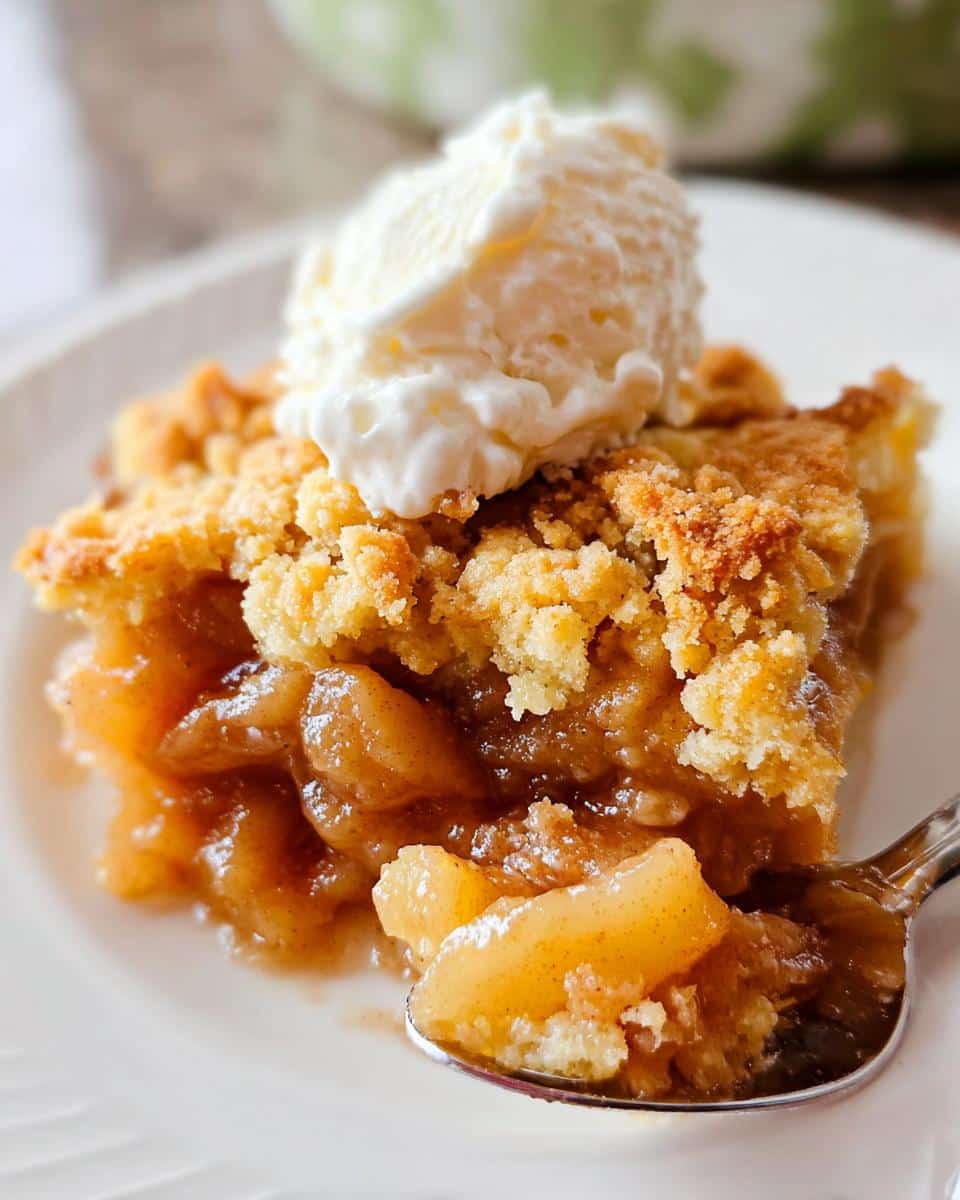
- That perfect bite – The tender, cinnamon-kissed apples underneath that golden, buttery cake topping? It’s like dessert harmony in every spoonful.
- Last-minute lifesaver – Need something warm and homemade fast? From pantry to oven in 10 minutes flat, and it bakes while you clean up (or sneak spoonfuls of ice cream).
- Tastes like childhood – That cozy, nostalgic vibe? Unbeatable. It’s the dessert equivalent of your favorite worn-in sweater.
- Play with it! Swap in pecans, drizzle caramel, or try pumpkin spice – I’ve tested them all, and it’s foolproof.
Ingredients You’ll Need for Easy Apple Cobbler
- 15.25 oz butter cake mix – The star of that golden, crumbly topping! Yellow cake mix works too if that’s what’s in your pantry, but trust me, the butter version adds that extra richness.
- 42 oz apple pie filling (2 cans) – I always keep a couple cans stashed for emergencies (dessert emergencies count, right?). If you’re feeling fancy, homemade filling is dreamy—just make sure it’s thick so your cobbler doesn’t get soupy.
- 8 tablespoon salted butter – Cut into little pieces before scattering over the top. They’ll melt into golden pools and make that cake mix crisp up like magic.
- 1 ½ tablespoon lemon juice – Freshly squeezed is my go-to—it brightens the apples and balances the sweetness so perfectly. (Bottled works in a pinch, but give it a sniff first—if it smells like cleaning supplies, maybe skip it.)
- 1 teaspoon vanilla extract – Pure vanilla is worth it here, friends. That warm, floral note takes the filling from "yum" to "can I have the whole dish?"
- 1 teaspoon apple pie spice – No jar? Mix ½ teaspoon cinnamon + ½ teaspoon nutmeg. Add a pinch of cardamom if you’re feeling adventurous—it’s my secret weapon!
Step-by-Step Instructions for Easy Apple Cobbler
- Preheat & Prep – Fire up that oven to 350°F (175°C) so it’s ready to work its magic. Grab your favorite 9x13-inch baking dish—I use my trusty ceramic one—and give it a quick grease with butter or a spritz of non-stick spray. Nobody wants cobbler stuck to the pan!
- Layer Apples – Dump those cans of apple pie filling right into the dish and spread ‘em out evenly. Now, here’s where the flavor really pops: drizzle that fresh lemon juice and vanilla over the apples like you’re painting a masterpiece. Then, shower them with apple pie spice—I always go heavy-handed because, well, life’s too short for bland desserts.
- Add Cake Mix – Here’s the fun part: take that butter cake mix and sprinkle it over the apples like you’re dusting snow over a winter village. Gently pat it down, but whatever you do, resist the urge to stir! The layers will fuse together beautifully in the oven, I promise.
- Dot with Butter – Take those little butter cubes and scatter them across the top like you’re decorating a cake. More butter = more golden, crispy goodness. (Pro tip: if the butter’s too soft to cut neatly, pop it in the freezer for 5 minutes first.)
- Bake to Perfection – Slide it into the oven and let the magic happen for 40–45 minutes. You’ll know it’s done when the top is golden brown and the edges are bubbling like a sweet, sugary volcano. Let it sit for 10 minutes before serving—it’ll thicken up just enough to hold its shape on your spoon. (But let’s be real, I’ve burned my tongue more than once because I couldn’t wait.)
Easy Apple Cobbler Variations
One of my favorite things about this easy apple cobbler is how versatile it is. I’ve played around with so many twists over the years—some on purpose, some because I was out of ingredients (oops)—and every single one turned out delicious. Here are my go-to riffs when I’m feeling adventurous:
- Spice Swap – Out of apple pie spice? Pumpkin spice gives it a cozy fall vibe, or try a pinch of cardamom for a floral twist. (My aunt swears by adding a dash of black pepper—sounds weird, but it really makes the apples pop!)
- Fruit Options – Peach pie filling with a squeeze of orange juice instead of lemon? Divine. Cherry filling with almond extract instead of vanilla? Even better. I’ve even mixed half apple, half blackberry for a jammy surprise underneath that buttery topping.
- Crunchy Topping – Toss a handful of chopped pecans or walnuts into the cake mix before sprinkling it over the fruit. For extra texture, add ¼ cup old-fashioned oats—they’ll toast up golden and crisp in the oven.
- Gluten-Free – Just grab a gluten-free yellow cake mix (I’ve tested Betty Crocker’s with great results) and double-check your pie filling label. It bakes up just as tender and golden!
Seriously, don’t be afraid to experiment. The worst that can happen is you invent a new family favorite—like the time I drizzled salted caramel over the apples before baking and my kids declared it "the best dessert ever." (I’ll take that win.)
Serving and Storage Tips for Easy Apple Cobbler
Listen, I know the hardest part about making this easy apple cobbler is waiting to dig in—but trust me, these little tricks will make every bite even better. Here’s how I’ve been serving (and stashing) it for years:
- Serving – Always, always serve it warm if you can. That melty scoop of vanilla ice cream on top? Non-negotiable in my house. The way it melts into the cobbler’s nooks and crannies is pure magic. No ice cream? A dollop of fresh whipped cream or even a drizzle of cold heavy cream works wonders.
- Storage – Got leftovers? (Rare in my kitchen, but it happens!) Let the cobbler cool completely, then cover tightly with foil or transfer to an airtight container. It’ll keep in the fridge for up to 4 days. Reheat single servings in the microwave for 30 seconds, or pop the whole dish back in a 300°F oven for 10-15 minutes to revive that crispy topping.
- Freezing – Yes, you can freeze this beauty! Assemble the unbaked cobbler right in a freezer-safe dish, wrap it like a mummy in plastic wrap and foil, and freeze for up to 3 months. When the craving hits, bake it straight from frozen—just add 10-15 minutes to the original bake time. (No thawing needed—that’s the beauty of it!)
One more pro tip: If you’re taking this to a potluck, bake it in a disposable aluminum pan. Not only does it travel like a dream, but you also won’t have to beg for your favorite baking dish back!
Helpful Notes for the Best Easy Apple Cobbler
- Caramel cheat code – Want next-level flavor? Drizzle 2 tablespoons of caramel sauce over the apples before adding the cake mix. It bakes into this luscious, gooey layer that’ll make everyone think you slaved over homemade caramel (our little secret).
- Lemon juice matters – That squeeze of fresh lemon isn’t just for show—it cuts through the sweetness and makes the apples taste brighter. Bottled works in a pinch, but if it smells like furniture polish instead of citrus, skip it.
- Oven watch – My oven runs hot, so I always set a timer for 35 minutes to peek under the foil if I’m covering it (to prevent burning). If the top’s already golden but the center isn’t bubbly yet, just tent it loosely with foil.
- Butter distribution – If your topping seems dry in spots after baking, next time cut your butter into slightly smaller pieces (pea-sized works great) and scatter them closer together. More butter coverage = more golden perfection.
- Pan size flexibility – No 9x13? A deep 10-inch cast-iron skillet or even two 8-inch square pans work—just reduce bake time by 5-10 minutes and watch for those bubbling edges.
Frequently Asked Questions About Easy Apple Cobbler
- Can I use homemade apple pie filling? Absolutely! I do it all the time when apples are in season. Just make sure your filling is nice and thick—if it’s too runny, toss in an extra tablespoon of cornstarch to help it hold up during baking. My grandma’s secret was simmering the apples with a dash of bourbon, but that’s between us.
- What if I don’t have apple pie spice? No sweat—mix ½ teaspoon cinnamon and ½ teaspoon nutmeg. I sometimes throw in a pinch of allspice when I’m feeling fancy. The beauty of this easy apple cobbler is that it’s forgiving—taste your apples first and adjust to your mood!
- Can I make this ahead? You bet! Assemble the whole thing (right up to the butter topping), cover tightly, and refrigerate overnight. When you’re ready, bake as directed but add 5–10 minutes since it’ll be cold. I’ve even left it for two days in the fridge (during the holidays, we do what we must).
- Why is my topping powdery in spots? Ah, the butter probably didn’t fully melt there. Next time, cut your butter into smaller pieces (pea-sized) and distribute them evenly. Or, halfway through baking, give the dish a gentle shake—the melted butter will redistribute like a dream.
- Can I halve the recipe? Of course! Use an 8x8-inch pan and check for doneness around 30 minutes. But fair warning—you’ll probably wish you’d made the full batch when the scent hits your kitchen.
Final Thoughts
Honestly, this Easy Apple Cobbler is the kind of recipe that feels like a warm hug—simple, comforting, and impossible to mess up. Whether you're pulling it out of the oven for a holiday crowd or just whipping it up on a lazy Sunday, that golden, buttery crust and those tender spiced apples will disappear faster than you can say "seconds, please." I’ve lost count of how many times I’ve made this over the years, but I do know one thing: it never fails to bring people together around the table (or the baking dish, if we’re being real).
So go ahead—make it your own, serve it with a scoop of ice cream, and watch it become a staple in your recipe rotation. And when you do, drop me a comment below! I’d love to hear your twists, your family’s reactions, or even your favorite pan to bake it in. Happy baking, friends—may your kitchen always smell like cinnamon and butter!
Print
Easy Apple Cobbler - Simple & Delicious Classic
- Total Time: 55 minutes
- Yield: 8 servings 1x
- Diet: Vegetarian
Description
A simple and delicious apple cobbler made with butter cake mix and apple pie filling, perfect for a quick dessert.
Ingredients
- 15.25 ounces butter cake mix
- 42 ounces apple pie filling (2 cans)
- 8 tablespoons salted butter
- 1 ½ tablespoons lemon juice (fresh is best)
- 1 teaspoon vanilla extract
- 1 teaspoon apple pie spice (or ½ teaspoon ground cinnamon, ½ teaspoon nutmeg)
Instructions
- Preheat your oven to 350°F (175°C).
- Spread the apple pie filling evenly in a baking dish.
- Sprinkle lemon juice, vanilla extract, and apple pie spice over the filling.
- Top with the butter cake mix, spreading it evenly.
- Dot the top with small pieces of butter.
- Bake for 40-45 minutes or until golden brown and bubbly.
- Let cool slightly before serving.
Notes
- Use fresh lemon juice for the best flavor.
- Adjust spices to your preference.
- Serve warm with vanilla ice cream for extra indulgence.
- Prep Time: 10 minutes
- Cook Time: 45 minutes
- Category: Dessert
- Method: Baking
- Cuisine: American
Nutrition
- Serving Size: 1 serving
- Calories: 320
- Sugar: 25g
- Sodium: 280mg
- Fat: 12g
- Saturated Fat: 7g
- Unsaturated Fat: 3g
- Trans Fat: 0g
- Carbohydrates: 50g
- Fiber: 2g
- Protein: 2g
- Cholesterol: 25mg
Keywords: easy apple cobbler, quick dessert, apple pie filling, butter cake mix


Leave a Reply