Oh, apple pie. Just saying those words makes me feel all warm and fuzzy inside—like I’m back in my grandma’s kitchen, stealing bites of flaky crust while she pretended not to notice. But here’s the thing: traditional apple pie can be a bit fussy, especially when you’re feeding a crowd. That’s why I’m obsessed with Apple Slab Pie. It’s got all the cozy, cinnamon-spiced goodness of classic apple pie, but in a big, beautiful rectangle that’s way easier to make (and slice!) for parties, potlucks, or just because you deserve pie on a Tuesday.

Seriously, this pie is a game-changer. The crust is buttery and crisp, the filling is sweet-tart with just the right amount of spice, and it comes together in about an hour and a half—including chilling time! Plus, it makes 12 generous servings, so you won’t have to fight over the last slice. Trust me, once you try this slab pie, you’ll never go back to wrestling with a round pie dish again.
Why You’ll Love This Apple Slab Pie
Listen, I don’t say this lightly: this apple slab pie might just become your new best friend. Here’s why:
Perfect for Gatherings
No more slicing tiny wedges and praying there’s enough to go around. The slab pie is basically the superhero of desserts—big, sturdy, and ready to feed a crowd. Bring it to a potluck, and watch it disappear faster than you can say "seconds, please."
Flaky, Buttery Crust
That crust? It’s the stuff of dreams. Crisp, tender, and just salty enough to balance the sweet apples. And the best part? No fancy techniques required. Just keep your butter cold (I’m serious—don’t skip the chill time!), and you’re golden. Literally.
Customizable Spice Level
Love cinnamon? Go wild. Prefer a subtler spice mix? Dial it back. The filling is your playground—adjust the warmth to match your mood. Pro tip: a pinch of cardamom is *chef’s kiss* if you’re feeling fancy.
Ingredients You’ll Need for Apple Slab Pie
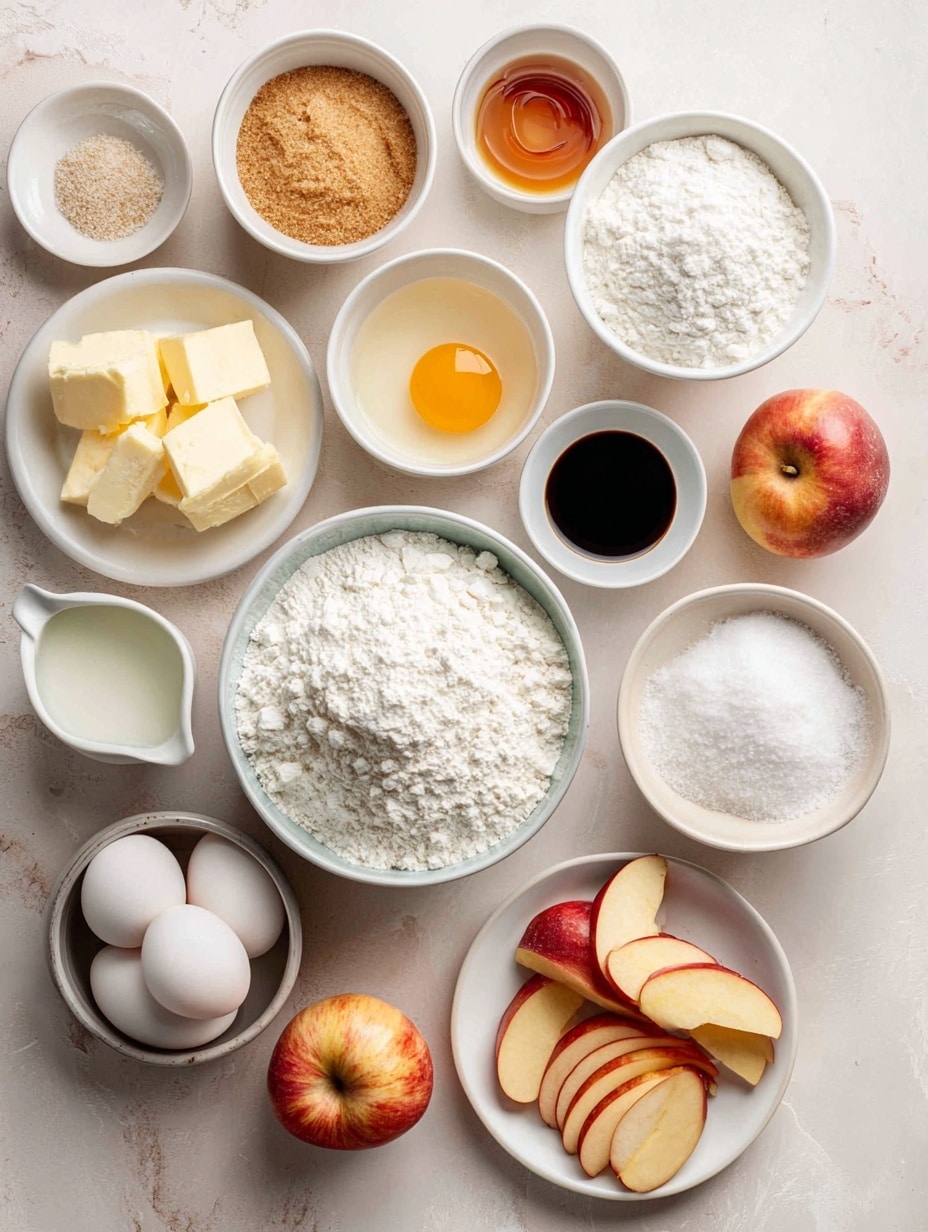
Okay, let’s talk ingredients—because great pie starts with great stuff. Don’t worry, nothing fancy here! Just simple, honest ingredients that come together like magic. Here’s what you’ll need:
For the Crust
- 3 ¾ cups (470 grams) all-purpose flour – Spoon and level it, don’t scoop! We want light, flaky layers, not a hockey puck.
- 1 ½ tablespoon sugar – Just a touch to balance the salt.
- 1 ½ teaspoon table salt – Trust me, this makes the flavors pop.
- 3 sticks (12 oz or 340 grams) unsalted butter, cubed and kept VERY cold – I mean, throw it back in the fridge if your kitchen’s warm. Cold butter = flaky crust. No compromises.
- ¾ cup very cold water – Ice water is your friend here. I sometimes even drop an ice cube in the measuring cup while I prep everything else.
For the Filling
- 3 ½ to 4 pounds apples – Peeled, cored, and chopped into ½-inch chunks (about 10 cups). Mix tart and sweet varieties—I love Granny Smith and Honeycrisp together.
- Squeeze of lemon juice – About half a lemon’s worth. Keeps the apples from browning and adds a little zing.
- ⅔ to ¾ cup sugar – Adjust based on your apples’ sweetness and your sweet tooth. Start with ⅔ cup—you can always add more.
- 3 tablespoon cornstarch – This thickens the juices so you don’t end up with soup.
- 1 rounded teaspoon ground cinnamon – The cozy backbone of the spice mix.
- ¼ teaspoon ground nutmeg – Warm and nutty, but don’t overdo it.
- ¼ teaspoon ground allspice – Adds depth without overpowering.
- ⅛ teaspoon table salt – Just a pinch to balance the sweetness.
For Finishing
- 2 tablespoon heavy cream OR 1 egg beaten with 1 tablespoon water – For that gorgeous golden shine. Use what you’ve got!
See? Nothing weird or hard-to-find. Now let’s get to the fun part—making the pie!
Step-by-Step Apple Slab Pie Instructions
Alright, let's do this! Don't be intimidated—it's just pie. And slab pie is the laid-back cousin of traditional pie, remember? Follow these steps, and you'll have a golden, flaky masterpiece in no time.
Making the Dough
- Preheat your oven to 375°F (190°C). This gives it plenty of time to get nice and toasty while you work.
- Mix the dry ingredients. In a large bowl, whisk together the flour, sugar, and salt. Just a quick stir to combine—no need to overthink it.
- Cut in the butter. Add your cold, cubed butter to the bowl. Now, here's where you can get creative: use a pastry cutter, two forks, or even your fingers (though try to work quickly so the butter stays cold!). You want the mixture to look like coarse crumbs with some pea-sized butter bits still visible. Those butter pockets? That's your future flakiness right there.
- Add the water. Drizzle in the ice-cold water a little at a time, mixing gently with a fork until the dough just starts to come together. It might look shaggy—that's perfect! You should be able to squeeze a handful and have it hold its shape without being sticky.
- Chill out. Divide the dough into two equal portions, flatten into discs, and wrap each in plastic. Pop them in the fridge for at least 30 minutes (up to 2 days). This relaxes the gluten and keeps the butter cold, which means a more tender crust.
Preparing the Filling
- Toss the apples. In a big bowl, combine your chopped apples with the lemon juice, sugar, cornstarch, cinnamon, nutmeg, allspice, and salt. Mix it all up until the apples are evenly coated. Let it sit for about 10 minutes—this helps the flavors mingle and the cornstarch start working its thickening magic.
Assembling and Baking
- Roll the bottom crust. On a lightly floured surface, roll one dough portion into a rectangle about 11x15 inches (it doesn't need to be perfect!). Gently transfer it to a rimmed baking sheet—I like to roll it loosely around my rolling pin and unroll it onto the sheet. Don't stress if it tears; just patch it up with your fingers.
- Add the filling. Spread the apple mixture evenly over the crust, leaving about a ½-inch border all around. If there's a lot of liquid in the bowl, use a slotted spoon to transfer the apples, but don't discard all the juice—a little keeps things juicy.
- Top it off. Roll out the second dough portion the same way and drape it over the apples. Crimp the edges together with your fingers or a fork to seal. Cut a few slits in the top to let steam escape (get creative with the pattern if you want!).
- Brush and bake. Lightly brush the top with your cream or egg wash—this gives it that beautiful golden color. Bake for 45-50 minutes, rotating the pan halfway through, until the crust is deep golden and you see bubbly juices peeking through the vents.
- Let it rest. I know it's tempting, but let the pie cool for at least 30 minutes before slicing. This gives the filling time to set so you don't have a runaway apple situation. Serve warm or at room temperature—either way, it's heaven.
See? Not so scary after all. Now go forth and slab!
Apple Slab Pie Variations
Once you’ve mastered the classic, why not play around a little? This slab pie is like your favorite pair of jeans—it looks great as-is, but you can dress it up or down depending on your mood. Here are some fun twists to try:
Gluten-Free Option
No gluten? No problem! Swap the all-purpose flour for a 1:1 gluten-free baking blend (I like the ones with xanthan gum already added). Everything else stays the same—just keep that butter cold, and you’ll still get a crust that’s shockingly flaky. Bonus: nobody will guess it’s GF unless you tell them.
Vegan Twist
Plant-based pals, this one’s for you. Use your favorite vegan butter (the stick kind works best) and swap the cream for a light brush of almond or oat milk. The filling’s already vegan as long as you skip the egg wash—easy peasy. You won’t miss a thing.
Feeling extra? Toss in a handful of chopped walnuts or pecans with the apples, or drizzle warm caramel sauce over the baked pie. Or—hear me out—use pears instead of apples for a floral, honeyed twist. The slab pie world is your oyster!
Serving and Storage Tips for Apple Slab Pie
Okay, you’ve baked this beauty—now let’s talk about showing it off and keeping it tasting amazing. Because let’s be real, pie leftovers are life.
Best Ways to Serve
Warm slices with a scoop of vanilla ice cream? Classic perfection. But don’t stop there! Try it with a dollop of cinnamon whipped cream (just add a teaspoon of cinnamon to your heavy cream before whipping). For breakfast—because yes, pie for breakfast is absolutely a thing—warm a slice and pair it with Greek yogurt. And if you’re feeling fancy, drizzle with salted caramel or sprinkle with toasted pecans right before serving. Basically, anything that makes you happy is fair game.
Keeping It Fresh
At room temp, your slab pie stays delicious for about 2 days (cover loosely with foil). For longer storage, pop it in the fridge for up to 5 days—just warm slices in a 300°F oven for 10 minutes to revive that crisp crust. Freezing? Absolutely! Wrap cooled pie tightly in plastic, then foil, and freeze for up to 3 months. Thaw overnight in the fridge, then reheat as above. Pro tip: freeze individual slices for emergency pie cravings. You’re welcome.
Helpful Notes for the Best Apple Slab Pie
A few golden rules to live by: First, keep everything cold when making the crust—warm butter is the enemy of flakiness. If your dough feels sticky while rolling, just dust with a little more flour. Second, mix apple varieties for balance—tart Granny Smith and sweet Fuji or Honeycrisp are my go-tos. Third, don’t skip the cornstarch! It’s what keeps your filling from turning into apple soup. And hey, if you’re watching sugar, you can dial it back a bit—the apples bring natural sweetness. Remember, pie is forgiving. Even if it’s messy, it’ll still taste like love.
Frequently Asked Questions About Apple Slab Pie
Got questions? I’ve got answers! Here are the things people ask me most about this pie—consider it your cheat sheet for slab pie success.
1. Can I make this ahead of time?
Absolutely! Assemble the pie up to a day ahead, wrap tightly, and refrigerate. Just add 5-10 minutes to the bake time since it’ll be extra cold. Or freeze unbaked for up to 3 months—bake straight from frozen (no thawing!) with a little extra time.
2. How do I prevent a soggy bottom crust?
Two tricks: First, make sure your oven is fully preheated—a hot start crisps the crust fast. Second, don’t overdo the liquid when mixing the filling. If your apples release a ton of juice after tossing, drain off a little before piling them on the dough.
3. Can I use store-bought pie dough?
Sure, in a pinch! You’ll need about 3 packages (6 discs total) to cover a baking sheet. Roll them out slightly thinner and overlap the edges—it won’t be quite as flaky, but it’ll still taste delicious.
4. What’s the best way to reheat leftovers?
Pop slices on a baking sheet in a 300°F oven for 10 minutes. The microwave works in emergencies, but the crust loses its crispness.
5. My apples are super juicy—is that okay?
Totally normal! Just make sure you’ve got enough cornstarch (3 tablespoon is perfect for most batches). If you see juices bubbling thickly through the vents while baking, you’re golden.
Final Thoughts
At the end of the day, this apple slab pie is everything you love about classic apple pie—but without the fuss. It’s forgiving, endlessly adaptable, and guaranteed to make your kitchen smell like a hug. Whether you’re feeding a crowd or just treating yourself (no judgment here), it’s the kind of recipe that feels like home. So grab those apples, get your hands a little floury, and dive in. I promise, once you taste that first warm, spiced bite with its buttery crust, you’ll wonder why you ever bothered with finicky round pies. Happy slab pie-ing, friends—now go bake some memories!
Print
Easy Apple Slab Pie Your Crowd
- Total Time: 1 hour 20 minutes
- Yield: 12 servings 1x
- Diet: Vegetarian
Description
A delicious and easy-to-make apple slab pie with a flaky crust and sweet, spiced apple filling.
Ingredients
- 3 ¾ cups (470 grams) all-purpose flour
- 1 ½ tbsp sugar
- 1 ½ tsp table salt
- 3 sticks (12 oz or 340 grams) unsalted butter, cubed and kept very cold
- ¾ cup very cold water
- 3 ½ to 4 pounds apples, peeled, cored and chopped into approximately ½-inch chunks (about 10 cups)
- Squeeze of lemon juice
- ⅔ to ¾ cup sugar (depending on how sweet you like your pie and how sweet your apples are)
- 3 tbsp cornstarch
- 1 rounded teaspoon ground cinnamon
- ¼ tsp ground nutmeg
- ¼ tsp ground allspice
- ⅛ tsp table salt
- 2 tbsp heavy cream or 1 egg beaten with 1 tablespoon water
Instructions
- Preheat your oven to 375°F (190°C).
- In a large bowl, mix the flour, sugar, and salt for the crust.
- Add the cold, cubed butter and mix until the mixture resembles coarse crumbs.
- Gradually add the cold water and mix until the dough comes together.
- Divide the dough into two portions, wrap in plastic, and chill for at least 30 minutes.
- In another bowl, toss the chopped apples with lemon juice, sugar, cornstarch, cinnamon, nutmeg, allspice, and salt.
- Roll out one portion of the dough to fit a baking sheet, then place it on the sheet.
- Spread the apple filling evenly over the crust.
- Roll out the second portion of dough and place it over the apples, sealing the edges.
- Brush the top with heavy cream or egg wash.
- Bake for 45-50 minutes, or until golden brown.
- Let cool before slicing and serving.
Notes
- Use a mix of sweet and tart apples for the best flavor.
- Keep the butter and water very cold for a flaky crust.
- Let the pie cool slightly before slicing to set the filling.
- Prep Time: 30 minutes
- Cook Time: 50 minutes
- Category: Dessert
- Method: Baking
- Cuisine: American
Nutrition
- Serving Size: 1 slice
- Calories: 350
- Sugar: 25g
- Sodium: 200mg
- Fat: 18g
- Saturated Fat: 11g
- Unsaturated Fat: 6g
- Trans Fat: 0g
- Carbohydrates: 45g
- Fiber: 3g
- Protein: 3g
- Cholesterol: 45mg
Keywords: apple pie, slab pie, dessert, baking


Leave a Reply