There are few things in life more delightful than biting into a fresh, warm doughnut. But what if I told you that you could recreate that same sugary, nostalgic experience in a much simpler and less messy form? That’s where these muffins that taste like doughnuts come in. The first time I made them was for a Sunday brunch, and they flew off the table faster than I could pour the coffee. Golden, fluffy, and coated in a cinnamon-sugar topping, they are the perfect fusion of doughnut and muffin.

These little gems are baked instead of fried, which means less guilt and much less cleanup. They’re ideal for breakfast, dessert, or an afternoon treat with tea. Best of all, they come together quickly with pantry staples. Once you try them, you’ll want to make them a regular part of your baking repertoire.
Why You’ll Love This Recipe
- Quick and Easy: Simple ingredients and ready in under 30 minutes.
- No Frying Required: All the doughnut flavor without the fuss of frying.
- Perfect for Breakfast or Snacks: Light, sweet, and satisfying at any time of day.
- Great for Sharing: Makes a perfect dozen—great for brunches and bake sales.
- Customizable: You can add fillings, glazes, or spices to make them your own.
- Kid-Friendly: Fun to make and even more fun to eat!
Ingredients You'll Need
- ¾ cup granulated sugar
- 1 large egg
- 1½ cups all-purpose flour
- 2 teaspoons baking powder
- ¼ teaspoon salt
- ¼ teaspoon ground nutmeg
- ¼ cup vegetable oil
- ¾ cup milk
- 1 teaspoon vanilla extract
- 2 tablespoons melted butter (for brushing)
- ½ cup granulated sugar mixed with 1½ teaspoons ground cinnamon (for rolling)
Optional: A pinch of cinnamon in the batter adds even more doughnut character.
Step-by-Step Instructions
Step 1: Preheat and Prepare
Preheat your oven to 350°F (175°C). Grease or line a 12-cup muffin tin with paper liners or spray with nonstick baking spray.
Step 2: Mix the Wet Ingredients
In a large bowl, whisk together the sugar and egg until the mixture is light and creamy. This step gives your muffins a soft and fluffy texture.
Step 3: Add the Dry Ingredients
Add the flour, baking powder, salt, and ground nutmeg to the sugar and egg mixture. Stir until just combined.
Tip: Don’t overmix the batter or your muffins may turn out dense.
Step 4: Add the Liquids
Pour in the vegetable oil, milk, and vanilla extract. Stir until the batter is smooth. It will be fairly loose, which is perfect for moist muffins.
Step 5: Fill the Muffin Cups
Spoon the batter into the prepared muffin cups, filling each about ⅔ full. This will help them rise beautifully without overflowing.
Step 6: Bake
Bake the muffins for 15–18 minutes, or until a toothpick inserted into the center comes out clean. The tops should be just lightly golden.
Step 7: Butter and Sugar Coat
Let the muffins cool in the tin for 5 minutes. While they’re still warm, brush the tops with melted butter. Then roll or dip each one in the cinnamon-sugar mixture until evenly coated.
Tip: Coating them while warm helps the sugar mixture stick better and gives that authentic doughnut-like finish.
Step 8: Serve or Store
Enjoy your muffins warm, or let them cool completely and store in an airtight container for up to 3 days.
Serving and Storage Tips
These muffins are best enjoyed fresh and warm, but they keep well for a few days. If you have leftovers, you can refresh them in the microwave for about 10 seconds. They also freeze beautifully—just wrap them individually in plastic wrap and store in a freezer-safe bag for up to 2 months. To reheat, thaw at room temperature and warm slightly before serving.
Serve with coffee, hot cocoa, or a glass of milk for a cozy treat. They also make a delightful addition to lunchboxes and picnic baskets.
Helpful Notes
- Nutmeg Is Key: Don’t skip the nutmeg—it’s what gives these muffins their classic doughnut flavor.
- Customize the Coating: Try rolling them in powdered sugar or a cocoa-cinnamon blend.
- Add Fillings: Drop a spoonful of jam or Nutella into the center of the batter before baking.
- Make Mini Muffins: Use a mini muffin tin and bake for about 10 minutes for bite-sized versions.
- Double the Batch: These disappear quickly—consider doubling the recipe!
Frequently Asked Questions
- Can I make these muffins gluten-free? Yes, use a 1:1 gluten-free flour blend for best results.
- Can I add a filling? Absolutely! Add a small spoonful of jam or chocolate to the center of the muffin batter.
- How do I keep the sugar topping from melting off? Let the muffins cool slightly, but coat while still warm—not hot—for best results.
- Can I use a different type of oil? Yes, canola oil or melted butter both work well.
- What’s the best way to store these muffins? In an airtight container at room temperature for 2–3 days, or freeze for up to 2 months.
- Can I make them in advance? Yes! Bake the muffins and store them unfrosted. Brush with butter and roll in sugar just before serving.
- Can I use paper liners instead of greasing the tin? Yes, but you may lose a little of the sugar coating with the liner when peeling.
Final Thoughts
These muffins that taste like doughnuts are the perfect solution for when you want the flavor of a doughnut without the hassle of frying. They're quick, simple, and absolutely delicious. Whether you're hosting brunch, baking with kids, or just treating yourself on a slow morning, these muffins are sure to bring smiles all around.
Have you tried these doughnut-inspired delights yet? Let me know your favorite twist or how you like to serve them!
Print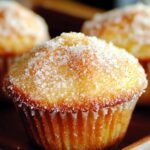
Muffins That Taste Like Doughnuts
- Total Time: 28 minutes
- Yield: 12 muffins 1x
Ingredients
- ¾ cup sugar
- 1 large egg
- 1 ½ cups all-purpose flour
- 2 tsp baking powder
- ¼ tsp salt
- ¼ tsp ground nutmeg
- ¼ cup vegetable oil
- ¾ cup milk
- 1 tsp vanilla extract
- 2 tbsp melted butter
- ½ cup sugar mixed with 1 ½ teaspoon cinnamon (for rolling)
Instructions
Step 1: Preheat and Prepare
- Preheat your oven to 350°F (175°C). Grease or line a 12-cup muffin tin with paper liners or spray with nonstick baking spray.
Step 2: Mix the Wet Ingredients
- In a large bowl, whisk together the sugar and egg until the mixture is light and creamy. This step gives your muffins a soft and fluffy texture.
Step 3: Add the Dry Ingredients
- Add the flour, baking powder, salt, and ground nutmeg to the sugar and egg mixture. Stir until just combined.
- Tip: Don’t overmix the batter or your muffins may turn out dense.
Step 4: Add the Liquids
- Pour in the vegetable oil, milk, and vanilla extract. Stir until the batter is smooth. It will be fairly loose, which is perfect for moist muffins.
Step 5: Fill the Muffin Cups
- Spoon the batter into the prepared muffin cups, filling each about ⅔ full. This will help them rise beautifully without overflowing.
Step 6: Bake
- Bake the muffins for 15–18 minutes, or until a toothpick inserted into the center comes out clean. The tops should be just lightly golden.
Step 7: Butter and Sugar Coat
- Let the muffins cool in the tin for 5 minutes. While they’re still warm, brush the tops with melted butter. Then roll or dip each one in the cinnamon-sugar mixture until evenly coated.
- Tip: Coating them while warm helps the sugar mixture stick better and gives that authentic doughnut-like finish.
Step 8: Serve or Store
- Enjoy your muffins warm, or let them cool completely and store in an airtight container for up to 3 days.
Notes
- Nutmeg Is Key: Don’t skip the nutmeg—it’s what gives these muffins their classic doughnut flavor.
- Customize the Coating: Try rolling them in powdered sugar or a cocoa-cinnamon blend.
- Add Fillings: Drop a spoonful of jam or Nutella into the center of the batter before baking.
- Make Mini Muffins: Use a mini muffin tin and bake for about 10 minutes for bite-sized versions.
- Double the Batch: These disappear quickly—consider doubling the recipe!
- Prep Time: 10 minutes
- Cook Time: 18 minutes
Nutrition
- Calories: 180


Leave a Reply