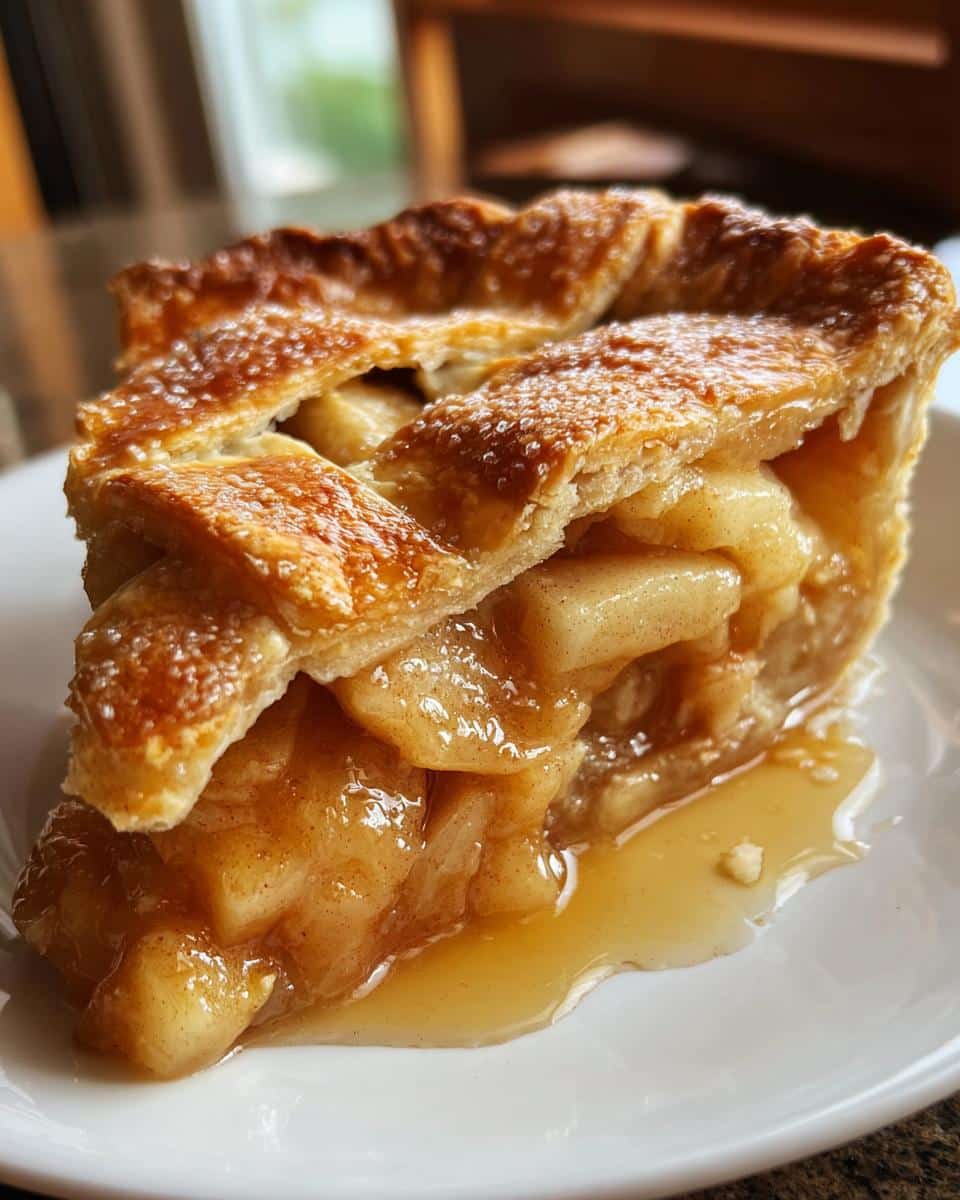
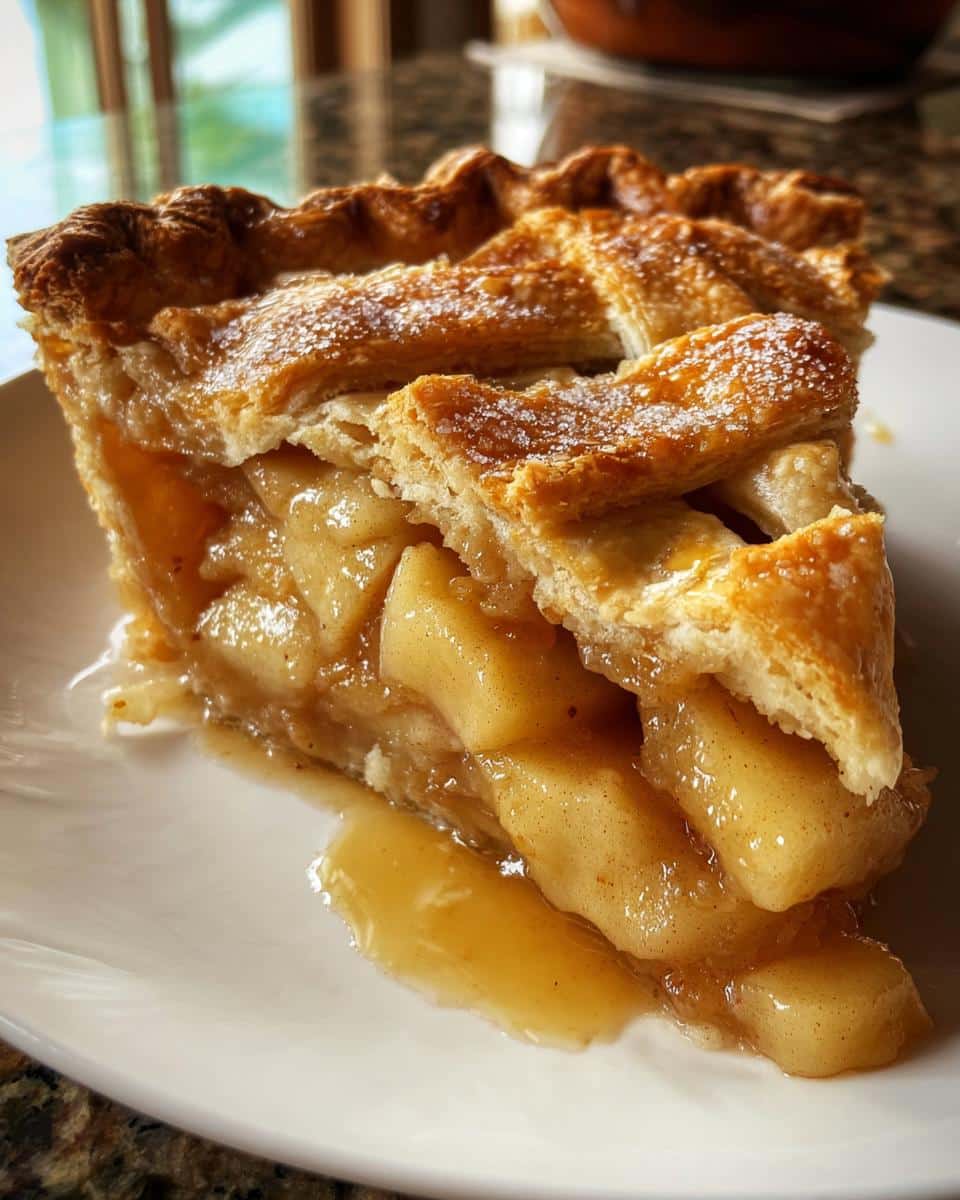
I’ll never forget the first time I made apple pie from scratch—it was a bit of a disaster. The crust crumbled, the filling leaked, and I may or may not have set off the smoke alarm. But you know what? Even that lopsided, slightly charred pie disappeared in minutes. There’s just something magical about apple pie—the buttery crust hugging those tender, cinnamon-spiced apples, the way the whole house smells like a cozy autumn day. It’s the kind of dessert that feels like a hug, and honestly, who doesn’t need more of that?

This isn’t just any apple pie, though. It’s the one I’ve tweaked and perfected over years of trial and error (and a few more smoke alarms). Whether you’re baking for a holiday table, a potluck, or just because it’s Tuesday, this recipe is foolproof. The crust is flaky without being fussy, the filling strikes the perfect balance of sweet and tangy, and—best of all—it’s easier than you’d think. Trust me, once you try it, you’ll never go back to store-bought. So grab your apples and let’s bake a pie that’ll make everyone ask for seconds.
Why You’ll Love This Apple Pie
- Flaky, buttery crust: The crust is tender and golden, with just the right amount of crunch. It’s the perfect base for all that delicious filling.
- Perfectly spiced apples: A mix of cinnamon and allspice gives the filling a warm, cozy flavor that’s not too sweet—just the way it should be.
- Easy to make: Don’t let the idea of homemade pie intimidate you. This recipe breaks it down into simple steps, even for beginners.
- Versatile: Serve it warm with ice cream, cold with coffee, or even for breakfast (no judgment here!). It’s a crowd-pleaser every time.
- Makes your home smell amazing: Seriously, the aroma of baking apple pie is worth it alone. It’s like a hug in dessert form.
- Great for any occasion: Whether it’s a holiday, a potluck, or just a Tuesday night, this apple pie fits right in.
Ingredients You’ll Need for Apple Pie
- 2 tablespoons unsalted butter – I prefer the rich flavor of unsalted, but if you only have salted, just reduce the added salt a tiny bit.
- 2 ½ pounds apples (about 5 large Honeycrisps) – Honeycrisps are my go-to because they hold their shape, but Granny Smiths or Braeburns work great too. Just avoid super soft apples—they turn to mush!
- ¼ teaspoon ground allspice – This little guy is the secret weapon. It adds warmth without overpowering the apples.
- ½ teaspoon ground cinnamon – Because what’s apple pie without cinnamon?
- ¼ teaspoon kosher salt – Balances the sweetness and makes all the flavors pop.
- ¾ cup plus 1 tablespoon sugar – The extra tablespoon is for sprinkling—trust me, it’s worth it for that golden top.
- 2 tablespoons all-purpose flour – Helps thicken the filling so it’s not runny.
- 2 teaspoons cornstarch – The backup thickener, because nobody likes a soggy bottom.
- 1 tablespoon apple cider vinegar – A splash brightens everything up.
- 1 recipe double pie dough – Homemade is dreamy (I use a simple butter crust), but store-bought works in a pinch. Just grab two crusts if going pre-made!
- 1 egg, lightly beaten – For that glossy, golden finish. A little kitchen magic.
Step-by-Step Apple Pie Instructions
Preparing the Apple Filling
First things first—turn your oven to 375°F (190°C) and let it preheat while you work. You want it nice and hot when the pie goes in.
Grab a large skillet (I like to use my trusty cast iron for this) and melt the butter over medium heat. The second it’s all bubbly, toss in your apple wedges. Don’t crowd the pan too much—you want them to soften, not steam! Stir in the allspice, cinnamon, salt, and sugar. The smell at this point? Absolute heaven. Let the apples cook for about 5 minutes, just until they start to soften but still hold their shape—no mushy apples here!
Now sprinkle in the flour and cornstarch, stirring like your pie’s future depends on it (it kinda does). These are your thickening heroes, so make sure they’re evenly mixed. Pour in the apple cider vinegar—that tiny splash cuts through the sweetness and makes the flavors sing. Cook for another 2 minutes until the mixture looks glossy and slightly thickened, then take it off the heat.
Assembling and Baking the Pie
Time for the crust! If you made homemade dough, roll out one disk on a floured surface until it’s about 12 inches wide—don’t stress over perfection; rustic is charming. Gently drape it into your pie dish, letting the edges hang over. Spoon in the apple filling, piling it higher in the center.
Roll out the second dough disk and lay it over the top. Here’s the fun part: crimp the edges together with your fingers or a fork to seal. Don’t forget to cut a few slits in the top—this lets steam escape so your pie doesn’t explode (lesson learned the hard way). Brush the crust with the beaten egg—this gives you that gorgeous golden shine. Sprinkle with that last tablespoon of sugar for a little sparkle and crunch.
Slide the pie into the oven and bake for 45–50 minutes. You’ll know it’s done when the crust is deep golden and you see bubbly juices peeking through the vents. Resist cutting into it right away—let it cool for at least an hour so the filling sets. I know, the wait is torture, but this is the difference between a slice that holds together and a puddle of apples. Worth it!
Apple Pie Variations
One of the best things about apple pie is how adaptable it is. Once you’ve mastered the basics, you can get creative and make it your own. Here are a few of my favorite twists to try:
- Caramel Drizzle: Take your pie to the next level by drizzling warm caramel sauce over the top before serving. It’s like a caramel apple in pie form—pure decadence.
- Streusel Topping: Skip the top crust and sprinkle on a buttery streusel instead. Just mix flour, brown sugar, cinnamon, and cold butter until crumbly, then bake as usual. Crunchy, sweet perfection.
- Nutty Crust: Add chopped pecans or walnuts to your crust for a little extra texture and flavor. It’s a subtle change that makes a big difference.
- Cheese Lovers: For a savory twist, sprinkle shredded sharp cheddar over the crust before baking. Trust me, the salty-cheesy-sweet combo is unreal.
- Seasonal Spices: Swap out the cinnamon and allspice for pumpkin pie spice or cardamom for a cozy fall vibe. A pinch of nutmeg works wonders too.
- Mini Pies: Use a muffin tin to make individual mini pies. Perfect for parties or portion control (though let’s be real, no one’s stopping at just one).
Don’t be afraid to mix and match—apple pie is a blank canvas, and the possibilities are endless. Just remember, no matter how you tweak it, it’s still going to taste amazing. Because, well, it’s apple pie.
Serving and Storing Apple Pie
Let’s talk about the best part—eating this beauty! Apple pie is magical straight out of the oven, still warm with a scoop of vanilla ice cream melting into all those nooks and crannies. If you can wait that long (no shame if you can’t), let it cool for about an hour so the filling sets—it’ll slice cleaner that way. But honestly? I’ve eaten it piping hot with a spoon before, and zero regrets.
Leftovers (if you somehow have any) keep well at room temperature for about 2 days—just cover loosely with foil. For longer storage, pop it in the fridge for up to 5 days. Want to reheat a slice? A quick 10-second zap in the microwave works, but for maximum crust revival, tuck it in a 350°F oven for 10 minutes. And yes, you can freeze the whole pie—wrap it tightly in plastic, then foil, and freeze for up to 3 months. Thaw overnight in the fridge, then warm it up before serving. Pro tip: Freeze individual slices for emergency pie cravings. You’re welcome!
Helpful Notes for Perfect Apple Pie
Okay, let’s talk pie pro tips—because little things make a big difference here. First, apple choice is everything. Firm apples like Honeycrisp or Granny Smith hold their shape and give you that perfect bite. Soft varieties (looking at you, Red Delicious) turn to mush, and nobody wants apple sauce pie. Second, chill your dough before rolling. Cold butter = flaky layers. If it’s sticky, pop it back in the fridge for 10 minutes—patience pays off!
Worried about a soggy bottom? Pre-bake the crust for 10 minutes before adding filling (just prick it with a fork first). And if your edges brown too fast, tent them with foil—saved many a pie from charcoal fate. Nutrition-wise, yeah, it’s dessert (320 calories a slice), but those apples pack fiber and vitamin C! Balance, right? Lastly, don’t stress the mess. Even lopsided pies taste incredible. Now go bake like nobody’s judging—because they’re too busy eating.
Frequently Asked Questions About Apple Pie
- Can I freeze apple pie?
Absolutely! Just wrap the baked and cooled pie tightly in plastic wrap, then foil, and freeze for up to 3 months. Thaw overnight in the fridge and reheat in a 350°F oven until warm—about 20 minutes. Or, freeze unbaked—assemble the pie but skip the egg wash, freeze solid, then bake straight from frozen (add 20 extra minutes). - What are the best apples for pie?
You want firm, slightly tart apples that hold their shape. My top picks: Honeycrisp (sweet and crisp), Granny Smith (tangy and sturdy), or Braeburn (balanced flavor). Avoid mealy apples like Red Delicious—they’ll turn to mush! - Why is my filling runny?
Usually means the apples released too much juice. Next time, toss sliced apples with 1 tablespoon sugar and let them drain in a colander for 30 minutes before cooking. And don’t skip the cornstarch/flour combo—they’re the dynamic duo of thickening. - Can I make this ahead?
Yes! Prep the filling up to 2 days ahead and store it covered in the fridge. Or assemble the whole pie, refrigerate unbaked for up to 24 hours, then bake as directed (add 5 extra minutes if cold from the fridge).
Final Thoughts
At the end of the day, apple pie isn’t just dessert—it’s a little slice of comfort, nostalgia, and pure joy. Whether you’re baking it for a special occasion or just because you deserve something sweet, this recipe is your ticket to pie perfection. The flaky crust, the spiced apples, that golden-brown top… it’s everything a classic apple pie should be, with none of the fuss. So grab those apples, roll up your sleeves, and bake yours today. Trust me, your future self (and anyone lucky enough to get a slice) will thank you. Happy baking!

Perfect Apple Pie Recipe with Flaky Crust
- Total Time: 1 hr 10 mins
- Yield: 8 servings 1x
- Diet: Vegetarian
Description
A classic apple pie with a flaky crust and sweet, spiced apple filling.
Ingredients
- 2 tablespoons unsalted butter
- 2 ½ pounds apples, peeled and cored, then cut into wedges (about 5 large Honeycrisps)
- ¼ teaspoon ground allspice
- ½ teaspoon ground cinnamon
- ¼ teaspoon kosher salt
- ¾ cup plus 1 tablespoon sugar
- 2 tablespoons all-purpose flour
- 2 teaspoons cornstarch
- 1 tablespoon apple cider vinegar
- 1 recipe double pie dough or pre-made crust
- 1 egg, lightly beaten
Instructions
- Preheat oven to 375°F (190°C).
- Melt butter in a large skillet over medium heat.
- Add apples, allspice, cinnamon, salt, and sugar. Cook until apples soften slightly, about 5 minutes.
- Stir in flour, cornstarch, and apple cider vinegar. Cook for another 2 minutes.
- Roll out pie dough and line a pie dish with the bottom crust.
- Pour apple filling into the crust.
- Cover with the top crust, seal edges, and cut vents.
- Brush top crust with beaten egg.
- Bake for 45-50 minutes or until golden brown.
- Let cool before serving.
Notes
- Use firm apples for best texture.
- Chill pie dough before rolling for easier handling.
- Serve warm with vanilla ice cream.
- Prep Time: 20 mins
- Cook Time: 50 mins
- Category: Dessert
- Method: Baking
- Cuisine: American
Nutrition
- Serving Size: 1 slice
- Calories: 320
- Sugar: 25g
- Sodium: 150mg
- Fat: 12g
- Saturated Fat: 5g
- Unsaturated Fat: 6g
- Trans Fat: 0g
- Carbohydrates: 52g
- Fiber: 4g
- Protein: 3g
- Cholesterol: 35mg
Keywords: apple pie, dessert, homemade pie, classic recipe


Leave a Reply