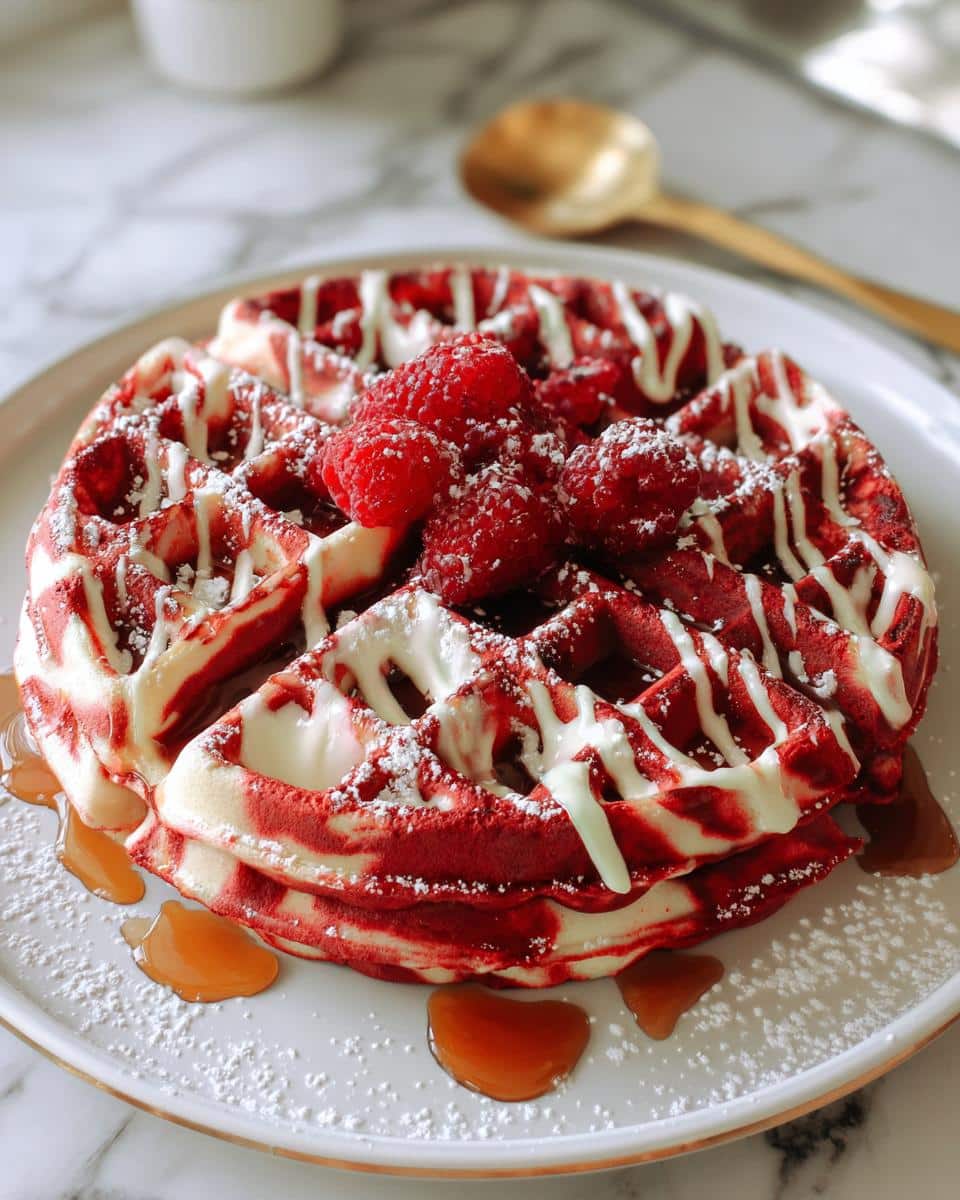
Growing up, there was always something magical about Sunday mornings in our house, and a big part of that magic came from the warm, fluffy waffles my mom would whip up. She had this way of making breakfast feel like a celebration, even if it was just the two of us at the table. The aroma of fresh waffles wafting through the house was enough to pull everyone from their cozy corners, and believe me, nobody ever complained about being the first to dig in. That’s why I’m so excited to share my take on a classic — Red Velvet Marble Waffles. These beauties not only capture that nostalgic feeling but also add a pop of color and flavor that’s perfect for any occasion, especially festive brunches or cozy family gatherings.

There’s something so comforting about the combination of classic vanilla and rich, cocoa-infused red velvet in each bite. It’s a delightful way to brighten up your morning, and trust me, once you serve these waffles, your family won’t stop talking about them. They’re the ideal treat for a holiday breakfast, a sweet surprise for a loved one, or even just a fun way to make a regular weekday morning special. Plus, who can resist that stunning marbled effect? Let’s dive in and make some memories with these delicious Red Velvet Marble Waffles!
Why You’ll Love "Red Velvet Marble Waffles"
- Quick prep time of just 15 minutes, making it perfect for busy mornings.
- Easy to whip up with minimal ingredients you probably already have at home.
- Family-friendly and sure to please both kids and adults alike!
- Beautiful marbled effect that adds a fun twist to your brunch table.
- Leftovers can be frozen for a quick breakfast option later — just pop them in the toaster!
- Adaptable for special occasions or just a cozy weekend treat.
Ingredients You’ll Need
- 1 ½ cups all-purpose flour
- 1 tablespoon sugar
- 1 teaspoon baking powder
- ½ teaspoon baking soda
- ¼ teaspoon salt
- 1 cup buttermilk (or substitute with milk mixed with 1 tablespoon of vinegar or lemon juice)
- 2 large eggs
- ¼ cup melted butter (unsalted for the best flavor)
- 1 teaspoon vanilla extract
- For the Red Velvet Batter:
- 1 cup all-purpose flour
- 2 tablespoons cocoa powder (use Dutch-processed for a richer taste)
- ¼ cup sugar
- 1 teaspoon baking powder
- ½ teaspoon baking soda
- ¼ teaspoon salt
- ¾ cup buttermilk (again, can be substituted with milk and vinegar)
- 1 large egg
- ¼ cup melted butter (unsalted)
- 1 teaspoon vanilla extract
- 1 tablespoon red food coloring (gel food coloring works best for vibrant color)
Step-by-Step Instructions
Prepare the Classic Batter
- In a large mixing bowl, combine 1 ½ cups of all-purpose flour, 1 tablespoon of sugar, 1 teaspoon of baking powder, ½ teaspoon of baking soda, and ¼ teaspoon of salt. Whisk them together until well mixed.
- Add in 1 cup of buttermilk, 2 large eggs, ¼ cup of melted butter, and 1 teaspoon of vanilla extract. Stir everything together until it’s smooth, but don’t worry if a few lumps remain — that’s perfectly okay!
Prepare the Red Velvet Batter
- In another mixing bowl, whisk together 1 cup of all-purpose flour, 2 tablespoons of cocoa powder, ¼ cup of sugar, 1 teaspoon of baking powder, ½ teaspoon of baking soda, and ¼ teaspoon of salt. Make sure it’s all evenly combined.
- Now, add in ¾ cup of buttermilk, 1 large egg, ¼ cup of melted butter, 1 teaspoon of vanilla extract, and 1 tablespoon of red food coloring. Mix until smooth and vibrant — it should be a lovely deep red color!
Preheat the Waffle Maker
- Plug in your waffle maker and preheat it according to the manufacturer’s instructions. If your waffle maker has a light to indicate when it’s ready, keep an eye on that!
Create the Marble Effect
- Once your waffle maker is hot and ready, take a ladle and pour a scoop of the classic batter into one side of the waffle iron.
- Next, scoop some of the red velvet batter and pour it right next to the classic batter, allowing them to touch slightly. Alternate between the two batters until you’ve filled the waffle maker, creating a beautiful marbled effect.
Cook the Waffles
- Close the waffle maker and cook according to the manufacturer’s instructions, usually around 4-5 minutes. You want them to be golden brown and cooked through.
- Check for doneness by carefully opening the waffle maker. If they look golden and crisp, they’re ready! If not, close it back up and give them another minute or so.
Serve the Waffles
- Once cooked, carefully remove the waffles from the iron (a fork or tongs can help here!) and serve them warm.
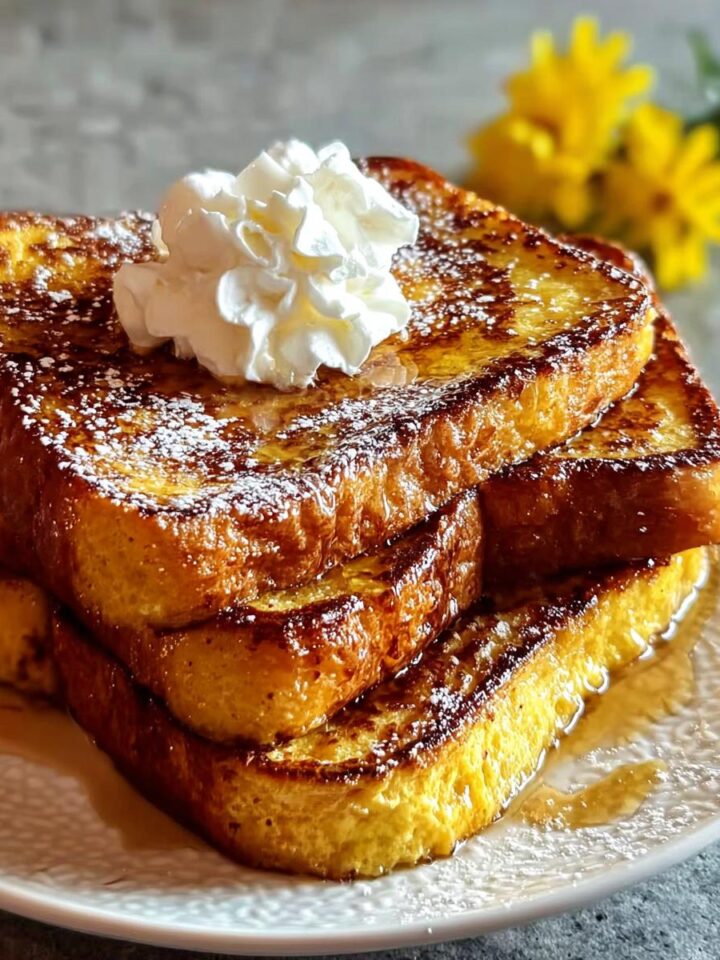
- Top with your favorite toppings like whipped cream, fresh berries, or a drizzle of syrup. Enjoy every bite of these delightful Red Velvet Marble Waffles!
Variations
- Add chocolate chips to the batters for a sweet twist.
- Substitute almond milk for buttermilk for a dairy-free version.
- For a seasonal flair, mix in pumpkin spice during fall or crushed peppermint during the holidays.
- Use gluten-free flour to make these waffles gluten-free.
- Top with cream cheese frosting instead of syrup for a decadent treat.
Serving and Storage Tips
Serving
Serve your Red Velvet Marble Waffles warm, topped with whipped cream, fresh berries, or a drizzle of maple syrup. For an extra special touch, consider adding a sprinkle of powdered sugar or a dollop of cream cheese frosting. They pair beautifully with a side of crispy bacon or a refreshing fruit salad for a complete breakfast experience!
Storage
Store leftover waffles in an airtight container in the refrigerator for up to 3 days. To freeze, place them in a single layer on a baking sheet until solid, then transfer to a freezer bag. They can be frozen for up to 2 months. Reheat in the toaster or oven for a quick breakfast treat!
Helpful Notes
- For a lighter version, use half whole wheat flour and half all-purpose flour.
- If you don’t have red food coloring, you can use beet juice for a natural alternative.
- Feel free to add in nuts or chocolate chips for extra texture and flavor.
- These waffles are great for meal prep — make a double batch and freeze for busy mornings!
- Ensure your baking powder and baking soda are fresh for the best rise.
Frequently Asked Questions
Can I freeze Red Velvet Marble Waffles?
Yes, you can absolutely freeze these waffles! Once they’ve cooled completely, place them in a single layer on a baking sheet until they’re firm, then transfer them to a freezer bag. They can be frozen for up to 2 months. When you’re ready to enjoy, just pop them in the toaster or oven until warmed through.
What can I use instead of buttermilk?
If you don’t have buttermilk on hand, no worries! You can substitute it by mixing 1 cup of regular milk with 1 tablespoon of vinegar or lemon juice. Let it sit for about 5 minutes to thicken. This will give you a similar tangy flavor that buttermilk provides. For more baking tips, check out King Arthur Baking's ingredient substitutions.
How can I make these waffles gluten-free?
To make these waffles gluten-free, simply substitute the all-purpose flour with a gluten-free flour blend. Make sure the blend contains xanthan gum, which helps mimic the texture of traditional wheat flour. You can also use almond flour or coconut flour, but you may need to adjust the liquid ratios slightly.
Can I add chocolate chips to the batter?
Oh, absolutely! Adding chocolate chips is a delightful way to enhance these waffles. Just fold in about ½ cup of chocolate chips into either the classic or red velvet batter before cooking. You could even do both for a fun surprise in every bite!
How do I know when the waffles are done cooking?
You’ll know the waffles are done when they are golden brown and crisp on the outside. Most waffle makers have an indicator light that will tell you when they’re ready. If you’re unsure, you can carefully open the waffle maker after a few minutes to check for that beautiful color and texture! For more information on waffle makers, see Food Network's guide to choosing a waffle maker.
Final Thoughts
So there you have it, my friends! These Red Velvet Marble Waffles are not only a feast for the eyes but also a delightful treat for the taste buds. I encourage you to gather your loved ones, whip up a batch, and create some beautiful memories around the breakfast table. Whether it’s a special occasion or just a cozy weekend morning, these waffles are sure to bring smiles and laughter. Remember, cooking is all about joy and sharing, so don’t hesitate to experiment with toppings and flavors. Happy cooking, and enjoy every bite!
Print
Red Velvet Marble Waffles
- Total Time: 35 minutes
- Yield: 4 servings 1x
- Diet: Vegetarian
Description
Delicious red velvet marble waffles that combine classic and red velvet flavors.
Ingredients
- 1 ½ cups all-purpose flour
- 1 tablespoon sugar
- 1 teaspoon baking powder
- ½ teaspoon baking soda
- ¼ teaspoon salt
- 1 cup buttermilk
- 2 large eggs
- ¼ cup melted butter
- 1 teaspoon vanilla extract
- For the Red Velvet Batter:
- 1 cup all-purpose flour
- 2 tablespoons cocoa powder
- ¼ cup sugar
- 1 teaspoon baking powder
- ½ teaspoon baking soda
- ¼ teaspoon salt
- ¾ cup buttermilk
- 1 large egg
- ¼ cup melted butter
- 1 teaspoon vanilla extract
- 1 tablespoon red food coloring
Instructions
- In a bowl, mix the dry ingredients for the classic waffle batter.
- Add buttermilk, eggs, melted butter, and vanilla to the dry ingredients. Mix well.
- In another bowl, combine the dry ingredients for the red velvet batter.
- Add buttermilk, egg, melted butter, vanilla, and red food coloring to the dry ingredients for the red velvet batter. Mix well.
- Preheat the waffle maker.
- Pour both batters into the waffle maker, alternating between the classic and red velvet batters to create a marble effect.
- Cook according to the waffle maker's instructions until golden brown.
- Serve warm with your favorite toppings.
Notes
- Adjust cooking time based on your waffle maker.
- Store leftover waffles in the refrigerator.
- Prep Time: 15 minutes
- Cook Time: 20 minutes
- Category: Breakfast
- Method: Waffle
- Cuisine: American
Nutrition
- Serving Size: 1 waffle
- Calories: 250
- Sugar: 10g
- Sodium: 300mg
- Fat: 10g
- Saturated Fat: 5g
- Unsaturated Fat: 3g
- Trans Fat: 0g
- Carbohydrates: 35g
- Fiber: 2g
- Protein: 5g
- Cholesterol: 50mg
Keywords: Red Velvet Marble Waffles
Leave a Reply