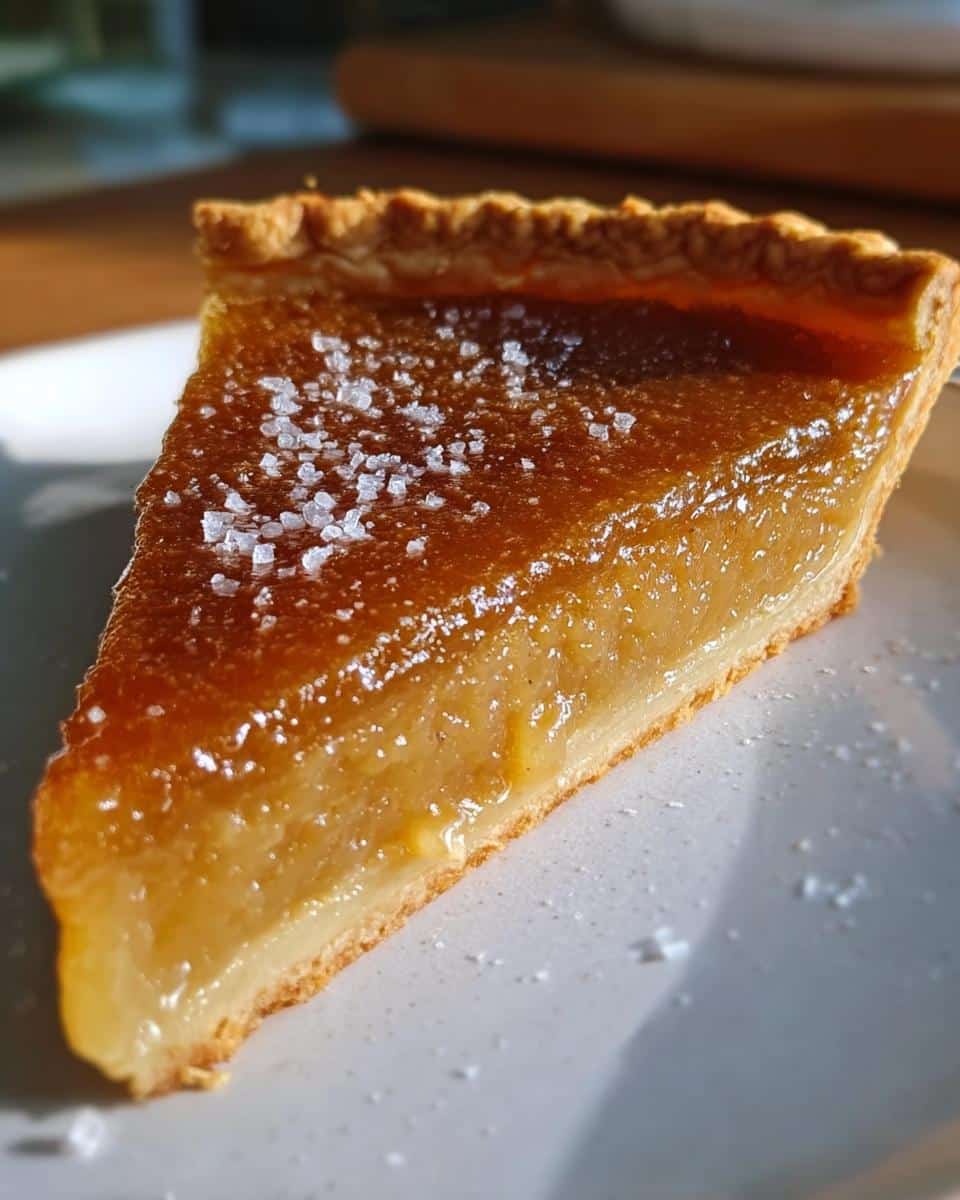
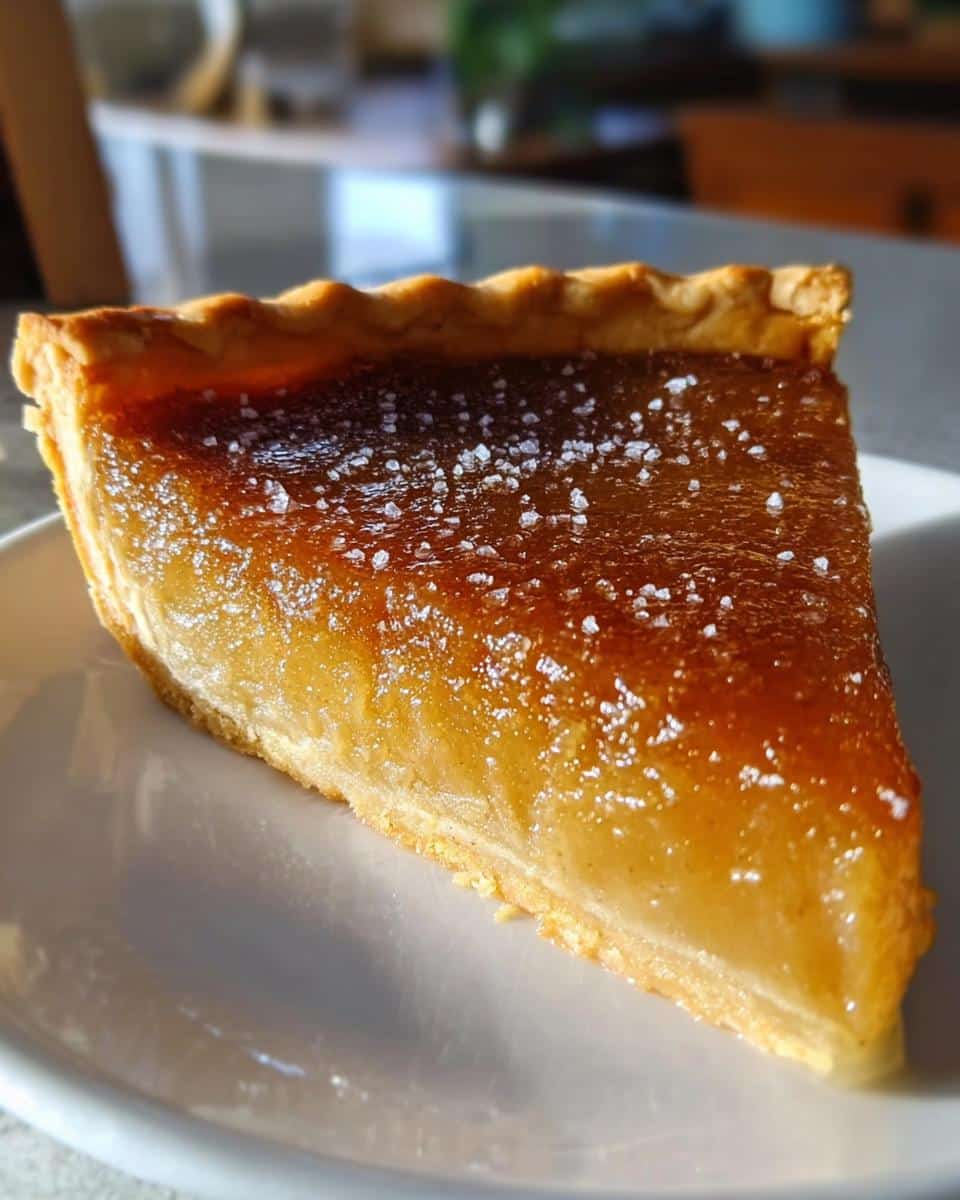
Okay, let me tell you about the first time I made Salted Honey Pie. It was one of those happy accidents—I'd just gotten a huge jar of wildflower honey from a farmer's market and was dying to bake something that really showed it off. But I didn’t want just sweet. I wanted that moment where you take a bite, and the honey sings, and then—bam!—a little kiss of salt comes through to balance it all. That’s when I knew this pie was special.

This Salted Honey Pie is like dessert magic—it’s rich, but not too heavy, with this gorgeous golden filling that sets up just right (trust me, it’s easier than custard pies). And that salty finish? Absolute perfection. It’s ready in about an hour, makes 8 dreamy slices, and is the kind of thing people beg you to make again. Perfect for holidays, dinner parties, or, you know, a Tuesday when you need a little golden happiness in your life.
Why You’ll Love Salted Honey Pie
Oh, where do I even start with this pie? It’s one of those recipes that just works—every single time. Here’s why you’re going to adore it:
- Sweet meets salty magic: That first bite is pure bliss—the honey’s floral sweetness followed by that flaky salt crunch. It’s like your taste buds throw a little party.
- Almost no fuss: No fancy techniques here! Just mix, pour, and bake. Even the crust can be store-bought if you’re in a hurry (I won’t tell).
- Crowd-pleaser alert: I’ve served this to pastry snobs and kids with a sweet tooth alike—everyone licks their plate clean.
- Forgiving texture: Unlike fussy custards, this filling sets up beautifully even if your oven runs hot or cold. A crack or two? Just call it “rustic charm.”
- Honey shines bright: It’s not just sugar-sweet—you’ll actually taste the honey, especially if you use a good wildflower or clover variety.
Seriously, this Salted Honey Pie is the dessert you didn’t know you needed in your life until now. One slice and you’ll be hooked.
Ingredients You’ll Need for Salted Honey Pie
Okay, let’s gather up the good stuff! You probably have most of these already—this pie keeps things simple but mighty. A quick tip: measure everything before you start mixing. It makes the whole process feel like a breeze.
- 1 9-inch pie crust, homemade or store-bought, blind baked (I use a basic butter crust, but even the frozen kind works in a pinch—just bake it empty first so it’s crisp!)
- ½ cup unsalted butter, melted and slightly cooled (if you only have salted butter, just skip the extra salt in the filling—no biggie)
- ¾ cup granulated sugar (plain white sugar does the job here—no need for fancy stuff)
- ¼ cup cornmeal, fine grind (this gives the filling the most lovely, subtle texture—don’t skip it!)
- ¼ teaspoon salt (unless you’re using salted butter, then leave this out)
- 1 tablespoon white vinegar or lemon juice (a tiny splash to balance the sweetness—I usually grab vinegar because it’s always in my pantry)
- 1 tablespoon white vinegar or lemon juice (a tiny splash to balance the sweetness—I usually grab vinegar because it’s always in my pantry)
- 1 teaspoon vanilla extract (the real stuff, please—it makes all the difference)
- ½ cup honey (wildflower or clover honey is my go-to for that floral kick—avoid the super dark, strong kinds like buckwheat)
- 3 large eggs, at room temperature (just leave ‘em on the counter for 30 minutes—trust me, they mix smoother)
- ½ cup heavy cream (yep, this is where the richness comes from—no skimping!)
- Flaky sea salt, like Maldon, to finish (that salty crunch on top is *chef’s kiss*)
See? Nothing too wild—just good, honest ingredients that turn into something magical. Now, let's make some pie!
Step-by-Step Salted Honey Pie Instructions
Alright, let’s get down to business! This pie comes together so easily—just follow these steps, and you'll have a golden, honey-kissed masterpiece in no time. I'll walk you through every little detail so nothing goes sideways. Ready? Here we go!
Preparing the Crust
First things first: that crust needs a head start. If you're using store-bought, just follow the package instructions for blind baking (that's fancy talk for baking it empty). For homemade, roll it out, tuck it into your pie dish, prick the bottom with a fork, and bake at 375°F for about 15 minutes until it's lightly golden. Let it cool while you make the filling—no one wants a soggy bottom!
Making the Filling
Now for the fun part! Grab a big mixing bowl and toss in your melted butter (make sure it's not hot—just warm), sugar, cornmeal, and salt. Stir it up until it looks like wet sand. Next, add the vinegar or lemon juice, vanilla, and honey. Mix it well—this is where the magic starts! Now, whisk in the eggs one at a time, making sure each one is fully blended before adding the next. Finally, pour in the heavy cream and stir until everything’s smooth and silky. Don’t worry if it seems thin—it’ll thicken up beautifully in the oven!
Baking and Finishing
Pour that luscious filling into your pre-baked crust and slide it into a 350°F oven. Bake for 45–50 minutes, until the edges are set but the center still has a slight jiggle (like Jell-O, not like soup). Let it cool completely on a wire rack—I know it’s tempting, but cutting into it too soon means a runny mess. Once it’s cool, sprinkle the top with flaky sea salt. That salty crunch? Absolute perfection. Slice, serve, and prepare for the compliments to roll in!
Salted Honey Pie Variations
One of the best things about this pie? It's like a blank canvas waiting for your personal touch! Here are some fun twists I've tried (and loved) over the years:
- Maple magic: Swap half the honey for pure maple syrup—it gives this incredible autumnal vibe that's perfect with the salt.
- Spice it up: Add a pinch of cinnamon or cardamom to the filling for a warm, cozy kick that plays so nicely with the honey.
- Nutty crust: Use a graham cracker or gingersnap crust instead of traditional pie dough for extra texture and flavor.
- Gluten-free: No problem! Just use your favorite GF pie crust—the filling doesn't know the difference.
- Creamier option: Replace half the heavy cream with sour cream for a tangier, slightly denser texture that's downright dreamy.
Honestly, once you've mastered the basic Salted Honey Pie, the variations are endless. I've even seen friends swirl in a spoonful of peanut butter before baking—because why not? Baking should be fun, so play around and make it yours!
Serving and Storing Salted Honey Pie
Okay, let’s talk about the best ways to enjoy (and save!) your Salted Honey Pie. First off, this pie is meant to be served at room temperature. I know it’s tempting to dive in while it’s still warm, but trust me, letting it cool completely lets the filling set up perfectly. That first slice? Pure golden bliss.
If you’re not serving it right away, no worries! Just cover it loosely with plastic wrap or foil and keep it at room temp for up to a day. After that, pop it in the fridge for up to 3 days—make sure it’s in an airtight container or wrapped well so it doesn’t pick up any fridge smells. Cold pie is actually pretty great, but if you want it room temp again, just let it sit out for 30 minutes before slicing.
Want to freeze it? Go for it! Wrap the whole pie (or individual slices) tightly in plastic wrap, then foil, and freeze for up to 2 months. Thaw it in the fridge overnight, and you’re good to go. Oh, and don’t forget to add that flaky salt just before serving—it’s the finishing touch that makes this Salted Honey Pie truly unforgettable.
Helpful Notes for Perfect Salted Honey Pie
Alright, let’s chat about those little things that take this pie from good to oh-my-goodness amazing. First, the honey—please, please use a good-quality wildflower or clover honey. The cheap stuff in bear-shaped bottles just won’t give you that floral depth you want here. And don’t even get me started on skipping the flaky salt finish—it’s non-negotiable!
Now, about cooling: I know it’s torture to wait, but letting the pie cool completely is key. If you cut into it too soon, the filling will run everywhere (still tasty, but messy!). If you see cracks forming as it cools? No stress! It’s totally normal—just sprinkle extra salt on top and call it “artisanal.”
Nutrition-wise, each slice packs about 350 calories—but hey, life’s too short to count when honey pie’s involved. One last tip: if your filling seems too runny after baking, chances are your oven runs cool. Just pop it back in for 5 more minutes next time. You’ve got this!
Frequently Asked Questions About Salted Honey Pie
Got questions? I’ve got answers! Here are the most common things people ask me about this Salted Honey Pie (and my best tips to keep it stress-free):
- Can I use salted butter instead of unsalted?
Absolutely! Just skip the extra ¼ teaspoon of salt in the filling. It’ll still taste amazing. - Why is my filling runny after baking?
It’s probably underbaked. Next time, leave it in the oven for an extra 5–10 minutes until the center has a slight jiggle, not a full-on wobble. And always let it cool completely before slicing! - Can I make this pie gluten-free?
Yep! Just use your favorite gluten-free pie crust—the filling doesn’t care what kind of crust it’s in. - What if I don’t have cornmeal?
You can skip it, but it adds a lovely texture. If you’re in a pinch, try an equal amount of flour or almond meal instead. - Can I freeze this pie?
Totally! Wrap it tightly in plastic wrap and foil, and freeze for up to 2 months. Thaw in the fridge before serving.
There you go—no mystery, no stress. Just pie. Now go make yourself some Salted Honey Pie magic!
Final Thoughts on Salted Honey Pie
At the end of the day, this pie is pure comfort in every slice—simple enough for weeknights but special enough for celebrations. That golden honey filling, the buttery crust, and that perfect salty finish? It’s the kind of dessert that makes people close their eyes and sigh after the first bite. Whether you’re a pie pro or a baking newbie, this recipe won’t let you down. So go ahead—whip one up, share it (or not!), and savor every sweet-and-salty moment. Happy baking, friends!
Print
Salted Honey Pie Recipe
- Total Time: 1 hour 10 minutes
- Yield: 1 9-inch pie 1x
- Diet: Vegetarian
Description
A sweet and salty pie with a rich honey filling.
Ingredients
- 1 9-inch pie crust, homemade or store-bought (blind baked)
- ½ cup unsalted butter, melted and slightly cooled
- ¾ cup granulated sugar
- ¼ cup cornmeal (fine grind)
- ¼ teaspoon salt
- 1 tablespoon white vinegar or lemon juice
- 1 teaspoon vanilla extract
- ½ cup honey (preferably wildflower or clover)
- 3 large eggs
- ½ cup heavy cream
- Flaky sea salt (such as Maldon), to finish
Instructions
- Preheat oven to 350°F (175°C).
- Blind bake the pie crust and set aside.
- In a bowl, mix melted butter, sugar, cornmeal, and salt.
- Add vinegar or lemon juice, vanilla, and honey. Stir well.
- Whisk in eggs one at a time.
- Stir in heavy cream until smooth.
- Pour filling into the pre-baked crust.
- Bake for 45-50 minutes until set.
- Cool completely before slicing.
- Sprinkle with flaky sea salt before serving.
Notes
- Use wildflower or clover honey for best flavor.
- Let pie cool completely to set properly.
- Prep Time: 20 minutes
- Cook Time: 50 minutes
- Category: Dessert
- Method: Baking
- Cuisine: American
Nutrition
- Serving Size: 1 slice
- Calories: 350
- Sugar: 30g
- Sodium: 150mg
- Fat: 18g
- Saturated Fat: 10g
- Unsaturated Fat: 7g
- Trans Fat: 0g
- Carbohydrates: 45g
- Fiber: 1g
- Protein: 4g
- Cholesterol: 110mg
Keywords: salted honey pie, honey dessert, pie recipe


Leave a Reply