Let me tell you about my love affair with the Walking Taco Casserole, a dish that brings back memories of summer barbecues and cozy family nights. I can almost hear the laughter of my kids as they devour their plates, their little hands diving into the cheesy goodness. There’s something magical about combining all those traditional taco flavors into a warm, comforting casserole that just screams, “Gather around the table!” It’s like a taco truck parked right in your kitchen, only without the long line and with a lot less mess!

This recipe has found its way into our home during the busy weeknights when I need something quick, filling, and delicious. It’s the perfect solution for when you want to please the whole family without spending hours in the kitchen. Whether it’s a chilly evening or a casual get-together with friends, the Walking Taco Casserole is always a hit. Plus, it’s so easy to whip up that I can almost guarantee you’ll make it a regular in your meal rotation!
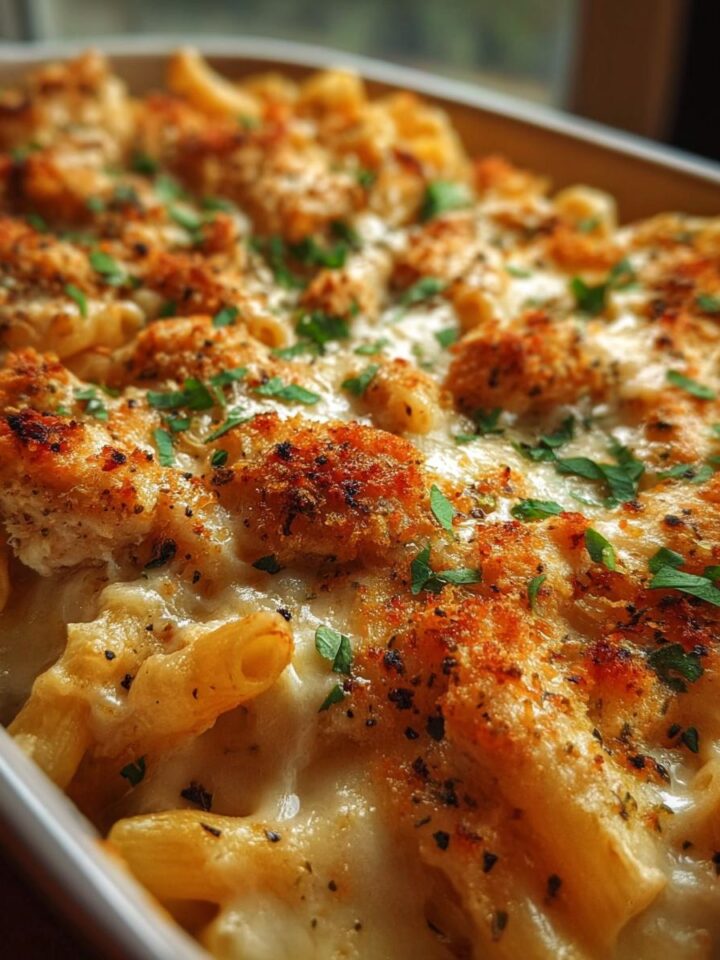
Why You’ll Love "Walking Taco Casserole"
- Super quick to prepare — ready in about 40 minutes!
- Minimal ingredients — you probably have most of them on hand!
- Family-friendly — even picky eaters will love it!
- Perfect for feeding a crowd — makes 6 hearty servings.
- Leftover friendly — easily reheats for lunch the next day.
- Great for gatherings — a guaranteed crowd-pleaser at parties!
Ingredients You’ll Need
- 1 ½ lbs ground beef (use lean beef for less grease)
- 1 cup onion, chopped (yellow or white onions work great)
- 3 oz cream cheese (softened for easier mixing)
- 1 packet taco seasoning (your favorite brand — I love using low sodium!)
- 1 can green chilis (diced, for a little kick — mild or hot depending on preference)
- 2-3 cups Fritos corn chips (for that classic crunch — don't skimp!)
- 1 cup shredded taco blend cheese (or a mix of cheddar and Monterey Jack)
- 1 Roma tomato, chopped (fresh for a burst of flavor)
- 1-2 cups shredded lettuce (for that fresh, crispy topping)
- Salsa and sour cream for garnish (optional, but oh so good!)
Step-by-Step Instructions
Preheat the Oven
- Start by preheating your oven to 350°F (175°C). This ensures that your casserole bakes evenly and perfectly when it’s time to pop it in!
Brown the Meat and Onions
- In a large skillet over medium heat, add your ground beef and chopped onions. The aroma of sautéing onions is going to make your kitchen smell heavenly!
- Cook until the beef is browned and cooked through, which should take about 5-7 minutes. Make sure to break it up with a spatula as it cooks!
Mix in the Cream Cheese and Seasoning
- Once the beef is cooked, lower the heat and add the softened cream cheese. Stir it in until it’s fully melted and creamy.
- Add the taco seasoning and green chilis to the mixture. Stir everything together until well combined. You should see a lovely taco filling starting to form!
Layer the Fritos
- Grab a baking dish and start layering the Fritos corn chips at the bottom. You want a nice, even layer that will hold all that deliciousness!
Add the Beef Mixture
- Now it’s time to spread that cheesy beef mixture over the Fritos. Make sure it’s evenly distributed, so every bite is packed with flavor.
Top with Cheese
- Sprinkle the shredded taco blend cheese generously over the beef mixture. Don’t be shy — more cheese equals more happiness!
Bake the Casserole
- Place the baking dish in your preheated oven and bake for about 20 minutes. You’re looking for melted cheese and a bubbly filling. Keep an eye on it!
Garnish and Serve
- Once it’s out of the oven, let it sit for a few minutes to cool slightly. Then, top it off with the chopped Roma tomatoes and shredded lettuce for a fresh crunch.
- Serve with salsa and sour cream on the side for dipping. Enjoy every cheesy, crunchy bite with your family!
Variations
- For a vegetarian option, substitute the ground beef with black beans or lentils.
- Add diced jalapeños for extra heat.
- Swap out Fritos for crushed tortilla chips or corn tortillas for a different texture.
- Try adding seasonal veggies like corn or bell peppers for a fresh twist.
- For a lighter version, use ground turkey or chicken instead of beef.
Serving and Storage Tips
Serving
Serve the Walking Taco Casserole hot, straight from the oven. Pair it with a side of fresh guacamole or a simple corn salad for a delightful meal. Don’t forget to offer extra salsa and sour cream for those who love a little extra flavor!
Storage
Store any leftovers in an airtight container in the fridge for up to 3 days. You can also freeze it for up to 2 months. To reheat, pop it in the oven at 350°F (175°C) until warmed through or microwave individual portions for a quicker option!
Helpful Notes
- If you want a creamier texture, add a splash of milk or a dollop of sour cream to the beef mixture.
- For dairy-free options, substitute cream cheese with a dairy-free alternative and use vegan cheese.
- Feel free to throw in extra veggies like zucchini or spinach to sneak in some nutrients.
- Adjust the taco seasoning to your spice preference — make it mild or turn up the heat!
- Leftover casserole can be transformed into taco salads for a different meal the next day.
Frequently Asked Questions
Can I freeze the Walking Taco Casserole?
Yes, you can freeze the Walking Taco Casserole! Just make sure it’s completely cooled before transferring it to a freezer-safe container. It can be stored for up to 2 months. When you’re ready to enjoy it, let it thaw in the fridge overnight and reheat in the oven until heated through.
What can I substitute for ground beef?
You can easily substitute ground beef with ground turkey, chicken, or even plant-based meats if you’re looking for a healthier or vegetarian option. Black beans or lentils also make a great filling alternative for a meatless twist.
How do I make this dish spicier?
To add some heat to your Walking Taco Casserole, you can mix in diced jalapeños or add a pinch of cayenne pepper to the beef mixture. You could also use spicy taco seasoning or serve with hot salsa on the side for those who like it fiery!
Final Thoughts
There you have it — my favorite Walking Taco Casserole recipe, ready to bring joy and comfort to your table! I hope you feel inspired to give it a try, whether it’s for a cozy family dinner or a fun gathering with friends. Remember, cooking should be a happy adventure, so don’t stress about perfection. Just enjoy the process and the laughter that follows. I can’t wait for you to experience those cheesy, crunchy bites that make everyone smile. Now, roll up your sleeves and get cooking — I promise you won’t regret it!
Print
Walking Taco Casserole: Comforting Family Favorite
- Total Time: 40 minutes
- Yield: 6 servings 1x
- Diet: Gluten Free
Description
A delicious and easy-to-make Walking Taco Casserole that combines all your favorite taco flavors.
Ingredients
- 1 ½ lbs ground beef
- 1 cup onion, chopped
- 3 oz cream cheese
- 1 packet taco seasoning
- 1 can green chilis
- 2-3 cups Fritos corn chips
- 1 cup shredded taco blend cheese
- 1 Roma tomato, chopped
- 1-2 cups shredded lettuce
- Salsa and sour cream for garnish
Instructions
- Preheat your oven to 350°F (175°C).
- In a skillet, brown the ground beef and onion over medium heat until the beef is cooked through.
- Add cream cheese, taco seasoning, and green chilis. Stir until combined.
- In a baking dish, layer Fritos corn chips at the bottom.
- Spread the beef mixture over the Fritos.
- Sprinkle shredded taco blend cheese on top.
- Bake in the oven for 20 minutes or until cheese is melted.
- Remove from the oven and top with chopped tomato and shredded lettuce.
- Serve with salsa and sour cream.
Notes
- Adjust the amount of taco seasoning to your taste.
- For a spicier dish, add jalapeños.
- This dish can be made ahead and reheated.
- Prep Time: 15 minutes
- Cook Time: 25 minutes
- Category: Main Course
- Method: Baking
- Cuisine: Mexican
Nutrition
- Serving Size: 1 serving
- Calories: 450
- Sugar: 2g
- Sodium: 800mg
- Fat: 30g
- Saturated Fat: 12g
- Unsaturated Fat: 15g
- Trans Fat: 0g
- Carbohydrates: 30g
- Fiber: 3g
- Protein: 25g
- Cholesterol: 80mg
Keywords: Walking Taco Casserole, Taco, Casserole, Easy Dinner


Leave a Reply