Oh my gosh, you guys – this Biscoff Cookie Butter Cheesecake is my latest obsession! It's got that magical combo of creamy, dreamy filling and that addictive Biscoff crunch that makes you want to lick the plate clean. I first made it for a potluck last summer, and let me tell you, people were literally scraping the pan with their forks trying to get every last crumb.
What I love most (besides how ridiculously delicious it is) is how simple this recipe really is. The crust comes together in minutes, the filling whips up smooth as silk, and that melted Biscoff cookie butter drizzle on top? Absolute perfection. It's become my go-to dessert when I want something that looks fancy but secretly couldn't be easier to make.

Why You’ll Love This Biscoff Cookie Butter Cheesecake
Okay, let me count the ways this cheesecake will steal your heart (and probably your waistline—but trust me, it's worth it!). First off, that texture—imagine the creamiest, silkiest cheesecake hugging those crispy Biscoff crumbs in every bite. It's like your dessert just got a cozy caramelized blanket.
Here’s why this recipe is my forever favorite:
- Minimal prep time—No fancy techniques here! Just mix, bake, and let the fridge do most of the work while you take credit for being a dessert genius.
- Crowd-pleasing magic: Biscoff’s warm spice flavor makes this a hit at parties. I’ve seen grown adults sneak second slices when they think no one’s looking.
- Easy to customize—Swirl in extra cookie butter, top with chocolate drizzle, or even mix in crushed cookies for extra crunch. (My aunt adds a pinch of sea salt on top—*chef’s kiss*!)
- Forgiving recipe: Overmixed the filling a bit? Accidentally baked it 5 minutes longer? No stress—this cheesecake stays creamy and dreamy.
Seriously, if you love that toasty, caramelized flavor of Biscoff cookies, this cheesecake is basically their fancier, more decadent cousin. And hey—no judgment if you "sample" the cookie butter straight from the jar while making it. I do it every time!
Ingredients for Biscoff Cookie Butter Cheesecake
Alright, let's talk ingredients—because using the right stuff makes all the difference between a good cheesecake and a "holy cow, can I have the recipe?" cheesecake. I've made this enough times to know exactly what works (and what doesn't). Here's your shopping list, broken down so you can grab everything in one trip.
For the Crust
This crust is so simple, you'll wonder why you ever bought pre-made ones. Just three ingredients, but they create that perfect crunchy base that holds up to the creamy filling:
- 2 cups Biscoff cookie crumbs - About 25 cookies pulsed in a food processor (or smashed in a ziplock bag with a rolling pin—great for stress relief!)
- ¼ cup granulated sugar - Just enough to enhance the cookies' natural caramel flavor
- ½ cup unsalted butter, melted - Use the real stuff, please! Margarine just won't give you that rich, toasty flavor
For the Cheesecake Filling
This is where the magic happens. Pro tip: set your cream cheese out 2 hours before baking—room temp ingredients mix smoother and prevent lumps:
- 16 oz cream cheese, softened - Full-fat only! This isn't the time for "light" versions
- ¾ cup granulated sugar - The perfect amount to balance the cookie butter's richness
- 1 cup Biscoff cookie butter - The star of the show! I use the smooth kind, but crunchy works too if you want extra texture
- 3 large eggs - Crack them into a separate bowl first—no one wants shell surprises
- 1 teaspoon vanilla extract - The good stuff, not imitation
- ½ cup heavy cream - This makes the filling luxuriously silky
For the Topping
Because we're extra like that—this takes the cheesecake from "yum" to "I need the whole pan":
- ¾ cup Biscoff cookie butter, melted - Microwave it for 20-second bursts until pourable
- Extra Biscoff cookie crumbs for garnish - Because more crunch is always better
See? Nothing crazy or hard-to-find. Just quality ingredients that come together to make something truly special. Now let's get mixing!
Equipment You’ll Need
Don’t worry—you don’t need fancy gadgets to make this dreamy cheesecake. Just grab these basics (chances are you’ve got most already!):
- 9-inch springform pan - The removable sides are *key* for getting that perfect slice without wrecking your masterpiece. Mine’s a little dented, but it works like a charm!
- Electric mixer - Stand or hand-held both work. Grandma used to mix by hand, but let’s be real—we’re going for creamy, not arm workout.
- Food processor or rolling pin + ziplock - For crushing those Biscoff cookies into crumbs (I prefer the rolling pin method when I need to vent some stress).
- Measuring cups and spoons - Eyeballing works for cookies, but cheesecake demands precision (and no, a coffee mug doesn’t count as a "cup").
- Spatula - For scraping every last bit of that heavenly filling into the pan. Waste not, want not!
- Mixing bowls - One for crust, one for filling. Or do what I do—wash the crust bowl quickly and reuse it. Lazy baker hacks!
That’s it! No special tools required—just good old-fashioned baking essentials. Now let’s get to the fun part: making magic happen.
How to Make Biscoff Cookie Butter Cheesecake
Alright, let's dive into the good stuff! Making this cheesecake is easier than you think—just follow these steps, and you'll have a showstopper dessert that'll make everyone think you trained at a fancy bakery. (Our little secret: it's practically foolproof!)
Preparing the Crust
This crust is so simple, you'll be tempted to eat it straight from the bowl (no judgment—I've done it). Here's how to get that perfect crunchy base:
- Preheat your oven to 325°F (160°C) - This lower temp prevents the crust from over-browning while the cheesecake bakes.
- Mix the crust ingredients - In a medium bowl, stir together the Biscoff crumbs, sugar, and melted butter until it looks like wet sand. Pro tip: use a fork to break up any butter clumps!
- Press it into the pan - Dump the mixture into your springform pan and press firmly with your fingers or a flat-bottomed cup. Get it nice and tight—this prevents crumbling later. I like to go about 1 inch up the sides for extra cookie goodness in every bite.
- Bake for 10 minutes - This quick bake sets the crust so it won't get soggy. Let it cool completely before adding filling (about 15 minutes). Resist the urge to rush this—a warm crust makes the filling seep underneath.
Making the Cheesecake Filling
This is where the magic happens! The key is patience—don't rush the mixing, and you'll be rewarded with the creamiest texture:
- Beat the cream cheese and sugar - In your mixer bowl, beat the softened cream cheese and sugar on medium until completely smooth (about 2 minutes). Scrape down the sides! Lumps now mean lumps in your finished cheesecake.
- Add the cookie butter - Spoon in that glorious Biscoff spread and mix until fully incorporated. The batter will turn a beautiful caramel color and smell like heaven.
- Incorporate eggs one at a time - Add eggs individually, mixing just until combined after each. Overbeating eggs introduces too much air—we want dense and creamy, not puffy!
- Finish with vanilla and cream - Pour in the vanilla and heavy cream, then mix on low until everything is silky smooth (about 30 seconds). The batter should ribbon off your beater—thick but pourable.
Baking and Chilling
The home stretch! Here's how to bake it to perfection and achieve that iconic creamy texture:
- Pour and smooth the filling - Gently pour the filling over your cooled crust. Use a spatula to spread it evenly—no need to tap the pan, which can create bubbles.
- Bake for 50-55 minutes - The edges should look set, but the center will still jiggle slightly when you nudge the pan. It's done when an instant-read thermometer hits 150°F (65°C) in the center. No thermometer? The "jiggle test" never fails me!
- Cool slowly - Turn off the oven and crack the door open with a wooden spoon. Let the cheesecake sit for 1 hour inside—this prevents drastic temperature changes that cause cracks. Then transfer to a wire rack to cool completely (about 2 hours).
- Chill overnight - Cover loosely with foil and refrigerate for at least 4 hours, but overnight is ideal. I know it's hard to wait, but this sets the texture perfectly. Trust me—it's worth it!
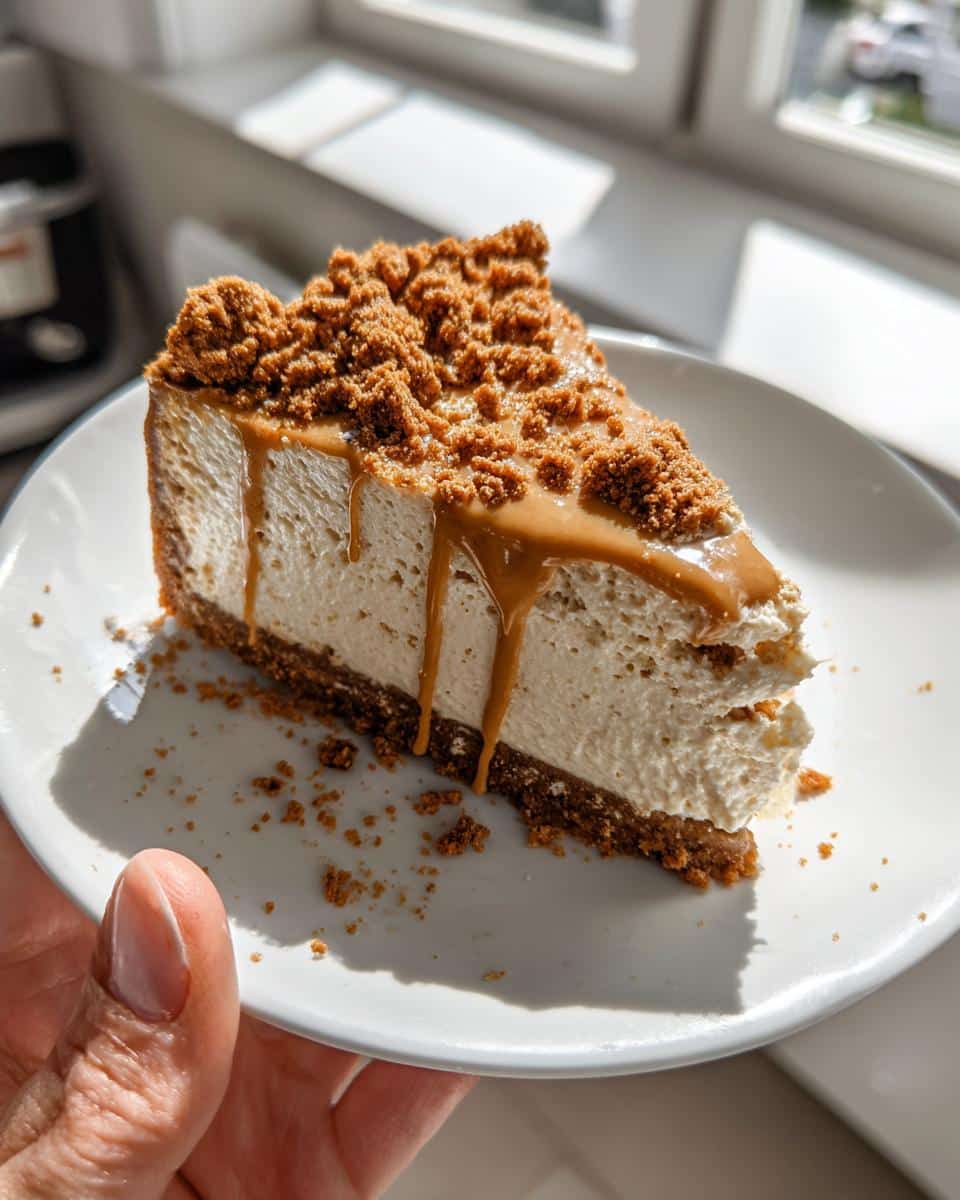
- Add the finishing touches - Before serving, melt the extra cookie butter (20-second microwave bursts) and drizzle artfully over the top. Sprinkle with reserved cookie crumbs for that Instagram-worthy crunch.
And voilà! You've just made a cheesecake that'll have people begging for the recipe. Now the hardest part: deciding whether to share it or keep the whole thing for yourself. (Again—no judgment here!)
Tips for the Perfect Biscoff Cookie Butter Cheesecake
You'd think baking a cheesecake is tricky, but I've made all the mistakes so you don't have to! Here are my hard-earned secrets for nailing this Biscoff beauty every single time.
Room temp is non-negotiable - Take your cream cheese, eggs, and even the cookie butter out at least 2 hours before baking. Cold ingredients = lumpy filling. I learned this the hard way when I once impatently microwaved my cream cheese... let's just say that cheesecake had more lumps than a bad mattress.
Mix like you mean it (but not too much!) - Overbeating introduces too much air, which leads to cracks and a weird puffy texture. Once you add the eggs, mix just until combined—no marathon mixing sessions needed. Your arm should NOT be tired!
The chill factor - I know it's torture to wait, but that overnight chill is what transforms good cheesecake into great cheesecake. Rushing this step means a sad, soupy center. Pro tip: make it the day before you need it—problem solved!
Baking tray insurance - Place your springform pan on a baking sheet before filling. Why? Because if (when!) some butter leaks from the crust, you won't have smoke alarms serenading your baking efforts. Speaking from experience here.
The jiggle test never lies - Your cheesecake is done when the edges are set but the center wobbles like Jell-O when gently shaken. If it looks completely firm in the oven, it'll be overbaked and dry after chilling. No one wants cheesecake jerky!
Crack prevention 101 - If you do get a crack (it happens to the best of us!), just cover it with extra cookie butter drizzle and crumbs. I call this the "cheesecake band-aid"—it fixes everything and makes it look intentional!
Remember—even if it's not picture-perfect, it'll still taste incredible. My first attempt looked like a cookie butter earthquake victim, but my family still licked the plate clean. That's the magic of Biscoff!
Variations and Substitutions
Listen, I get it—sometimes you're staring into your pantry thinking, "I don't have THAT ingredient!" Or maybe you want to put your own spin on this Biscoff beauty. No worries! Here are my favorite twists that still deliver that wow factor (because let's be real, cheesecake should never be stressful).
Cookie Crust Swaps
The crust is crazy adaptable! Can't find Biscoff cookies? Try these:
- Graham crackers - The classic! Use 2 cups crumbs + 2 tablespoon sugar + 6 tablespoon butter. It'll taste like a caramel hug.
- Gingersnaps - For extra spice lovers. The molasses pairs beautifully with the cookie butter.
- Gluten-free cookies - Schär's gluten-free biscuits work great, or any GF shortbread. Same measurements as the original recipe.
- Oreos - Remove the filling first. Chocolate + Biscoff? Yes please! (My nephew calls this the "cookie monster" version.)
Filling Twists
Want to play mad scientist with the filling? Here's where you can get creative:
- Nut butter swap - Out of Biscoff? Peanut butter works shockingly well (use creamy, not natural). Almond butter gives it a marzipan-like vibe.
- Chocolate swirl - Before baking, dollop ¼ cup melted chocolate on top and drag a knife through for a marbled effect.
- Espresso kick - Add 1 tablespoon instant espresso powder to the filling for a mocha twist. My book club goes nuts for this version!
- Lighter option - Swap half the cream cheese for Greek yogurt (strained overnight). Texture changes slightly, but still delicious.
Topping Ideas
The finishing touches are where personality shines! Try these:
- Salted caramel drizzle - Store-bought works fine, but homemade takes 10 minutes and makes you feel fancy.
- Whipped cream clouds - Pipe rosettes around the edge for a bakery-style look. Add a sprinkle of cinnamon.
- Fresh fruit - Sliced strawberries or caramelized bananas cut through the richness beautifully.
- Crushed pretzels - For that sweet-salty crunch. My husband's favorite—he says it's like "grown-up cheesecake."
The moral of the story? This recipe is your playground. As long as you keep the basic ratios (cream cheese to eggs to sugar), you can tweak to your heart's content. My only rule? Whatever you make, save me a slice!
Serving and Storing Biscoff Cookie Butter Cheesecake
Okay, let's talk about the best part—eating this glorious creation! After all that waiting (I know, the anticipation is torture), here's how to serve it like a pro and keep leftovers fresh—though let's be honest, leftovers might not be a problem!
Serving temperature is key - Take the cheesecake out of the fridge 15-20 minutes before slicing. Too cold, and it's like cutting concrete; too warm, and it gets messy. You want it cool but sliceable—that perfect "just right" Goldilocks moment.
The perfect slice - Dip your knife in hot water and wipe it clean between cuts. This gives you those Instagram-worthy clean edges. My grandma taught me this trick, and it works every time! Serve on small plates—this cheesecake is rich, so a little goes a long way (though no one will judge if you go back for seconds).
Garnish game strong - That melted Biscoff drizzle and extra crumbs are mandatory, but why stop there? Try:
- A dollop of whipped cream with a cookie perched on top
- Chocolate shavings for a fancy touch
- A sprinkle of flaky sea salt to balance the sweetness
- Fresh raspberries for a pop of color
Storing your masterpiece - Cover any leftovers tightly with plastic wrap or transfer slices to an airtight container. It'll keep beautifully in the fridge for up to 5 days—if it lasts that long! The crust might soften slightly by day 3, but the flavor only gets better.
Freezing for later - Wrap individual slices in plastic, then foil, and freeze for up to 2 months. Thaw overnight in the fridge when cravings strike. Pro tip: freeze individual slices on a tray first before stacking to prevent sticking. Perfect for emergency dessert needs!
And remember—this cheesecake is meant to be enjoyed cold straight from the fridge. No reheating needed (unless you count the 10 seconds it takes to microwave that extra cookie butter drizzle... not that I've done that or anything). Now go forth and cheesecake!
Biscoff Cookie Butter Cheesecake FAQs
I've gotten so many questions about this recipe over the years—here are the ones that pop up most often (along with my slightly opinionated answers!). Consider this your cheat sheet for Biscoff cheesecake success.
Can I use homemade cookie butter instead of store-bought?
Absolutely! I've made my own by blending 2 cups Biscoff cookies with ¼ cup neutral oil until smooth. Just know it might be slightly grainier than the commercial stuff. You'll need about 1 ¾ cups for both filling and topping since homemade tends to be less dense.
Help! My cheesecake cracked—what did I do wrong?
First, don't panic! Cracks usually happen from temperature shock (opening the oven door too early) or overmixing the eggs. The good news? That luscious cookie butter topping covers all sins. Next time, try the water bath method—wrap your springform pan in foil and place it in a larger pan with 1 inch of hot water while baking.
How long will this cheesecake keep in the fridge?
It stays dreamy for up to 5 days when properly covered. The crust softens a bit by day 3, but the flavor actually improves. I once "hid" a slice in the veggie drawer (don't ask) and it was still fantastic a week later—though I don't officially recommend pushing it that far!
Can I freeze leftovers?
You bet! Freeze whole or in slices—wrap tightly in plastic, then foil. It'll keep for 2 months. Thaw overnight in the fridge when cravings strike. Pro tip: freeze individual slices on a tray first before stacking to prevent sticking. Perfect for emergency dessert needs!
Is there a way to make this without a springform pan?
Desperate times call for creative measures! Use a 9-inch cake pan lined with parchment paper (let it hang over the edges for easy lifting). Or go rustic—bake in a pie dish and serve wedges straight from the pan. Just don't try to flip it like a regular cake... trust me on that one.
Nutritional Information
Okay, let's be real—this is a decadent dessert, not a salad. But hey, knowledge is power! Here's the nutritional breakdown per slice (because let's face it, we're all going to eat a slice... or three). Remember, these are estimates—your exact numbers might vary slightly depending on brands and how generous you are with that cookie butter drizzle!
- Calories: 450 (Consider it an investment in happiness!)
- Fat: 30g (But it's the good, creamy, makes-life-worth-living kind)
- Saturated Fat: 15g (Blame the butter and cream cheese—worth every gram)
- Carbohydrates: 40g (Mostly from those heavenly Biscoff cookies)
- Sugar: 30g (It's dessert, people—let's not kid ourselves)
- Protein: 6g (Hey, eggs and cream cheese count as protein, right?)
- Sodium: 200mg (Pretty reasonable for such a flavor explosion)
Important disclaimer: I'm a baker, not a nutritionist! These numbers are calculated using standard ingredients and serving sizes, but your mileage may vary. If you're watching specific dietary needs, definitely check your exact ingredient labels. Now go enjoy that slice—life's too short not to savor the good stuff!
Final Thoughts
Well, there you have it—my not-so-secret-anymore recipe for the most decadent, crave-worthy Biscoff Cookie Butter Cheesecake you'll ever make! If you're anything like me, you've probably bookmarked this page, licked your lips a few times, and are already mentally scheduling when you can make it (tomorrow is totally acceptable, by the way).
This cheesecake has become my signature dessert for good reason—it's the perfect balance of impressive and easy, with that magical Biscoff flavor that makes people's eyes light up. I can't tell you how many times I've gotten texts from friends saying, "I made your cheesecake and OMG..." followed by a string of heart-eye emojis.
So what are you waiting for? Grab those Biscoff cookies, soften that cream cheese, and get ready to fall in love with every creamy, crunchy bite. And when you do make it (because you totally should), tag me or leave a comment—I want to hear all about your cheesecake adventures! Did you add any fun twists? Did your family fight over the last slice? Spill all the delicious details!
Remember—the best recipes are meant to be shared, both the desserts themselves and the joy they bring. Now go forth and spread some cookie butter happiness (And maybe save me a sliver...)
Print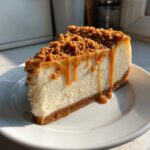
Irresistible Biscoff Cookie Butter Cheesecake Recipe
- Total Time: 5 hours 15 mins (includes cooling and chilling)
- Yield: 12 servings 1x
- Diet: Vegetarian
Description
A rich and creamy Biscoff Cookie Butter Cheesecake with a crunchy Biscoff crust, topped with melted cookie butter and extra crumbs for garnish.
Ingredients
- For the Crust:
- 2 cups Biscoff cookie crumbs
- ¼ cup granulated sugar
- ½ cup unsalted butter, melted
- For the Cheesecake Filling:
- 16 oz cream cheese, softened
- ¾ cup granulated sugar
- 1 cup Biscoff cookie butter
- 3 large eggs
- 1 teaspoon vanilla extract
- ½ cup heavy cream
- For the Topping:
- ¾ cup Biscoff cookie butter, melted
- Extra Biscoff cookie crumbs for garnish
Instructions
- Preheat your oven to 325°F (160°C).
- Mix Biscoff cookie crumbs, sugar, and melted butter for the crust.
- Press the mixture into the bottom of a springform pan.
- Bake the crust for 10 minutes, then let it cool.
- Beat cream cheese and sugar until smooth.
- Add Biscoff cookie butter and mix well.
- Add eggs one at a time, then vanilla and heavy cream.
- Pour the filling over the crust.
- Bake for 50-55 minutes until set.
- Let the cheesecake cool, then refrigerate for at least 4 hours.
- Melt Biscoff cookie butter and drizzle over the cheesecake.
- Sprinkle extra cookie crumbs on top before serving.
Notes
- Use room temperature cream cheese for smoother filling.
- Chill the cheesecake thoroughly before serving.
- Store leftovers in the refrigerator.
- Prep Time: 20 mins
- Cook Time: 55 mins
- Category: Dessert
- Method: Baking
- Cuisine: American
Nutrition
- Serving Size: 1 slice
- Calories: 450
- Sugar: 30g
- Sodium: 200mg
- Fat: 30g
- Saturated Fat: 15g
- Unsaturated Fat: 10g
- Trans Fat: 0g
- Carbohydrates: 40g
- Fiber: 1g
- Protein: 6g
- Cholesterol: 100mg
Keywords: Biscoff, cheesecake, cookie butter, dessert, easy recipe


Leave a Reply