There’s something irresistible about that salty-sweet combination, and these Caramel Pretzel Crack Bars deliver in every crunchy, gooey bite. Whether you're hosting a party, bringing treats to a potluck, or just want to satisfy a serious snack craving, these bars are a guaranteed crowd-pleaser.

This recipe has become a staple in my home—it's one of those go-to treats that checks all the boxes: easy, fast, affordable, and utterly addictive. The beauty of these bars lies in their simplicity. With just six ingredients and minimal prep time, you can whip up a tray of these in under 30 minutes. Yet the result is something that tastes like it came from a gourmet bakery.
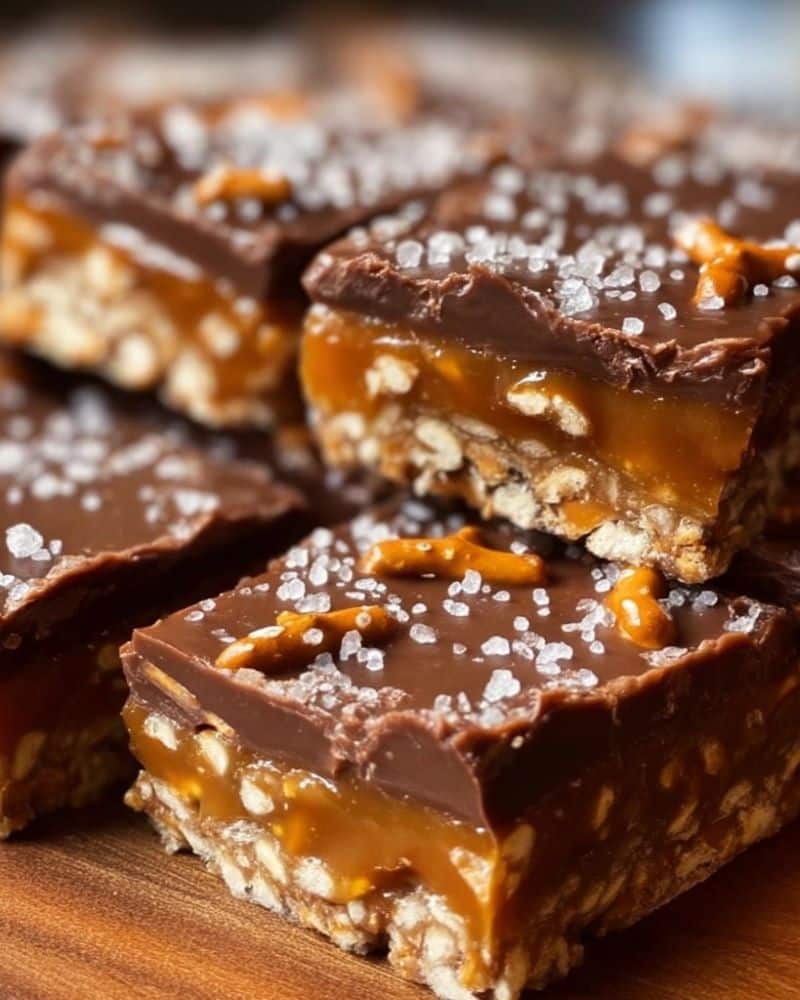
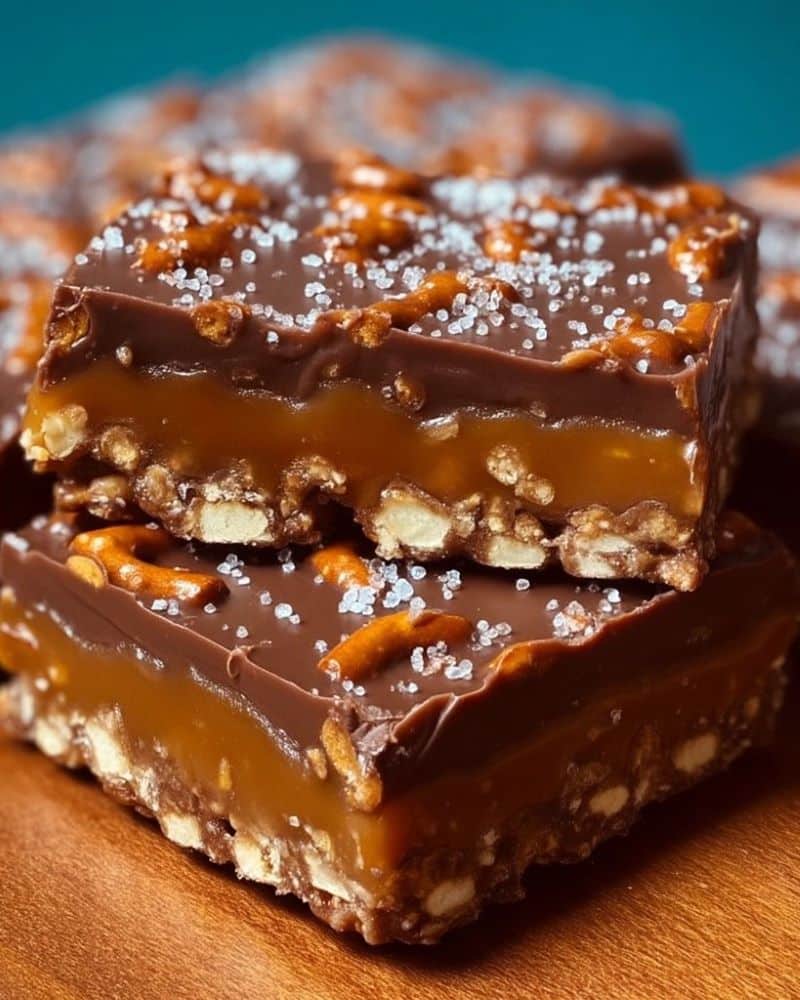
These bars get their "crack" nickname from their dangerously delicious flavor and texture: buttery caramel soaks into the salty pretzels, then gets topped with melty semisweet chocolate and a hint of sea salt. They’re the kind of treat that disappears quickly, with everyone coming back for "just one more bite."
Why You’ll Love Caramel Pretzel Crack Bars
- Salty-sweet perfection in every bite.
- Quick and easy: Ready in under 30 minutes.
- Minimal ingredients—only six needed!
- Great for gifting or sharing at parties.
- No special tools required—just a saucepan and baking pan.
- Customizable with your favorite toppings.
- Perfect make-ahead dessert—stores and freezes beautifully.
- Kid-friendly and adult-approved.
Ingredients You’ll Need
- 2 cups pretzels, crushed (not too fine—leave some texture)
- 1 cup unsalted butter
- 1 cup brown sugar, packed
- ½ teaspoon vanilla extract
- 1 ½ cups semisweet chocolate chips
- Sea salt, for sprinkling (optional)
Step-by-Step Instructions
- Preheat and prepare your pan
- Preheat oven to 350°F (175°C).
- Line a 9x13-inch baking pan with parchment paper or foil, leaving an overhang for easy removal. Lightly grease the paper.
- Create the pretzel base
- Roughly crush pretzels using a rolling pin inside a zip-top bag or pulse briefly in a food processor.
- Spread the crushed pretzels evenly across the bottom of the prepared baking dish. This will form the crunchy, salty base.
- Make the caramel
- In a medium saucepan over medium heat, combine the butter and brown sugar.
- Stir constantly as the mixture melts and begins to bubble.
- Once boiling, let it cook for 3–4 minutes, continuing to stir. The caramel will thicken slightly.
- Remove from heat and stir in the vanilla extract.
- Pour and bake
- Carefully pour the hot caramel mixture over the pretzels.
- Use a spatula to spread the caramel evenly, ensuring it seeps into all the cracks.
- Bake in the preheated oven for 10 minutes.
- Top with chocolate
- Remove the pan from the oven and immediately sprinkle the chocolate chips over the hot caramel layer.
- Let them sit for 2–3 minutes until softened, then use an offset spatula to spread the melted chocolate into an even layer.
- Add finishing touches
- Sprinkle with sea salt for that perfect contrast (optional but highly recommended).
- Let the bars cool at room temperature for about 30 minutes.
- Transfer the pan to the refrigerator and chill for at least 1 hour until fully set.
- Cut and serve
- Lift the bars out using the parchment paper.
- Cut into small squares or rectangles using a sharp knife.
- Wipe the knife clean between cuts for neat edges.
Serving and Storage Tips
- Serve chilled or at room temperature—they're delicious both ways.
- Perfect for holiday dessert trays, lunchbox treats, or afternoon pick-me-ups.
- Store in an airtight container at room temperature for up to 3 days.
- Refrigerate for longer freshness, especially in warmer weather.
- Freeze for up to 2 months: separate layers with parchment paper to prevent sticking.
- Thaw in the fridge or at room temperature before serving.
Helpful Notes
- Caramel tips: Keep stirring during the boiling phase to prevent scorching. Use a silicone spatula to get all the caramel goodness from the pan.
- Chocolate choices: Semisweet is classic, but feel free to experiment with milk chocolate, dark chocolate, or even white chocolate.
- Texture variety: Add chopped nuts, crushed toffee bits, or shredded coconut for extra flavor and crunch.
- Want thicker bars? Halve the pan size and slightly reduce baking time.
- Use a serrated knife to make clean cuts through the chilled chocolate.
- For a fun twist, try drizzling melted peanut butter or Nutella over the top layer.
Frequently Asked Questions
- Can I use salted butter?
Yes, you can, but if you do, skip the sea salt topping or reduce the amount. You don’t want the bars to become overly salty. - Can I use a different kind of chocolate?
Absolutely. These bars are incredibly flexible—use whatever chocolate you love. Dark chocolate gives a more intense flavor, while milk chocolate makes them sweeter. - Why is it called "crack"?
The name comes from how addictively delicious these bars are—one bite and you’ll want more. It's a nickname referring to the texture and irresistible flavor, not an ingredient. - Can I make these ahead of time?
Definitely. These bars keep well in the fridge and are perfect for make-ahead events. You can even freeze them in advance and defrost before serving. - How should I crush the pretzels?
Use a zip-top bag and rolling pin for easy cleanup, or pulse in a food processor if you want a more uniform texture. Just don’t crush them into dust—you want some crunch! - How do I prevent the chocolate from cracking when I cut the bars?
Let the bars come to room temperature for about 10–15 minutes after chilling before cutting. Use a warm knife (run under hot water and wipe dry) for cleaner cuts.
Final Thoughts
These Caramel Pretzel Crack Bars hit every note: crunchy, chewy, salty, sweet, and undeniably satisfying. They’re easy to make, incredibly flexible, and a guaranteed hit at any gathering. Whether you're baking up a treat for a holiday spread, whipping up a snack to enjoy during movie night, or looking for a new go-to dessert, these bars are bound to become a favorite.
Once you try them, you’ll understand why people keep going back for more. They’re so quick to make yet taste like a treat you spent hours perfecting. Keep the ingredients on hand—you’ll want to make these again and again!
If you try this recipe, I’d love to see your results! Leave a comment below, share your photos, or tag me on social media. Happy baking!


Leave a Reply