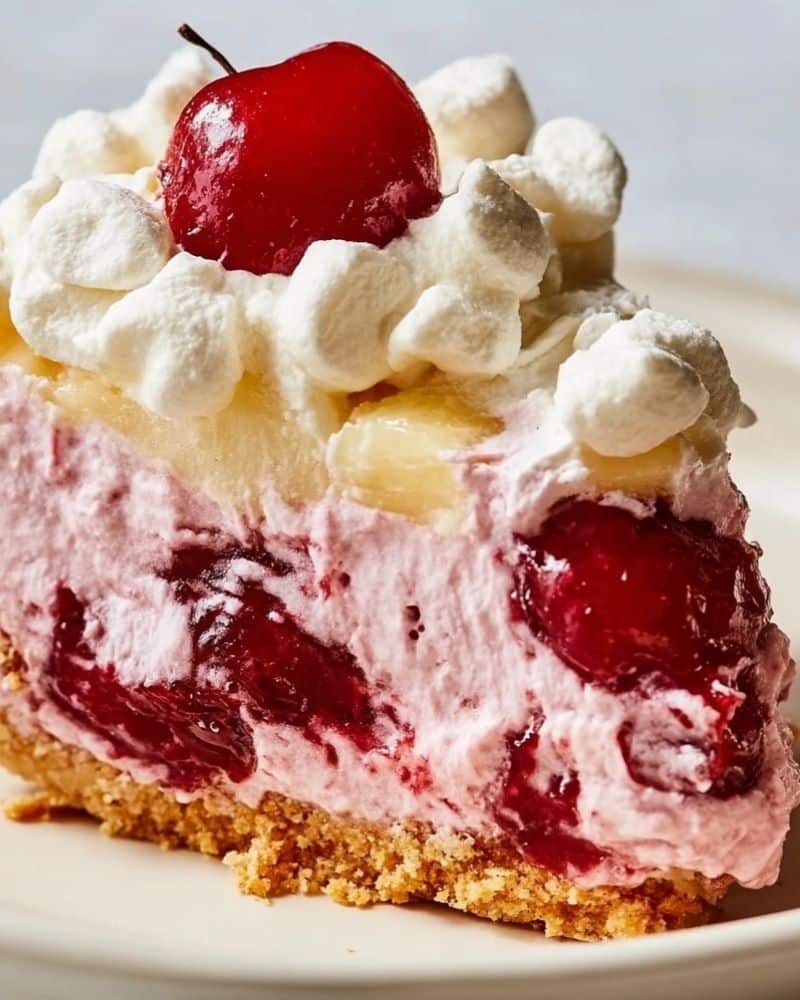
Whenever I need a quick dessert that still feels special, this Cherry Pineapple Pie (5 Minute No-Bake Recipe) is my secret weapon. It’s one of those vintage-style, no-bake pies that comes together in minutes but tastes like you spent hours in the kitchen. Perfect for summer cookouts, potlucks, or last-minute guests, this pie is fruity, creamy, and irresistibly easy.

This pie is especially dear to me because it reminds me of the types of chilled, creamy desserts my grandma used to make for Sunday dinners. It has that old-fashioned charm, combining pantry staples into something magical. You don’t need an oven, mixer, or fancy tools—just a bowl, a spoon, and a love for easy desserts that bring smiles to every face at the table.
What I love most about this recipe is its simplicity. With just six pantry-friendly ingredients, you can whip up a sweet, chilled pie that’s bursting with cherry and pineapple flavor, nestled in a buttery graham cracker crust. It’s colorful, cheerful, and always a hit with both kids and adults.
Why You’ll Love Cherry Pineapple Pie
- No baking required—perfect for hot summer days or busy holidays.
- Only 6 ingredients—most are shelf-stable or freezer-friendly.
- Ready in just 5 minutes—plus chill time.
- Light, fruity, and creamy—a crowd-pleasing combo.
- Budget-friendly—no fancy ingredients needed.
- Make ahead—perfect for entertaining or family meals.
- Great for beginners—foolproof and fail-safe.
Ingredients You’ll Need
- 1 can (21-ounce) cherry pie filling
- 1 can (20-ounce) crushed pineapple, drained well
- 1 can (14-ounce) sweetened condensed milk
- 8 ounces whipped topping, thawed (like Cool Whip)
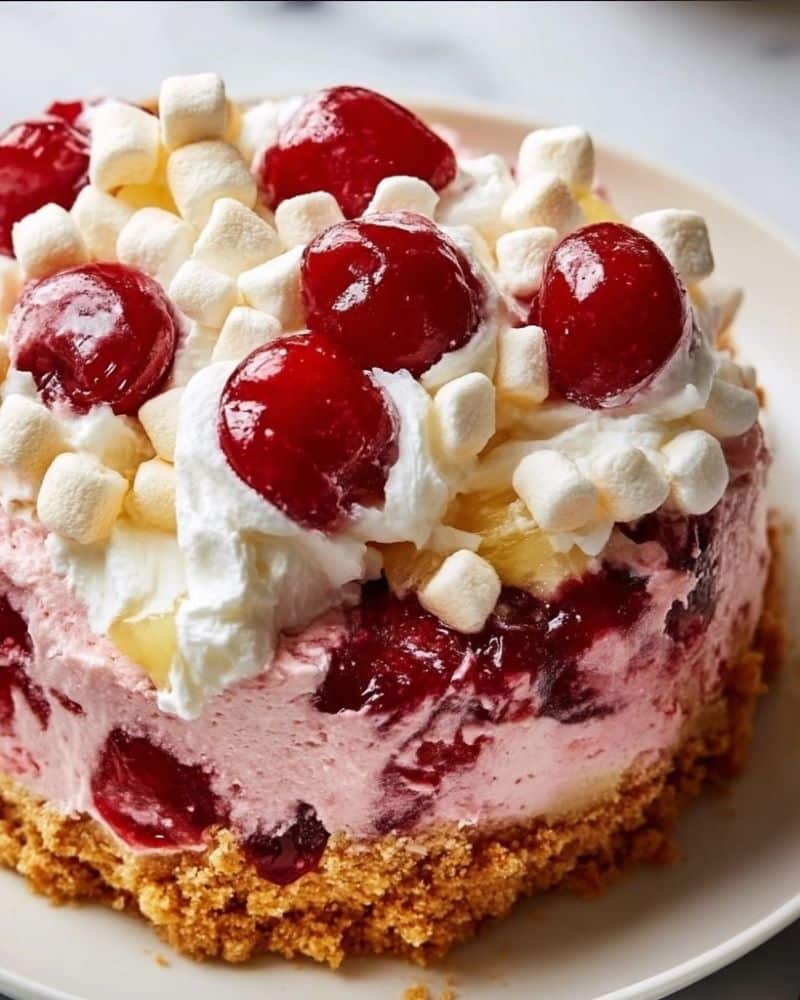
- 1 cup mini marshmallows
- 1 (9-inch) graham cracker crust (store-bought or homemade)
Step-by-Step Instructions
- Combine filling ingredients
- In a large mixing bowl, gently stir together the cherry pie filling, well-drained crushed pineapple, and sweetened condensed milk.
- Be careful not to overmix—just until combined.
- Add mini marshmallows
- Stir in the mini marshmallows for an added sweet, chewy texture.
- They also help give the filling more body as they absorb some of the liquid.
- Fold in whipped topping
- Gently fold in the thawed whipped topping using a spatula.
- The mixture should be a soft pink, airy, and well combined.
- Fill the crust
- Spoon the mixture into the graham cracker crust.
- Use a spatula to smooth the top evenly, pressing down slightly to compact the filling.
- Chill
- Refrigerate the pie for at least 4 hours, preferably overnight, to allow the filling to set.
- The longer it chills, the better the texture.
- Serve
- Slice and serve chilled.
- Garnish with additional whipped topping, maraschino cherries, or a sprinkle of chopped nuts if desired.
Serving and Storage Tips
- Serve chilled straight from the fridge—it tastes best cold.
- Store leftovers tightly covered in the refrigerator for up to 4 days.
- Avoid freezing—the texture of the whipped topping and marshmallows can break down.
- Transport tip: Chill thoroughly and cover with plastic wrap before traveling.
- Cut with a warm knife (dipped in hot water and dried) for clean slices.
Helpful Notes
- Drain pineapple thoroughly to prevent a runny or watery filling.
- Want a homemade crust? Mix 1 ½ cups graham cracker crumbs, ⅓ cup sugar, and 6 tablespoons melted butter. Press into a pie plate and chill for 30 minutes.
- Add-ins: Chopped pecans or walnuts add a great crunch.
- Switch up the flavor: Try different pie fillings like blueberry, strawberry, or peach.
- Make it lighter: Use fat-free sweetened condensed milk and light whipped topping.
- For a tropical twist, stir in ¼ cup shredded coconut.
- Use a deep-dish crust if you want to double the filling for extra thickness.
Frequently Asked Questions
- Can I use homemade whipped cream instead of whipped topping?
Yes, but be sure it's whipped to stiff peaks so it holds up in the mixture. Keep in mind it won’t be quite as stable for long-term storage. - Can I make this in advance?
Absolutely. This pie is actually better after it’s had time to chill overnight, making it a perfect make-ahead dessert. - Can I substitute fresh fruit for canned?
You can use fresh chopped pineapple and pitted cherries, but they will need to be very well drained or lightly cooked to remove excess moisture. - Can I make this gluten-free?
Yes, just use a gluten-free graham cracker crust or make one from crushed gluten-free cookies. - Why is my pie not setting?
Most likely, it didn’t chill long enough or the pineapple wasn’t drained thoroughly. Always chill at least 4 hours, but overnight is ideal. - Can I use other fillings besides cherry?
Definitely! Blueberry, strawberry, apple, or mixed berry all work wonderfully. Just stick to a 21-ounce can.
Final Thoughts
This Cherry Pineapple Pie is the ultimate no-bake dessert—quick, easy, and full of fruity, creamy goodness. It’s one of those nostalgic recipes that never goes out of style. The cherry and pineapple pair beautifully for a bright, tropical flavor, and the creamy, fluffy filling melts in your mouth.
It’s perfect for when you’re short on time but still want to bring something homemade to the table. Whether you're hosting a gathering or just need a little something sweet in your fridge, this pie is a winner every time.
Give it a try and see why it’s a family favorite. And if you do, I’d love to hear how it turned out! Leave a comment below, share your creation, or tag me on social media. Happy no-bake baking!

Leave a Reply