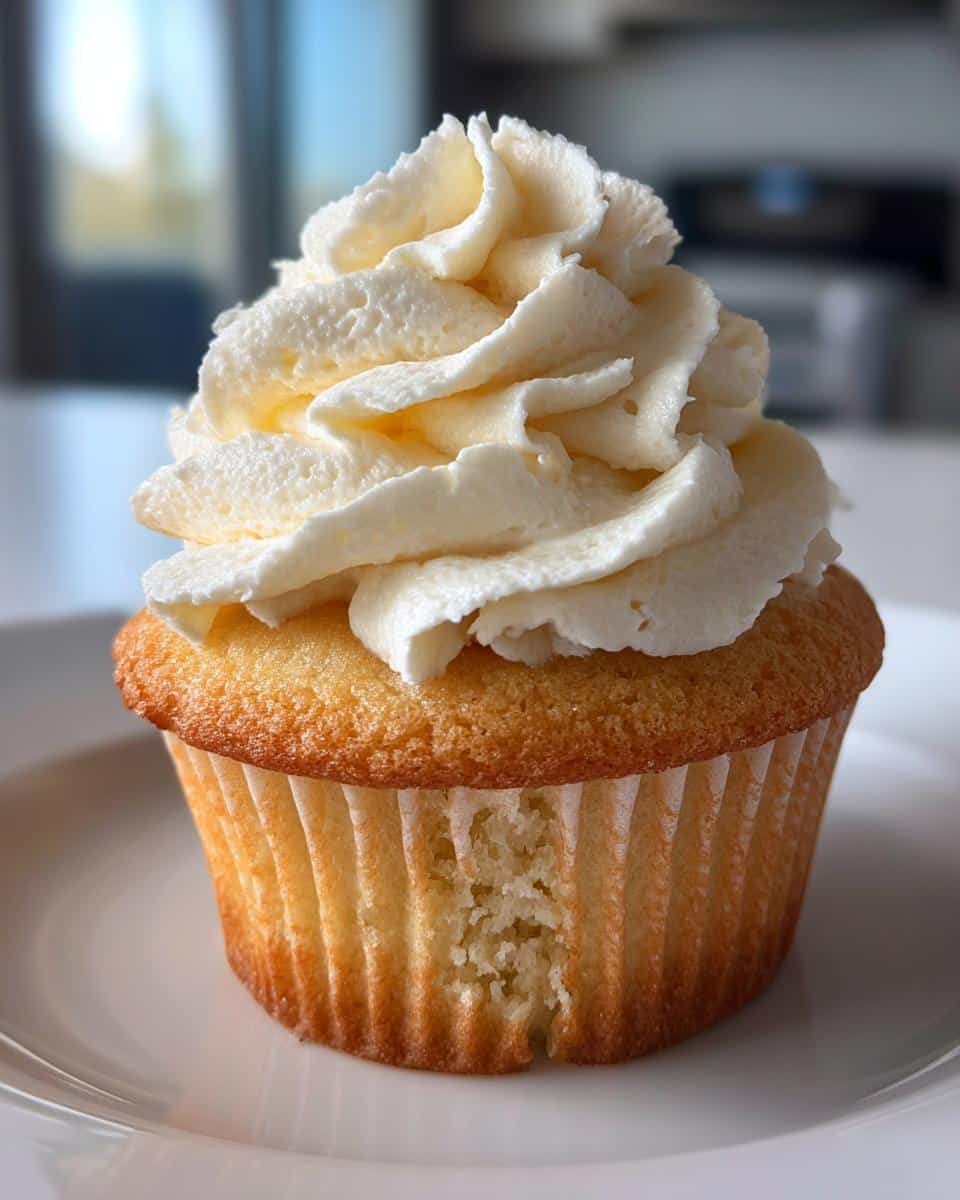
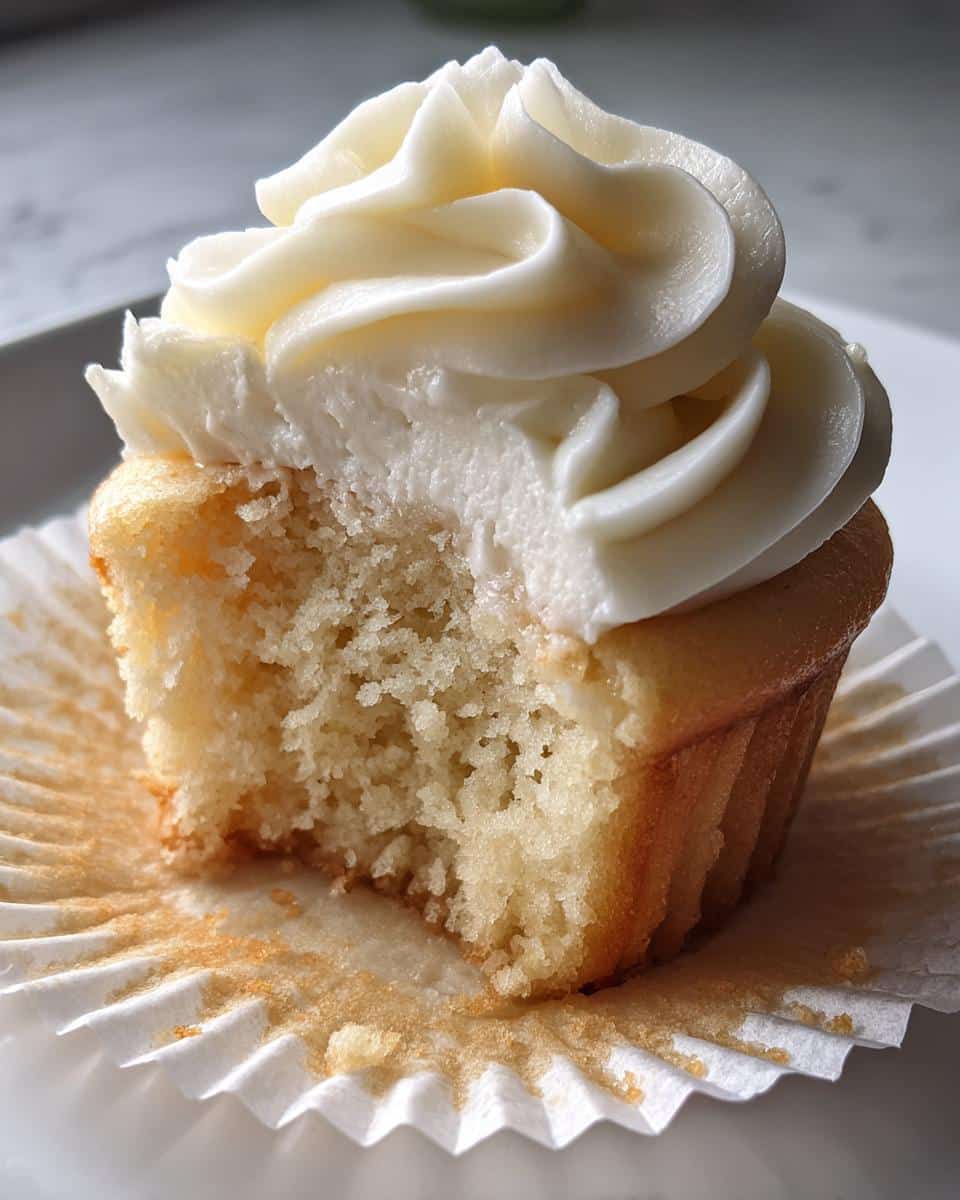
There's something magical about classic vanilla cupcakes – that perfect balance of fluffy cake and creamy frosting that makes everyone's eyes light up. My version comes from years of tweaking (and plenty of happy taste-testers!), with a secret I'll share: using real vanilla beans in the frosting takes these from good to "oh-my-goodness" amazing. These aren't just any cupcakes – they're the kind that disappear before the party even starts.

I'll never forget the first time I made these for my niece's birthday. She took one bite, got buttercream on her nose, and declared them "better than the bakery!" That's when I knew this recipe was special. What makes them stand out? Pure vanilla flavor in every bite, a melt-in-your-mouth texture, and frosting so light it practically floats. Whether you're a beginner or seasoned baker, these vanilla cupcakes will become your new go-to for every celebration (or just because it's Tuesday).
Why You’ll Love These Classic Vanilla Cupcakes
These aren't just any cupcakes – they're the little cakes that could! Here's why they've stolen hearts (and stomachs) everywhere:
- Foolproof magic: Even my disaster-prone cousin nailed these on her first try (and she once burned boiled water!)
- Party chameleons: Dress them up with sprinkles for birthdays or keep them simple for afternoon tea – they always fit the occasion
- Crowd pleasers: That moment when your picky nephew AND your gourmet-foodie aunt both reach for seconds? Priceless
- Vanilla that actually tastes like vanilla: No bland bakery cupcakes here – we're talking real, fragrant vanilla flavor in every bite
Trust me, once you taste that fluffy crumb and cloud-like frosting, you'll understand why this recipe has been my secret weapon for 15 years.
Ingredients for Classic Vanilla Cupcakes
Gathering your ingredients is like assembling a dream team - each player has to be at their best! Here's exactly what you'll need to make these heavenly vanilla cupcakes (and that swoon-worthy frosting):
For the cupcakes:
- 1½ cups (190g) all-purpose flour - spooned and leveled, please! No packing it down
- 1½ teaspoon baking powder - make sure yours is fresh (I give mine the sniff test)
- ¼ teaspoon salt - just enough to make the flavors pop
- ½ cup (113g) unsalted butter - softened to that perfect "finger-dent" stage
- 1 cup (200g) granulated sugar - the sweet foundation of our fluffy dreams
- 2 large eggs - room temperature is non-negotiable here
- 2 teaspoon pure vanilla extract - none of that imitation stuff! This is where the magic happens
- ½ cup (120ml) whole milk - also room temp (see a theme here?)
For the vanilla buttercream:
- 1 cup (226g) unsalted butter - softened but still cool to the touch
- 3–4 cups (360–480g) powdered sugar - sifted unless you enjoy sugar lumps
- 2–3 tablespoon heavy cream or milk - start with 2 and add as needed
- 2 teaspoon vanilla extract - yes, more vanilla! This is the star after all
- Pinch of salt - the secret weapon against cloying sweetness
Pro tip from my many frosting fails: If you're out of heavy cream, whole milk works fine - just add it slowly. And if you're feeling fancy, scrape a vanilla bean into the frosting for those gorgeous little specks that make people go "Ooooh!"
Equipment You’ll Need
You probably have most of these already - that's the beauty of classic cupcakes! Here's your quick checklist:
- Muffin tin - standard 12-cup is perfect
- Electric mixer - stand or hand-held, your biceps' choice
- Measuring cups & spoons - precision is key
- Cupcake liners - the prettier, the better
- Piping bag & tip - optional but oh-so-fancy
That's it! No fancy gadgets required - just good old-fashioned baking tools.
How to Make Classic Vanilla Cupcakes
Now for the fun part - let's turn these simple ingredients into little clouds of vanilla happiness! Follow these steps, and you'll have perfect cupcakes every time.
Making the Cupcake Batter
This is where we build that signature light texture - don't rush it!
- Preheat your oven to 350°F (175°C) and line your muffin tin with cute cupcake liners. Trust me, you'll thank me later when they pop out perfectly.
- Whisk together the flour, baking powder, and salt in a medium bowl. I like to give mine a good sift if my flour seems lumpy.
- Cream the butter and sugar in a large bowl for a full 2-3 minutes until it's light and fluffy. This isn't the time to be lazy - proper creaming makes all the difference!
- Add eggs one at a time, mixing well after each. Then pour in that glorious vanilla extract - take a deep breath of that amazing smell!
- Alternate adding dry ingredients and milk: Start and end with the dry (I do 3 additions of dry, 2 of milk). Mix just until combined - overmixing is the enemy of fluffy cupcakes!
Baking and Cooling
Now we transform that batter into golden perfection:
- Fill cupcake liners ⅔ full - I use an ice cream scoop for even portions. No overfilling unless you want muffin tops!
- Bake for 18-20 minutes until they're just golden and a toothpick comes out clean. Rotate the pan halfway if your oven bakes unevenly.
- Cool in the pan for 5 minutes, then transfer to a wire rack. They must cool completely before frosting - warm cupcakes melt buttercream into sad puddles!
Vanilla Buttercream Frosting
The crowning glory! Let's make frosting so good you'll want to eat it with a spoon:
- Beat the butter until it's completely smooth and almost white - about 3 minutes. Scrape down the bowl often.
- Gradually add powdered sugar, about ½ cup at a time, mixing well after each addition. Add vanilla and a pinch of salt with the first addition.
- Stream in heavy cream 1 tablespoon at a time until you reach your perfect consistency - thick enough to hold peaks but soft enough to pipe easily.
- Beat on high for 2 full minutes to make it ultra-light and fluffy. This is when the magic happens!
Pro tip: If your frosting gets too soft, pop the bowl in the fridge for 15 minutes. Too stiff? Add more cream a teaspoon at a time. You've got this!
Tips for Perfect Classic Vanilla Cupcakes
After making hundreds (okay, maybe thousands) of these cupcakes, I've learned all the tricks to guarantee bakery-quality results every time. Here are my can't-live-without tips:
Room temperature is non-negotiable
Cold ingredients are the arch-nemesis of fluffy cupcakes! Your butter, eggs, and milk should sit out for at least 30 minutes before baking. I test butter by pressing it - it should dent easily but not feel greasy or melted. Room temp ingredients blend better, creating that perfect airy texture we're after.
The scoop-and-level flour method
Too much flour = dry cupcakes = sad faces. Never scoop flour directly from the bag! Instead, spoon it lightly into your measuring cup, then level off with a knife. My grandma taught me this trick, and it's saved countless batches from being hockey pucks.
The toothpick lie detector
Ovens lie, but toothpicks don't! Check cupcakes at 18 minutes - if the toothpick comes out with a few moist crumbs, they're done. Clean means overbaked. And don't trust the "spring back" test - by the time the top springs back, the bottoms are often overdone.
Frosting temperature matters
Here's my buttercream timeline: Frost cool cupcakes with room-temp frosting. If your kitchen's warm, chill frosted cupcakes for 15 minutes before serving. Too cold? The frosting hardens. Too warm? It slides right off. Finding that sweet spot makes all the difference.
The secret to domed tops
Want those perfect bakery-style rounded tops? Fill liners just ⅔ full and bake at the correct temperature - no shortcuts! Overfilling makes flat tops, while underfilling leaves them stubby. My ice cream scoop method (about 3 tablespoon per cupcake) gives me perfect domes every time.
Remember, even "failed" cupcakes still taste amazing - ask my neighbors who've benefited from my "experiments" over the years! But follow these tips, and you'll nail perfect vanilla cupcakes on your first try.
Variations for Classic Vanilla Cupcakes
While I adore the pure simplicity of these vanilla cupcakes, sometimes it's fun to play dress-up! Here are my favorite easy twists that keep the classic base but add a little extra personality:
Confetti Celebration
Fold in a handful of rainbow sprinkles right before filling the liners - about ¼ cup does the trick. The colors bake into the most cheerful polka dots! I call these my "happy accident" cupcakes because I once knocked over a sprinkle jar into the batter (oops!) and created my niece's now-favorite birthday treat. Pro tip: Use the round "jimmies" style sprinkles - the long strands can bleed color.
Citrus Sunshine
Add the zest of one lemon or orange to the batter along with the vanilla. The citrus oils make the vanilla flavor sing even brighter! For an extra punch, swap half the milk with fresh citrus juice. My book club goes wild when I make these with Meyer lemon zest - they're like little bursts of sunshine in cupcake form.
Vanilla Bean Dream
Split a vanilla bean and scrape those gorgeous black specks into the batter and frosting. It's worth the splurge for special occasions - the flavor is richer and more complex than extract alone. I save this version for bridal showers and anniversary parties when I want to hear that inevitable "Mmm, what IS that amazing flavor?" reaction.
The beauty of this recipe? It's like your favorite little black dress - perfect as-is, but so easy to accessorize! Just remember: When adding mix-ins, keep them to about ½ cup total so you don't weigh down that beautiful fluffy texture we worked so hard to achieve.
Serving and Storing Classic Vanilla Cupcakes
Here's the best part - enjoying your gorgeous vanilla creations! But first, let's talk about how to keep them tasting fresh and fabulous whether you're serving them immediately or saving some for later.
Serving at their peak
These cupcakes are happiest served at room temperature about 1-2 hours after frosting. That's when the flavors have settled but the frosting is still dreamily soft. I always sneak one right after frosting (quality control, obviously!), but honestly they taste even better after that short rest. Arrange them on a pretty cake stand - the vanilla bean specks in the frosting look so elegant against white liners!
Storing unfrosted cupcakes
Life happens, and sometimes you need to bake ahead! Unfrosted cupcakes keep beautifully for:
- 2 days at room temp in an airtight container - just pop a slice of bread in to keep them moist
- 1 week in the fridge wrapped tightly in plastic - bring to room temp before frosting
- 3 months in the freezer in freezer bags - thaw overnight in the fridge
My emergency dessert trick? I always keep a batch of unfrosted cupcakes in the freezer. Last-minute guests? Boom - instant homemade dessert with fresh frosting!
Storing frosted cupcakes
Once frosted, these beauties need a little more care:
- 1 day at room temp under a cake dome - buttercream forms a slight crust but stays creamy inside
- 3 days in the fridge in an airtight container - let sit 30 minutes before serving to soften
- Not recommended for freezing - the frosting texture changes too much
Hot tip from my catering days: If you must refrigerate frosted cupcakes, place a paper towel over them before sealing the container - it absorbs condensation so your decorations stay perfect!
Reviving day-old cupcakes
Found a leftover cupcake hiding in the back of the fridge? Don't toss it! Here's how I bring them back to life:
- Microwave for 5-8 seconds - just enough to take the chill off but not melt the frosting
- Refresh frosting with a quick whip using your mixer - adds air and brings back that light texture
- Add fresh toppings like berries or a sprinkle of sea salt to perk up flavors
Honestly though, in my house, leftover cupcakes are about as common as unicorns - they disappear faster than I can say "vanilla bean!"
Nutritional Information
Now, let's talk numbers - but keep in mind, these are just friendly estimates! Your exact nutritional values will dance around depending on your specific ingredients and how generously you frost those cupcakes (no judgment here - I'm team extra frosting all the way!).
These classic vanilla cupcakes are meant to be enjoyed as an occasional treat, like when you need a little pick-me-up or want to celebrate life's sweet moments. I always say one perfectly frosted cupcake is worth a hundred sad, dry "healthy" muffins any day!
Remember, homemade treats like these are about more than just numbers - they're about the joy of baking, the memories you create, and that happy sigh when someone takes their first bite. So go ahead, savor every vanilla-kissed crumb!
Frequently Asked Questions
Over the years, I've gotten so many questions about these vanilla cupcakes - here are the ones that pop up most often with my tried-and-true answers!
Can I use cake flour instead of all-purpose?
Absolutely! Cake flour makes an even more tender crumb - just use 1¾ cups (190g) cake flour instead of the all-purpose. The lower protein content gives that melt-in-your-mouth texture. I reach for cake flour when making these for fancy events, but honestly, they're delicious either way!
Help! My frosting is too runny - how do I fix it?
Been there, cried over that! First, pop your bowl in the fridge for 15 minutes to firm up the butter. Then beat in more powdered sugar ¼ cup at a time until it holds peaks. If it's still too soft, a tiny pinch of cornstarch can help stabilize it without changing the flavor.
Why do my cupcakes sink in the middle?
Oh no, the dreaded cupcake slump! Usually this means either: 1) Your baking powder is old (check the expiration date!), 2) You overmixed the batter (stop as soon as ingredients are combined), or 3) You opened the oven door too early. Wait until at least 15 minutes have passed before peeking!
Can I make these cupcakes ahead of time?
You sure can! Bake them up to 2 days before and store unfrosted at room temp in an airtight container. The frosting can be made 3 days ahead and kept in the fridge - just rewhip it before piping. I actually think the flavors meld and improve after a day!
How do I get those perfect bakery-style swirls?
My secret weapon? A large open star tip (I use Wilton 1M) and holding the piping bag straight up about ½ inch above the cupcake. Start in the center, pipe outward in a spiral, then pull up quickly at the end. Practice makes perfect - and "ugly" swirls still taste amazing!
Got more questions? Slide into my DMs anytime - I love helping fellow bakers nail these vanilla dreams!
Print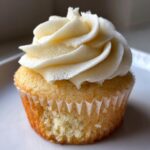
Irresistible Classic Vanilla Cupcakes That Steal Hearts
- Total Time: 35 minutes
- Yield: 12 cupcakes 1x
- Diet: Vegetarian
Description
Classic vanilla cupcakes with fluffy vanilla buttercream frosting. Perfect for any occasion.
Ingredients
- 1½ cups (190g) all-purpose flour
- 1½ tsp baking powder
- ¼ tsp salt
- ½ cup (113g) unsalted butter, room temperature
- 1 cup (200g) granulated sugar
- 2 large eggs, room temperature
- 2 tsp pure vanilla extract
- ½ cup (120ml) whole milk, room temperature
- 1 cup (226g) unsalted butter, softened
- 3–4 cups (360–480g) powdered sugar, sifted
- 2–3 tablespoon heavy cream or milk
- 2 tsp vanilla extract
- Pinch of salt
Instructions
- Preheat oven to 350°F (175°C). Line a muffin tin with cupcake liners.
- Whisk flour, baking powder, and salt in a bowl.
- Cream butter and sugar until light and fluffy.
- Beat in eggs one at a time, then add vanilla.
- Alternate adding dry ingredients and milk, mixing until just combined.
- Divide batter evenly into liners. Bake for 18–20 minutes or until a toothpick comes out clean.
- Cool completely before frosting.
- For the buttercream, beat butter until smooth. Gradually add powdered sugar, cream, vanilla, and salt until fluffy.
- Frost cooled cupcakes and serve.
Notes
- Use room temperature ingredients for best results.
- Do not overmix the batter to keep cupcakes light.
- Adjust frosting consistency with more cream or sugar as needed.
- Prep Time: 15 minutes
- Cook Time: 20 minutes
- Category: Dessert
- Method: Baking
- Cuisine: American
Nutrition
- Serving Size: 1 cupcake
- Calories: 320
- Sugar: 28g
- Sodium: 85mg
- Fat: 16g
- Saturated Fat: 10g
- Unsaturated Fat: 5g
- Trans Fat: 0g
- Carbohydrates: 42g
- Fiber: 0.5g
- Protein: 3g
- Cholesterol: 70mg
Keywords: vanilla cupcakes, classic cupcakes, homemade cupcakes, vanilla buttercream


Leave a Reply