I'll never forget the first time I made homemade crock pot yogurt. I was skeptical—how could just milk and a spoonful of yogurt turn into something so creamy and delicious? But oh, it did. And now I'm hooked. No more overpriced store-bought yogurt with its weird stabilizers and excessive sugar. This is the real deal, my friends.

Here's the magic: your crock pot does all the work while you sleep. Two ingredients. Minimal effort. Maximum payoff. Whether you're drowning in yogurt parfaits for breakfast or just want to control what goes into your food, this method is a game-changer. And when you taste that first spoonful of your own homemade yogurt—thick, tangy, and perfect—you'll never go back. Trust me on this one.
Why You’ll Love Homemade Crock Pot Yogurt
Listen, once you try this, you’ll wonder why you ever bought yogurt in those tiny plastic cups. Here’s why this recipe is a total winner:
- It’s ridiculously creamy. Like, spoon-standing-up-straight creamy. The slow cooker works magic on the milk proteins, giving you that velvety texture without a single weird thickener or stabilizer.
- Your wallet will thank you. A gallon of milk costs less than most fancy yogurts—and you get a whole gallon of the good stuff! I did the math once and nearly fell over.
- You’re the boss of the flavor. Want honey vanilla swirl? Go for it. Obsessed with strawberry? Mash some in. The base is a blank canvas for your yogurt dreams.
- It’s embarrassingly easy. Dump, wait, stir, forget about it. I’ve literally made this while half-asleep (more on that later).
- Hello, probiotics! When you control the fermentation, you get all those gut-friendly cultures without the sugar crash.
Creamy Texture Without Additives
The slow cooker’s gentle heat is the secret. Unlike stovetop methods where you risk scorching, the crock pot coaxes the milk into perfect yogurt territory—no gums, no gelatin, just pure dairy goodness. If you’ve ever gagged on chalky store-bought yogurt, this’ll be your redemption.
Budget-Friendly and Customizable
My kids used to go through those $5 yogurt pouches like they were free samples. Now? We make a batch every Sunday for less than the price of two lattes. And since you’re starting from scratch, you can go wild with mix-ins after fermentation (key tip: add fruit/jam AFTER so the cultures stay happy).
Ingredients You’ll Need for Homemade Crock Pot Yogurt
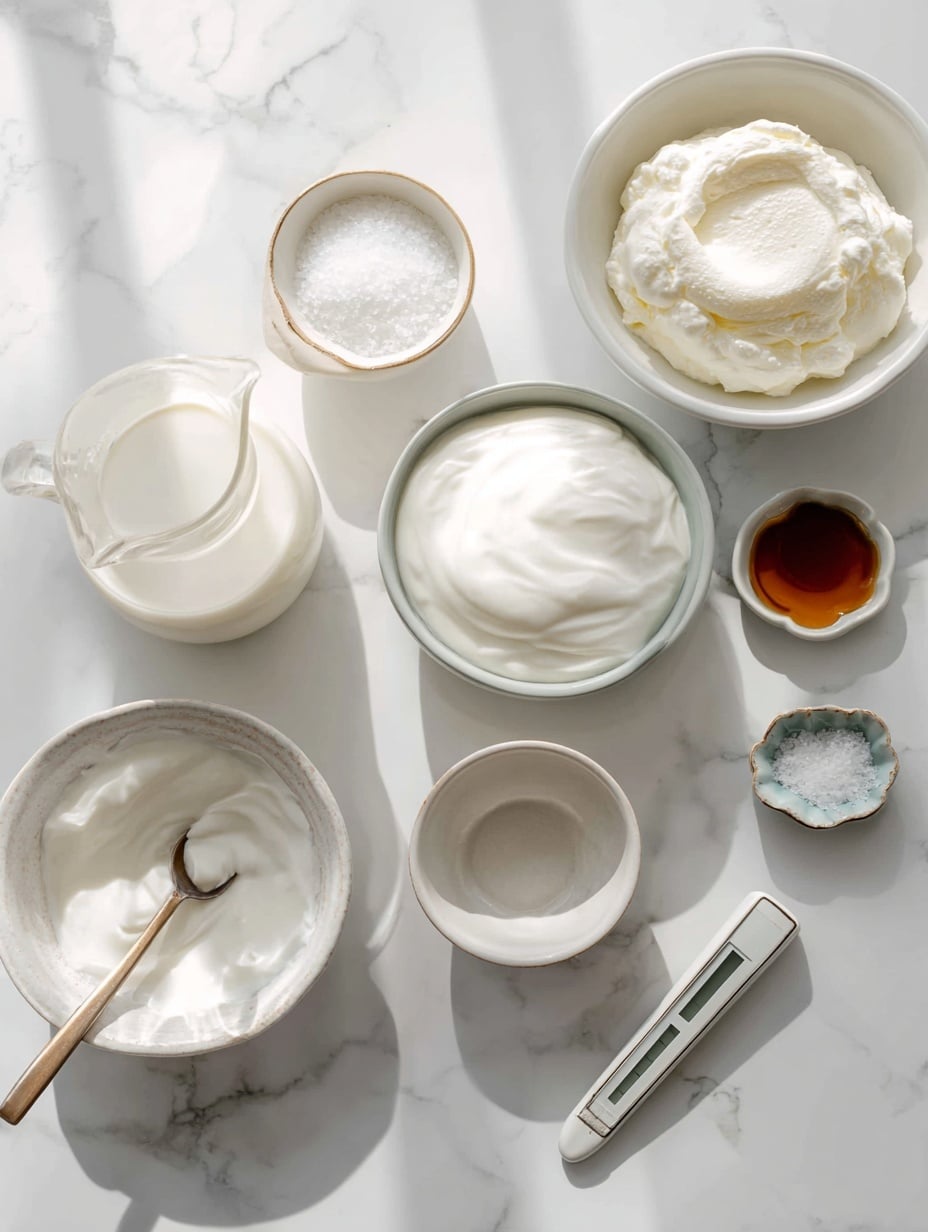
Okay, here’s the beautiful part—you only need two things. That’s it! But I’ll give you the nitty-gritty because quality matters here:
- 1 gallon whole milk – Don’t even think about skim. Whole milk gives that luxe, custardy texture. Pro tip: Avoid ultra-pasteurized milk (it says it right on the label). It’s stubborn and won’t culture right.
- ½ cup plain yogurt with active live cultures – Check the label for "live and active cultures." Any brand works (I’ve used everything from fancy organic to store-brand), but make sure it’s unsweetened and plain. This is your starter, so no vanilla hiding in there!
See? Told you it was simple. Now grab those ingredients—we’re about to make some magic.
Step-by-Step Homemade Crock Pot Yogurt Instructions
Step 1: Heat the Milk
First, pour that whole gallon of milk straight into your crock pot—no need to grease it or anything fancy. Pop the lid on and set it to LOW. Now, walk away for exactly 2.5 hours. Seriously, don’t peek! The milk needs to reach about 180°F to kill off any competing bacteria, but we’re not boiling it. If you see bubbles forming around the edges, that’s perfect. If it starts actually boiling? Oops, too hot. But as long as you keep it on low, you’re golden.
Step 2: Cool and Add Starter
After 2.5 hours, turn off the crock pot and let the milk cool undisturbed for 3 hours. This is crucial—if it’s too hot when you add the starter, you’ll murder those precious cultures. The milk should feel warm but not hot when you dip a clean finger in (around 110°F). If you’re a thermometer person, now’s its time to shine.
How to Check Milk Temperature
No thermometer? No problem. Use the wrist test—dip a clean finger in the milk. It should feel like a warm bath, not "yowch!" hot. If it’s still too warm, give it another 30 minutes. Once it’s ready, scoop out about a cup of warm milk into a bowl, whisk in your ½ cup yogurt starter until smooth, then pour it all back into the crock pot. Stir gently but thoroughly—this is your only chance to distribute those cultures evenly!
Step 3: Ferment Overnight
Here’s where the magic happens. Put the lid back on and wrap the entire crock pot in a thick bath towel (or two). You’re creating a cozy incubator for the yogurt to culture. Tuck it somewhere draft-free (I use the oven with the light on if my kitchen’s chilly). Now—and this is important—leave it alone for at least 8 hours. Overnight is even better. No peeking, no stirring! Those cultures need peace and quiet to work their tangy magic.
Step 4: Chill and Serve
Good morning, yogurt maker! Unwrap your crock pot—it’ll look like slightly thickened milk with maybe some yellowish whey on top (totally normal). Give it a gentle stir, then ladle it into containers and refrigerate for at least 2 hours. This chilling time is non-negotiable; it’s when the yogurt firms up into that spoonable glory. Taste test time? Oh yes. That first creamy, tangy bite is your well-earned reward.
Homemade Crock Pot Yogurt Variations
Okay, so you've mastered the basic recipe—now let's play! The beauty of homemade yogurt is how easily you can tweak it to your exact cravings. Here are my favorite ways to mix things up.
Thicker Yogurt
If you're like me and dream of yogurt so thick your spoon stands straight up, you need to strain it. Line a fine-mesh strainer with cheesecloth or a clean flour sack towel, set it over a bowl, and pour in your finished yogurt. Let it drain in the fridge for 2-4 hours. The longer it drains, the thicker it gets—hello, Greek yogurt! Save that whey that drains out, by the way. It's fantastic in smoothies or for baking bread.
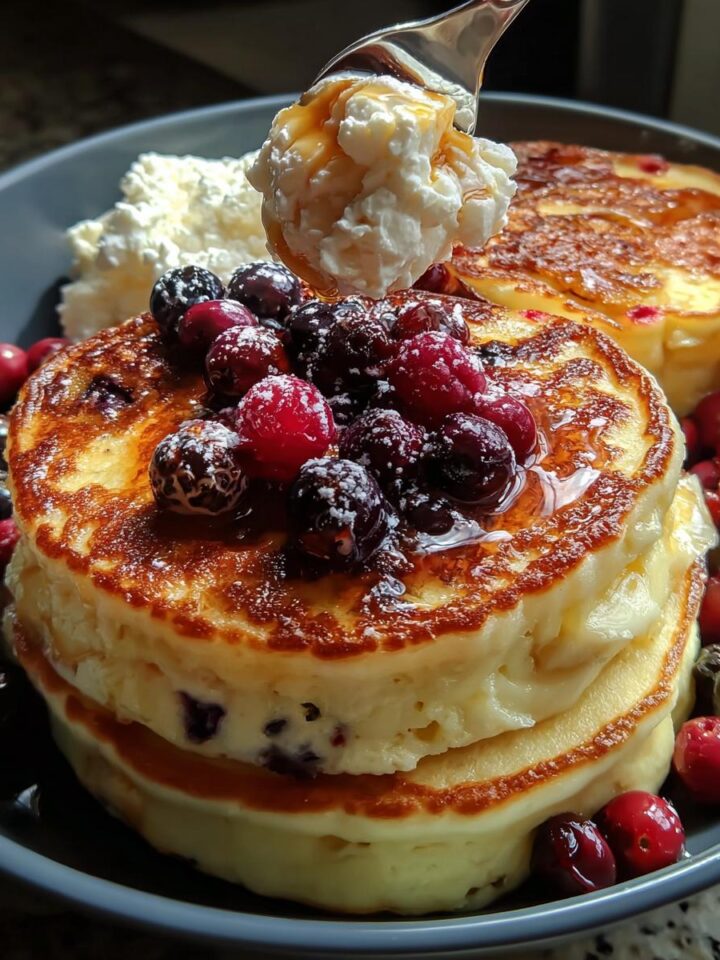
Flavored Yogurt
This is where the real fun begins, but a super important tip: always add flavors AFTER the yogurt is done fermenting and chilling. If you add fruit or sugar before, it can interfere with the culturing process. Once your yogurt is cold and thick, stir in a drizzle of honey or maple syrup, a splash of vanilla extract, or some mashed-up fresh berries. My kids go nuts for a swirl of strawberry jam right in their bowl. You're in complete control of the sweetness, which is the best part.
Serving and Storing Homemade Crock Pot Yogurt
Now that you've got this glorious batch of homemade yogurt, let's talk about how to keep it fresh and delicious. I like to store mine in a few small airtight containers—mason jars work perfectly—so I can grab a single serving without disturbing the whole batch. It’ll stay fresh in the fridge for up to 2 weeks (if it lasts that long in your house, which, let’s be real, it probably won’t). Just give it a quick stir before serving if any whey has separated—that’s totally normal and means your yogurt is alive and happy!
Best Topping Pairings
Oh, the topping possibilities are endless! Here’s what I can’t live without:
- A big handful of crunchy granola for texture contrast
- Fresh berries or sliced banana when they’re in season
- A sprinkle of toasted nuts or seeds for some healthy fats
- A drizzle of honey or maple syrup when I need a little sweetness
- A pinch of cinnamon or cardamom for a warm spice kick
Pro tip: If you're packing yogurt for lunch, keep toppings separate until you're ready to eat so everything stays crisp!
Helpful Notes for Perfect Homemade Crock Pot Yogurt
Alright, let’s talk yogurt troubleshooting—because even though this recipe is foolproof, sometimes things get funky (and not in the good, cultured way). Here’s my hard-earned wisdom:
- Lactose content: The fermentation process actually breaks down most of the lactose, so many lactose-sensitive folks can enjoy this yogurt just fine. But if you’re super sensitive, try fermenting for a full 24 hours—the longer it cultures, the more lactose gets eaten up.
- Milk alternatives: You can try this with non-dairy milks, but results vary wildly. Coconut milk works best in my experience (use full-fat canned), but you’ll need to add a thickener like tapioca starch. Almond milk tends to stay thin no matter what.
- Separation anxiety: If your yogurt looks watery with yellow liquid on top—congrats, that’s just whey! Stir it back in or drain it off if you prefer thicker yogurt. Either way, it’s totally normal.
- Too tart? Shorten the fermentation time next batch. Love that tang? Let it go longer!
- Failed batch? Usually means your starter yogurt was too old or your milk was too hot/cold when you added it. Try again with fresh starter!
Remember: yogurt-making is part science, part art. Don’t stress—even "failed" batches make great smoothie bases!
Frequently Asked Questions
Can I Use Non-Dairy Milk?
You can try, but results will vary. Coconut milk (the full-fat canned kind) works best—add a tablespoon of tapioca starch per can to help it thicken.
Almond and oat milks usually stay thin no matter what. The cultures need lactose to work their magic, so non-dairy versions will always be different.
Why Didn’t My Yogurt Thicken?
Two likely culprits: Either your starter yogurt was too old (check that expiration date!) or the milk wasn't the right temperature when you added it.
Too hot kills the cultures; too cold and they won't wake up. Aim for that 110°F sweet spot—like baby bottle warm.
How Do I Know If It's Safe to Eat?
Good yogurt smells fresh and tangy, not sour or rotten. If you see mold (ew) or it smells off, toss it.
But a little separation is totally normal—that's just whey doing its thing.
Can I Use This Yogurt as Starter for Next Batch?
Absolutely! Just save ½ cup before adding any flavors. But after 4-5 batches, start fresh with store-bought starter to keep cultures strong.
Final Thoughts
Look, if I can make this yogurt—a person who once burned microwave popcorn—you’ve totally got this. There’s something magical about turning simple milk into creamy, tangy perfection with just time and patience. Don’t stress if your first batch isn’t Instagram-perfect. Mine looked questionable too, until I realized yogurt, like people, gets better with a little nurturing. Now it’s our weekly ritual: Sunday night, crock pot goes on, Monday morning—boom, breakfast for days. So grab that milk, trust the process, and get ready to fall in love with real homemade yogurt. Your future self (and your tastebuds) will thank you. Happy culturing, friends!
Print
Creamy Homemade Crock Pot Yogurt Recipe
- Total Time: 8 hours
- Yield: 1 gallon 1x
- Diet: Low Lactose
Description
Make creamy homemade yogurt in your crock pot with just two ingredients.
Ingredients
- 1 gallon whole milk
- ½ cup yogurt with active, live cultures (check label)
Instructions
- Pour milk into crock pot.
- Cook on low for 2.5 hours.
- Turn off crock pot and let sit for 3 hours.
- Whisk in yogurt starter.
- Wrap crock pot in towels and let ferment overnight.
- Chill yogurt before serving.
Notes
- Use whole milk for best texture.
- Check yogurt label for live cultures.
- Keep crock pot undisturbed during fermentation.
- Prep Time: 10 mins
- Cook Time: 2.5 hours
- Category: Dairy
- Method: Slow Cooker
- Cuisine: International
Nutrition
- Serving Size: 1 cup
- Calories: 150
- Sugar: 12g
- Sodium: 120mg
- Fat: 8g
- Saturated Fat: 5g
- Unsaturated Fat: 2g
- Trans Fat: 0g
- Carbohydrates: 12g
- Fiber: 0g
- Protein: 8g
- Cholesterol: 25mg
Keywords: homemade yogurt, crock pot yogurt, easy yogurt recipe


Leave a Reply