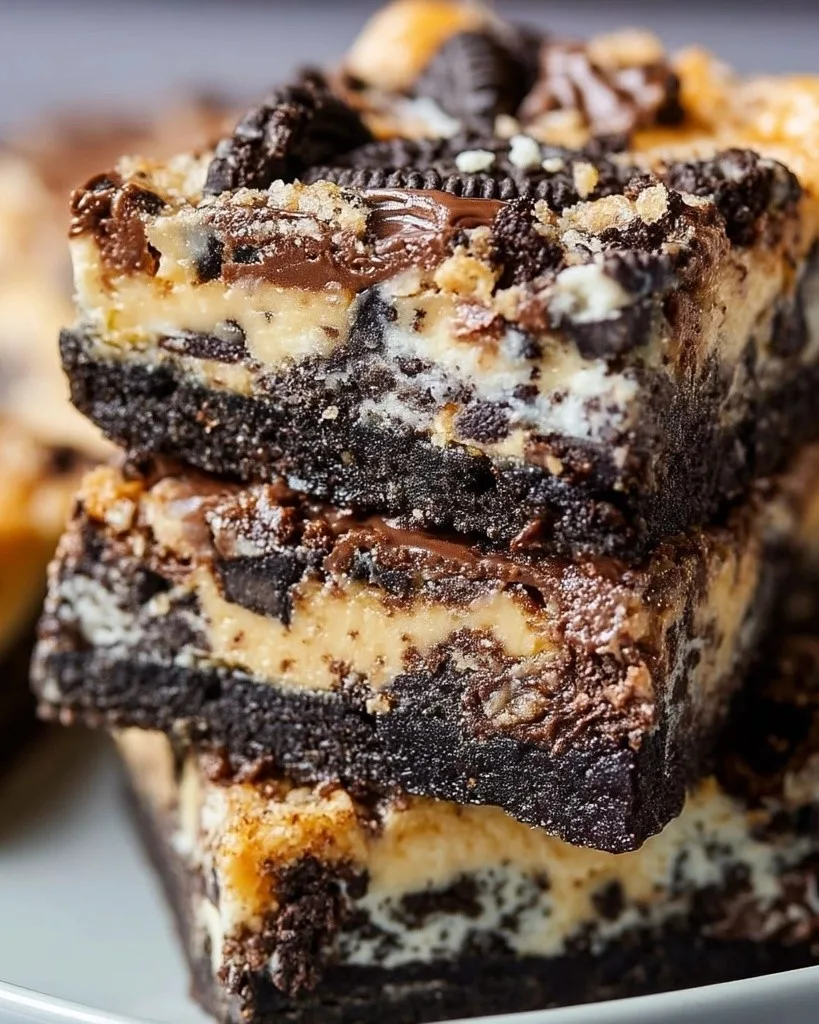
If you’ve ever wished for a dessert that’s as magical as it is mouthwatering, look no further than Oreo Magic Bars. These rich, layered treats are what dessert dreams are made of—gooey, crunchy, chocolatey, and incredibly easy to make. I first tried them at a friend’s potluck, and I knew immediately that I needed the recipe. Once I saw how simple they were, they quickly became my go-to for holidays, bake sales, and lazy Sunday baking sprees.
Combining a buttery Oreo crust, melty chocolate and peanut butter chips, and a luscious blanket of sweetened condensed milk, these bars are pure bliss in every bite. The chopped Oreo topping gives them an irresistible crunch and extra pop of cookie goodness. Let’s dive into this magical recipe!
Why You’ll Love Oreo Magic Bars
Irresistibly Delicious
- Rich, indulgent flavor with layers of chocolate, peanut butter, and cookie.
Super Easy to Make
- Just a few ingredients and a simple layering process.
No Mixer Needed
- Minimal cleanup and prep—perfect for beginner bakers.
Crowd-Pleaser
- Great for potlucks, parties, and bake sales.
Freezer-Friendly
- Make ahead and freeze for last-minute dessert cravings.
Ingredients You’ll Need
For the Crust
- 20 Oreo cookies – Classic Oreos, finely crushed (use a food processor or zip-top bag and rolling pin).
- 5 tablespoons unsalted butter, melted – Helps bind the crust and adds richness.
For the Filling
- 1 cup semi-sweet chocolate chips – Adds deep, chocolatey flavor.
- 1 cup peanut butter chips – Creamy, nutty contrast to the chocolate.
- 1 (14 oz) can sweetened condensed milk – Binds everything together into a gooey, magical layer.
- 8 Oreo cookies, roughly chopped – For that perfect crunchy topping.
Step-by-Step Instructions
1. Preheat and Prepare
- Preheat your oven to 350°F (175°C).
- Line an 8x8-inch or 9x9-inch baking pan with parchment paper, leaving a little overhang for easy removal.
2. Make the Crust
- In a medium bowl, combine the crushed Oreos and melted butter.
- Stir until the mixture resembles wet sand.
- Press firmly into the bottom of the prepared pan to form an even crust.
3. Layer the Fillings
- Sprinkle the chocolate chips evenly over the crust.
- Add a layer of peanut butter chips.
- Pour the sweetened condensed milk evenly over the chips, spreading gently with a spatula if needed.
4. Add the Topping
- Scatter the chopped Oreos on top, pressing down lightly so they stick into the milk layer.
5. Bake
- Bake for 25–30 minutes, or until the edges are golden and the center is set.
- Remove from the oven and let cool completely in the pan.
6. Slice and Serve
- Once fully cooled, lift the bars out of the pan using the parchment paper.
- Slice into squares or rectangles and enjoy!
Serving and Storage Tips
Serving Suggestions
- Serve chilled or at room temperature.
- Pair with a glass of milk or a scoop of vanilla ice cream.
- Great for dessert platters or lunchbox treats.
Storage
- Store in an airtight container at room temperature for up to 4 days.
- Refrigerate for up to a week for firmer texture.
- Freeze in a single layer, then transfer to a freezer bag for up to 2 months. Thaw at room temperature before serving.
Helpful Notes
Ingredient Swaps
- Oreo Variations – Try flavored Oreos like mint or golden for a twist.
- Nut-Free Option – Skip the peanut butter chips or replace with butterscotch or white chocolate chips.
Tips for Success
- Press the crust firmly to prevent crumbling.
- Let the bars cool completely before slicing for clean edges.
- Use a hot knife (dipped in warm water and wiped dry) for neat slices.
Frequently Asked Questions
1. Can I double this recipe?
Yes! Use a 9x13-inch pan and increase baking time by 5–10 minutes.
2. Are these bars very sweet?
They are definitely indulgent. You can use dark chocolate chips to cut the sweetness a bit.
3. Can I make these ahead of time?
Absolutely—these bars store well and taste even better the next day.
4. What if I don’t have peanut butter chips?
Substitute with white chocolate, caramel chips, or more chocolate chips.
5. Do I need to use a food processor for the Oreos?
Nope! A rolling pin and zip-top bag work just fine to crush them.
Final Thoughts
Oreo Magic Bars are the ultimate treat for cookie lovers and chocolate fans alike. They’re rich, gooey, and packed with texture—plus, they couldn’t be easier to whip up. Whether you’re baking for a special occasion or just because, these bars are guaranteed to bring smiles. Try them out, and don’t forget to tag your creations or leave a comment sharing how they turned out. Happy baking and enjoy the magic!
Print
Oreo Magic Bars
- Total Time: 1 hour 35 minutes
- Yield: 12 bars 1x
Ingredients
- 20 Oreo cookies (for crust)
- 5 tablespoons unsalted butter (melted)
- 1 cup semi-sweet chocolate chips
- 1 cup peanut butter chips
- 1 14 oz can sweetened condensed milk
- 8 Oreo cookies (roughly chopped (for topping))
Instructions
Preheat and Prepare
- Preheat your oven to 350°F (175°C).
- Line an 8x8-inch or 9x9-inch baking pan with parchment paper, leaving a little overhang for easy removal.
Make the Crust
- In a medium bowl, combine the crushed Oreos and melted butter.
- Stir until the mixture resembles wet sand.
- Press firmly into the bottom of the prepared pan to form an even crust.
Layer the Fillings
- Sprinkle the chocolate chips evenly over the crust.
- Add a layer of peanut butter chips.
- Pour the sweetened condensed milk evenly over the chips, spreading gently with a spatula if needed.
Add the Topping
- Scatter the chopped Oreos on top, pressing down lightly so they stick into the milk layer.
Bake
- Bake for 25–30 minutes, or until the edges are golden and the center is set.
- Remove from the oven and let cool completely in the pan.
Slice and Serve
- Once fully cooled, lift the bars out of the pan using the parchment paper.
- Slice into squares or rectangles and enjoy!
Notes
- Oreo Variations – Try flavored Oreos like mint or golden for a twist.
- Nut-Free Option – Skip the peanut butter chips or replace with butterscotch or white chocolate chips.
- Press the crust firmly to prevent crumbling.
- Let the bars cool completely before slicing for clean edges.
- Use a hot knife (dipped in warm water and wiped dry) for neat slices.
- Prep Time: 10 minutes
- Cook Time: 25 minutes
Nutrition
- Calories: 395

Leave a Reply